Customization
This chapter contains general information on customizing the evoVIU camera web application.
Introduction
In the Customization section, the settings offer many options to make the behaviour of your camera even more individual. In addition to some display options in the web application, you can also configure the status of your display or bridging.
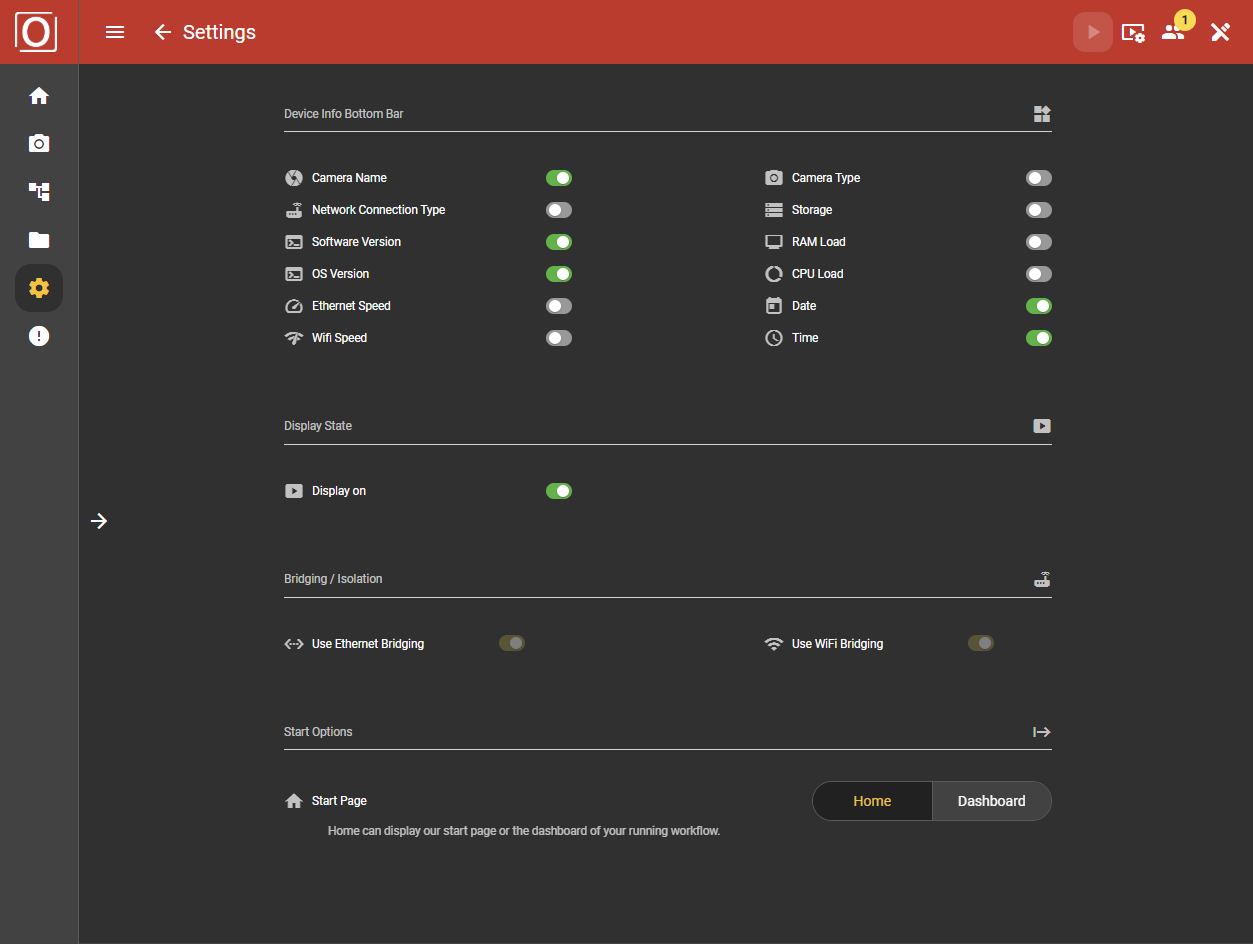
Device Info Bottom Bar
You can permanently display certain information in the bottom app bar, regardless of where you are in the application. For example, if you want to keep an eye on RAM usage at all times, you can set this display setting on the Customization page.
The following attributes are available:
Camera Name
The name you have selected. This information can be important for finding the correct camera in the tab.
Network Connection Type
Here you can see the primary network connection type used. This provides information about the main data flow of your application. If an endpoint cannot be reached - for example, because you are accessing a specific network segment via WLAN - the cause can be quickly identified here.
Software version
VISIONWEB software version of your evoVIU Smart camera
Version | Stability | Name | Description |
|---|---|---|---|
7.x.x | STABLE | MASTER-VERSION | Stable tested master version |
| STABLE | MINOR-VERSION | Stable tested minor version |
7.5.0 | STABLE | HOTFIX-VERSION | Stable tested hotfix |
7.0.0-support-label | STABLE | SUPPORT-VERSION | Stable support version with special functions for a defined customer order |
7.5.0.1234-dev0 | INSTABLE | DEV-BUILD-VERSION | Development - Version provided for testing purposes |
7.5.0.1234-feature-VIU-xxxxx | INSTABLE | FEATURE-VERSION | Feature - Version provided for testing purposes of a specific feature |
OS Version
Version of the VIU.OS operating system of your evoVIU Smart Camera
Version | Stability | Name | Description |
|---|---|---|---|
4.4.3 | STABLE | MASTER-VERSION | Stable tested master version |
4.4.3-docker | STABLE | DOCKER-VERSION | Stable tested master version including an area accessible via SSH for the provision of Docker containers. |
Ethernet Speed
Speed of your Ethernet connection in Mb/s
If you have a 1000Mbit (1Gbit) network but the cameras only display 100Mbit, please check the cable connection and the type of cable used.
Network speeds | ||
|---|---|---|
10Mbit/s | 100Mbit/s | 1000Mbit/s |
Wifi Speed
Speed of your wifi connection
Camera Type
Your camera type
Storage
Memory utilization of your camera
RAM Load
RAM utilization
If the RAM load is > 93%, the running workflow program switches itself off.
CPU Load
CPU load
Date
Current date
Time
Current time
Display State
Display on
Here you can switch the display of your camera off or on. This allows you, for example, to prevent unauthorized access or changes via the display.
When deactivated, the display shows “No Response from Driver”.
Please note that if the display is deactivated, it is no longer possible to take rescue measures via the display in the event of a fault.

Bridging / Isolation
Here you can activate Ethernet or WiFi bridging to connect several networks with each other - or deactivate bridging. For example, the connected Ethernet network can be accessed when the camera is in WiFi AP mode. If this is not desired, it is advisable to deactivate both bridging options.
You need admin rights to edit the setting. Admin rights can be assigned to selected users in the User Management area.

Start Options
Here you can select whether the home screen or the dashboard should be displayed directly when the web application is opened. If you opt for the dashboard, the dashboard of the currently active routine is automatically displayed when you start the application. If no routine is active, the normal home screen is loaded instead. This setting is particularly helpful if you want to access the dashboard quickly without having to go via the workflow area.
