Network settings
This chapter contains general information on configuring the network settings of the evoVIU camera.
Introduction
In the Network section, you can configure the connection of your camera in the network. In addition to the configuration options for Ethernet and WiFi, this area also displays further information about your network connection.
Important: Be extremely careful when configuring the network settings and, if in doubt, contact your IT department for correct installation.
As soon as you make changes, you must confirm them again using the Save button. Only then will your changes be applied.
Ethernet
As soon as you open the Network area, the Ethernet tab is selected. All the attributes that you need to configure the Ethernet connection are listed there.
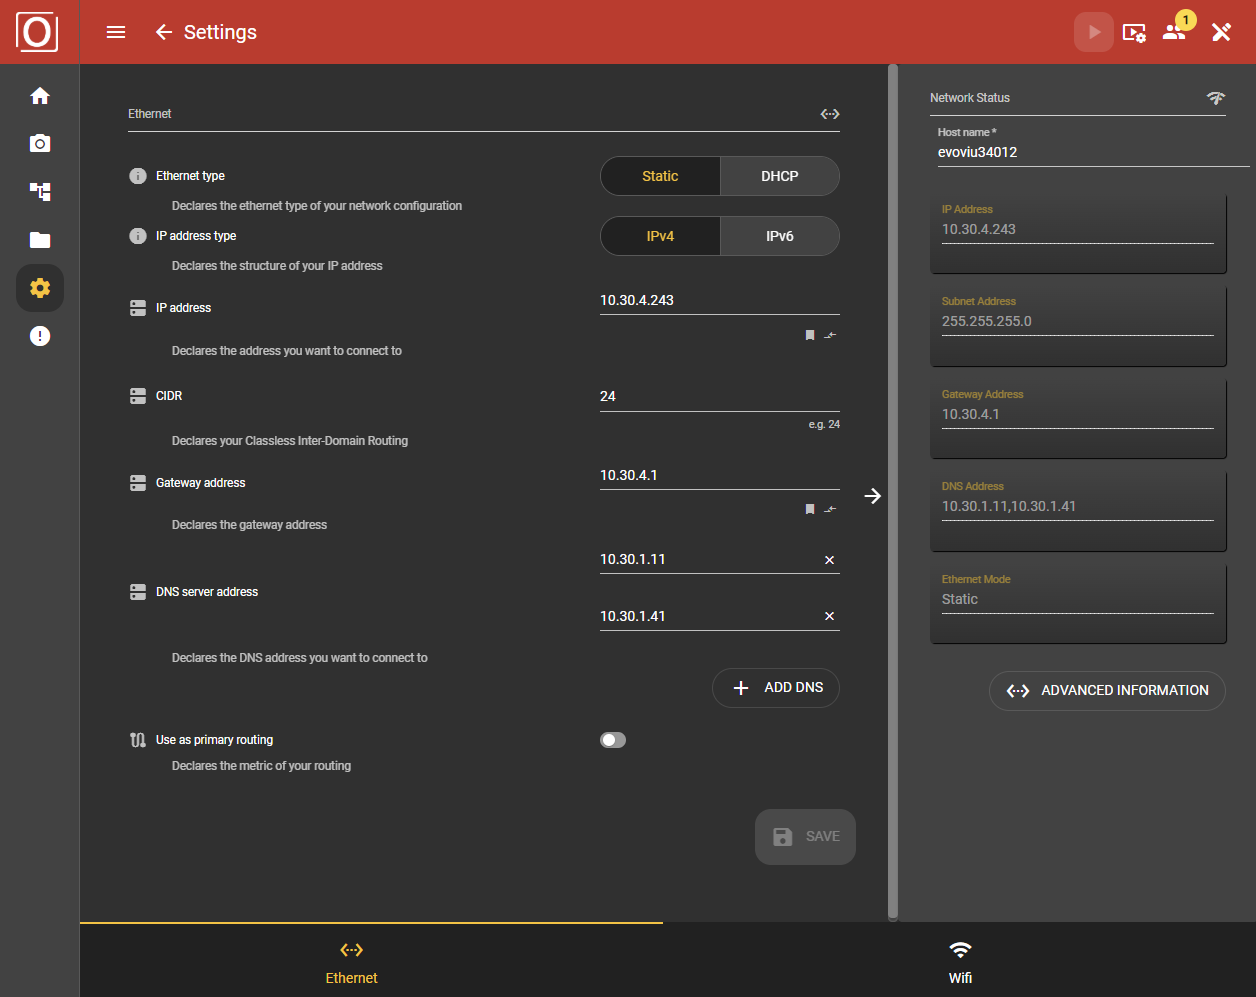
Ethernet Type
Select Static or DHCP as the communication type.
With Static, you have the option of specifying the IP addresses for the target network yourself. In addition to the subnet and gateway, you also have the option of specifying several different DNS server addresses.
With DHCP, the camera is assigned an IP address via the network.
Important: Please talk to your IT department about which of the two options makes sense for you. As a rule, DCHP is used via an assignment with your MAC address. IT will immediately provide you with the IP address or a domain after approval so that you do not have to search for it. It is recommended that you make these settings via the access point, as an incorrect configuration gives you the option of continuing to make the settings on the web interface. You can also see the current configuration of the camera in the overview on the right.
IP address type
Select IPv4 or IPv6 as the IP address type.
Ethernet Configuration
The next step is to enter the addresses. These include the IP address based on IPv4 or IPv6, the CIDR (Classless inter-domain routing), the gateway address and the DNS server address. If you want to use several DNS servers, you can add further addresses using the “ADD DNS” button.
CIDR
As a rule, the CIDR is better known as a subnet. If you have received a subnet (e.g. 255.255.255.0) from your IT department, this can be quickly converted into a CIDR.
Subnet Rechner | CIDR, Subnetzmaske und IPs
DNS
The connection to a DNS server is particularly important if your IT department has provided domain names for a time server or other data endpoints. Without DNS, these names cannot be resolved - i.e. not translated into IP addresses - and therefore cannot be found.
Use as primary routing
By activating the slider, you enable the Ethernet port for primary use of the network port. In this case, the DNS servers of the Ethernet port are used, for example, when communicating with domains. If the item is activated under Ethernet, it is automatically deactivated under WiFi.
WiFi
In the Network section, you can also select the WiFi tab to establish a wireless network connection for your camera. All the attributes that you need to configure the WiFi connection are also listed there if you want to set them statically. However, there are other configuration options.
WiFi Mode
Choose one of the modes Static, Auto, Access Point or deactivate your WiFi.
Static: Connect to a network by entering the SSID and password and creating a static IP address with gateway and subnet mask.
Auto: Select the appropriate network from a list of surrounding networks.
AP: Create your own network for the camera.
Off: Deactivate the WiFi interface
WiFi Mode Static
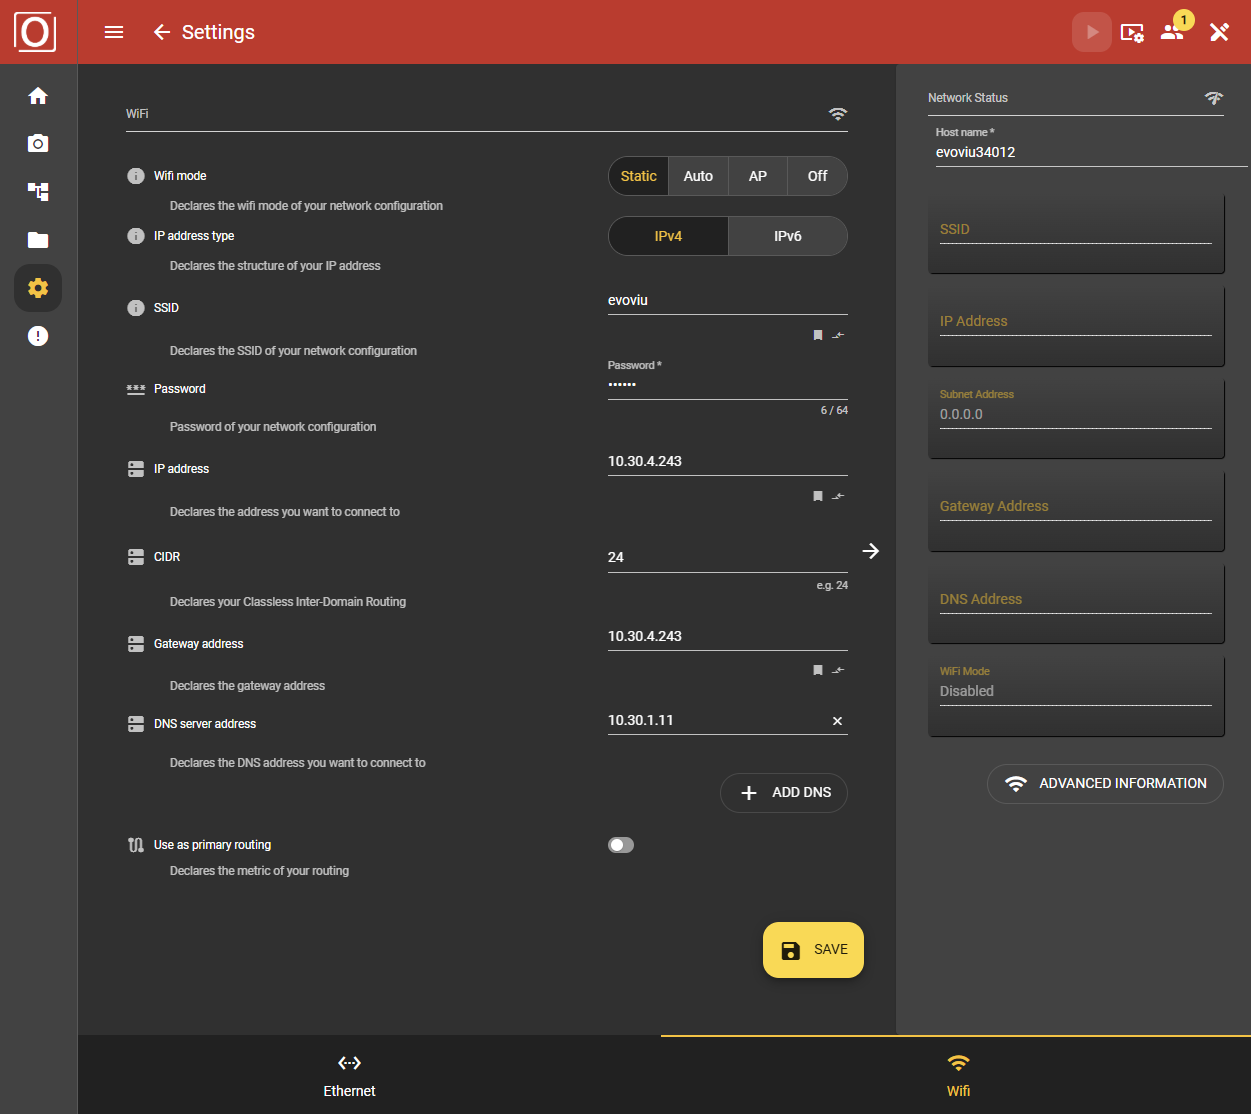
IP address type
Select IPv4 or IPv6 as the IP address type.
SSID
Enter the name assigned to the WLAN network here.
Password
Enter the key required to access the WLAN here.
WiFi configuration
The next step is to enter the addresses. These include the IP address based on IPv4 or IPv6, the CIDR (Classless inter-domain routing), the gateway address and the DNS server address. If you want to use several DNS servers, you can add further addresses using the Add Dns button.
Use as primary routing
By activating the slider, you enable the WiFi port for primary use of the network port. In this case, the DNS servers of the WiFi port are used, for example, when communicating with domains. If the item is activated under WiFi, it is automatically deactivated under Ethernet.
WiFi Mode Auto
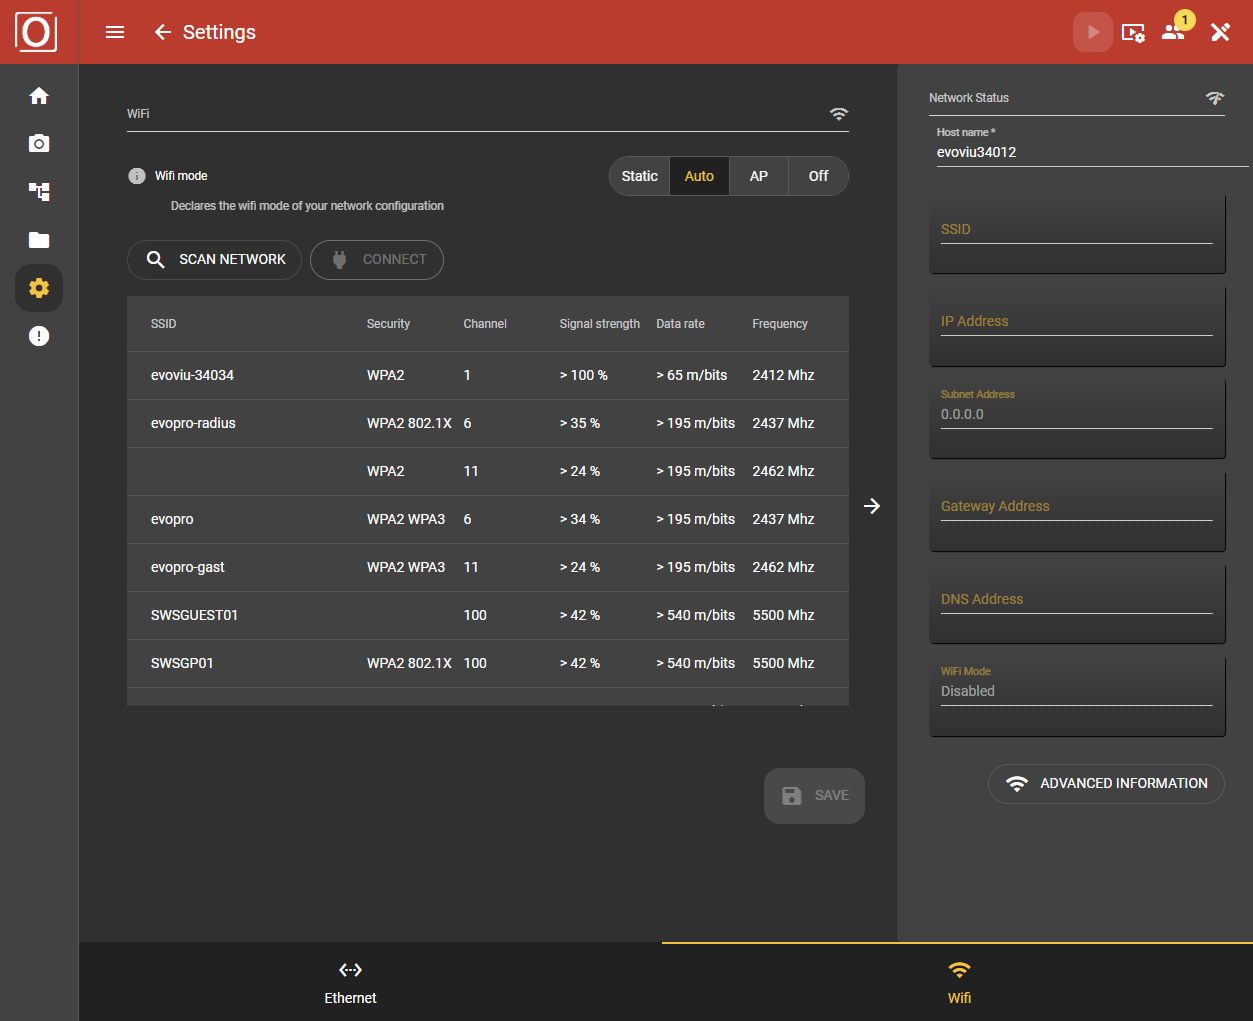
Scan network
Click the button to scan the surrounding network of the camera. A list of all available networks is then displayed.
SSID: Name of the network
Security: Type of encryption
Channel: Specification of the channel
Signal strength: Indication of the signal strength of the network (0-100%)
Data rate: Data rate over the available network
Frequency: Frequency band 2.4GHz / 5GHz
Important: The network scan can take up to 30 seconds.
Connect
After the scan, select a network and click on Connect. Enter the network password in the dialog box and click Confirm to initiate the connection.
Use as primary routing
By activating this button (yellow), you enable the WiFi port for primary use of the network port. In this case, the DNS servers of the WiFi port are used, for example, when communicating with domains. If the item is activated under WiFi, it is automatically deactivated under Ethernet.
WiFi Mode AP (Access Point)
By activating the access point, you have the option of controlling the camera via your PC or cell phone. Then follow the instructions in the first-step guide.
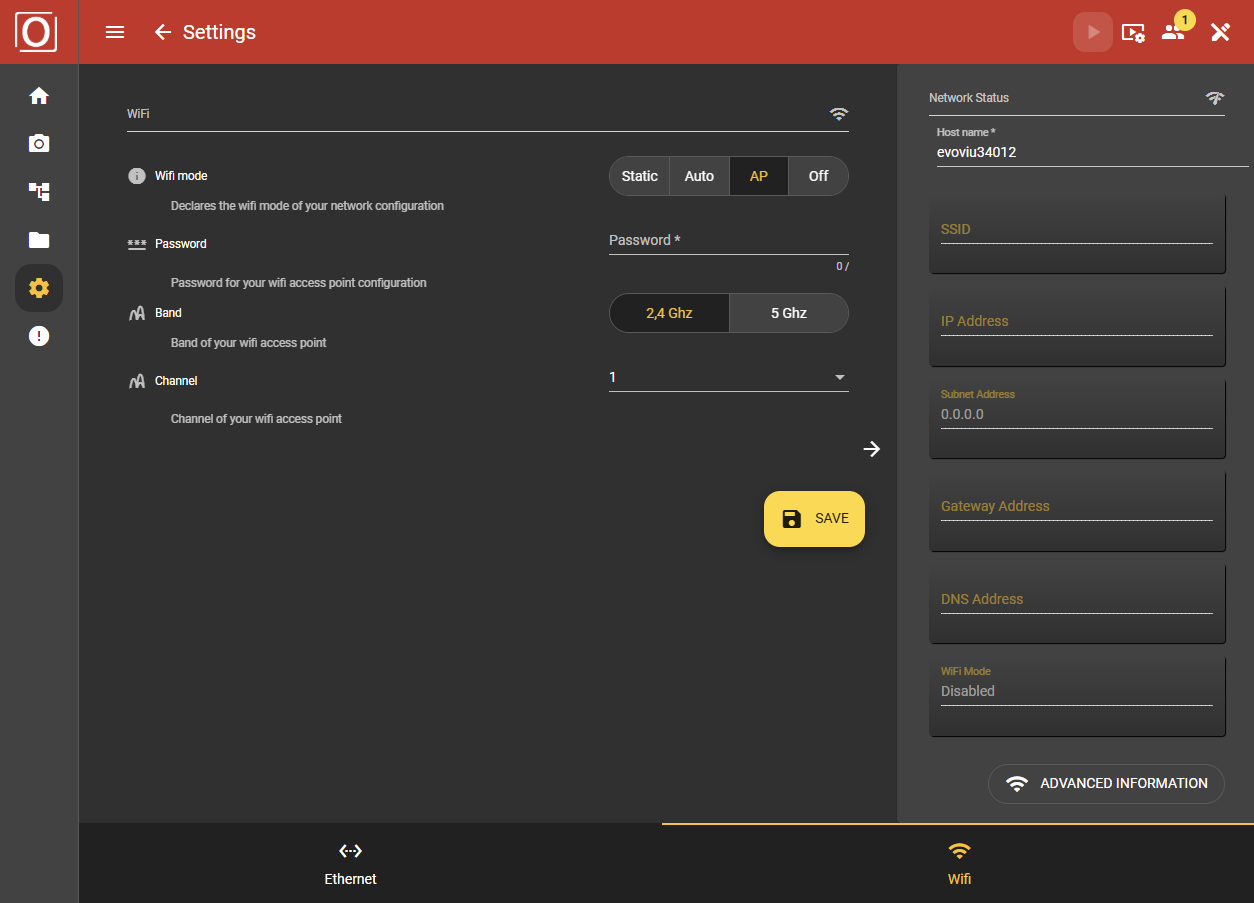
Password
Entering a password when using the access point is optional or depends on the access point used.
Band
Here you can select the specific frequency range that is used to send and receive data from the WLAN device. The 2.4 GHz band offers greater range, while the 5 GHz band offers higher speed and is less susceptible to interference.
Channel
The available WLAN channels depend on the selected band.
WiFi Mode Off
Deactivate the interface and thus ensure that operation only runs via Ethernet.
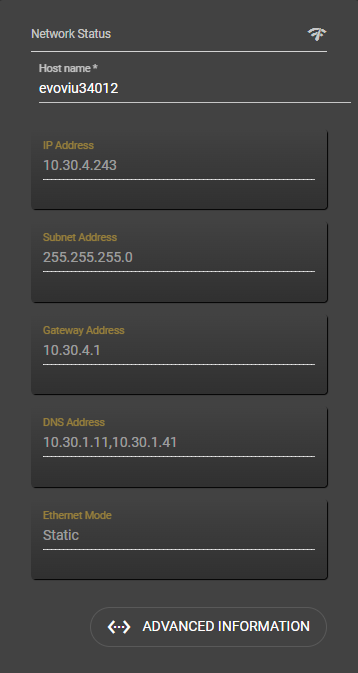
Network Status & Hostname
On the right-hand side in Network Status, you will find the host name, which you can change when using Ethernet or WiFi. Enter the name with which you want to make the camera visible in the network. Once entered, the name is automatically adopted and does not need to be saved explicitly. Please note the Reload note to make the new name visible in the browser. All other data is also listed under this point.
Naming: According to RFC1123, the following characters are permitted for the host name. [a-z] or [A-Z] or [0-9] or [-]. The minus must not be the first character!
Reload: The host name is automatically adopted when it is entered. When switching from one page to the next, the old host name is still displayed. By reloading the page, the updated name is displayed.
Advanced network information
Ethernet
In the advanced Ethernet network information, you can read out data on speed, ports and various modes.

WiFi
You can also read out specific connection data in the advanced WiFi network information.
