File System
In this chapter you will find out what you can use the file system for and what functions it offers.
Introduction
You can store any number of files and folders in the File System as long as you do not exceed the storage capacity available on your camera. You can save your own images in the file system or carry out feasibility analyses using sample images. You can now even watch videos in this area.
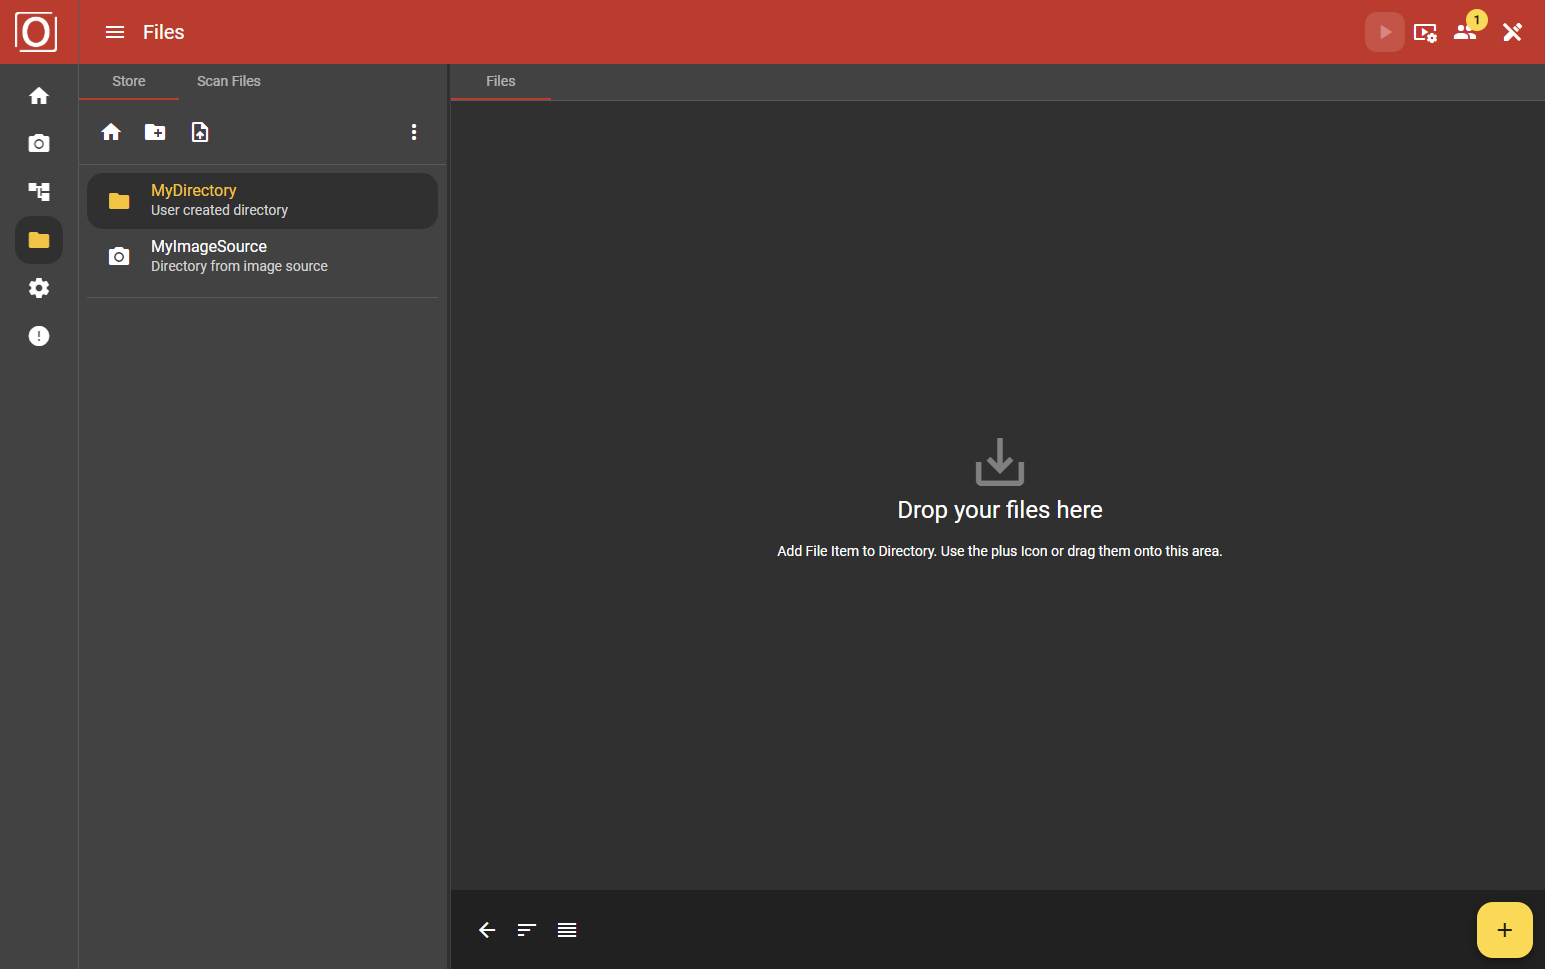
On the left-hand side, you can see all current folders and, below them, individual files that are not in a folder. On the right-hand side, you can see the folders and the files in the folders. If there are no folders or files on your camera, you will see a blank screen. With just a few clicks, however, you too can breathe life into your file system, as we will show you in the next steps.

Filling the file system
Navigation
All existing folders and files are listed in the navigation on the left-hand side of the screen. You can also create folders and upload files there. If you are already in a folder, you can navigate back to the starting point at any time.
Bottom App Bar
In the Files tab, you will see a bar at the bottom of the screen with a yellow button and plus icon. If you use this button, a dialog opens in which you can select and upload a file from your own system. You can also change the view in the bottom app bar and switch between the grid and table view.

Saving files
You can save and manage files in different ways. In the next step, we will show you in detail how you can store files in the file system.

Creating folders
User-generated folders
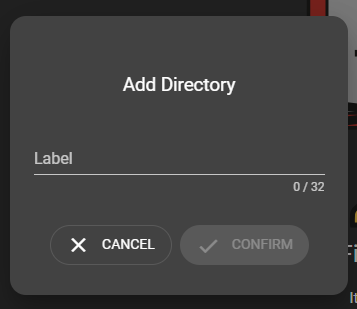
As previously mentioned, you can create folders yourself via the navigation. To do this, simply click on the folder symbol with the plus sign. Please make sure that the name of your folder is unique, uses only valid characters and is within the permitted minimum and maximum length.
Automated folders
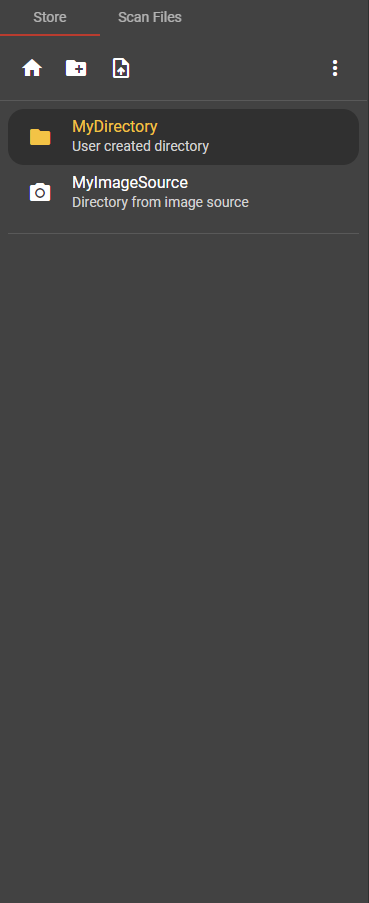
As soon as you create an image source of the type Hardware, a folder is automatically created in the File System area. Where the available folders are listed in the navigation, you will find a description of the respective folder in addition to the folder name. Here you will find a note as to whether it is a “User created directory” or a “Directory from image source”. The “Directory from image source” was created automatically. All images that you now capture and save via this image source are automatically sorted into this folder.
Uploading files
As already mentioned, files can be uploaded to the file system via the bottom app bar or the menu in the navigation bar. You can also drag and drop files in the Files tab. This function is possible both in general and in a folder selected by you.
Functions within the file system
Managing folders
To be able to manage folders, you must first select a folder. An icon with three vertically aligned dots then appears in the top right-hand corner of the navigation bar. Behind this is the folder menu. You can use this menu to change the name of your folder, download the contents of the folder or remove the folder.

File management
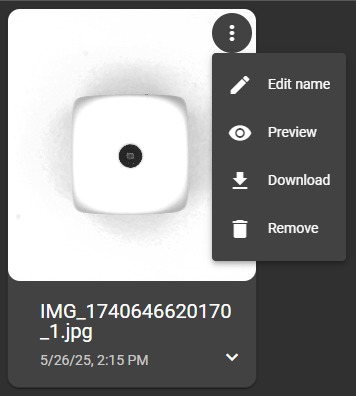
As soon as you have uploaded a file, it is displayed in the Files tab. You can use the menu with the three vertically arranged dots to manage the files. You have the option of editing the file name, removing the file, downloading it or viewing it in preview mode.
Preview mode
There is currently an additional preview mode for image and video files. Here the image is displayed in large size. You can also use this to download or remove the file. If you have captured the image via the image source, you can also view the settings made during image capture on the right-hand side of the screen.
Using the files
If you want to access the files at a different point in the application, you can click on the folder icon at the relevant points. You will find this icon in the workflow, for example, if you want to configure a file image source component.

On the other hand, you can select a single image from the file system when configuring an annotation in the workflow.
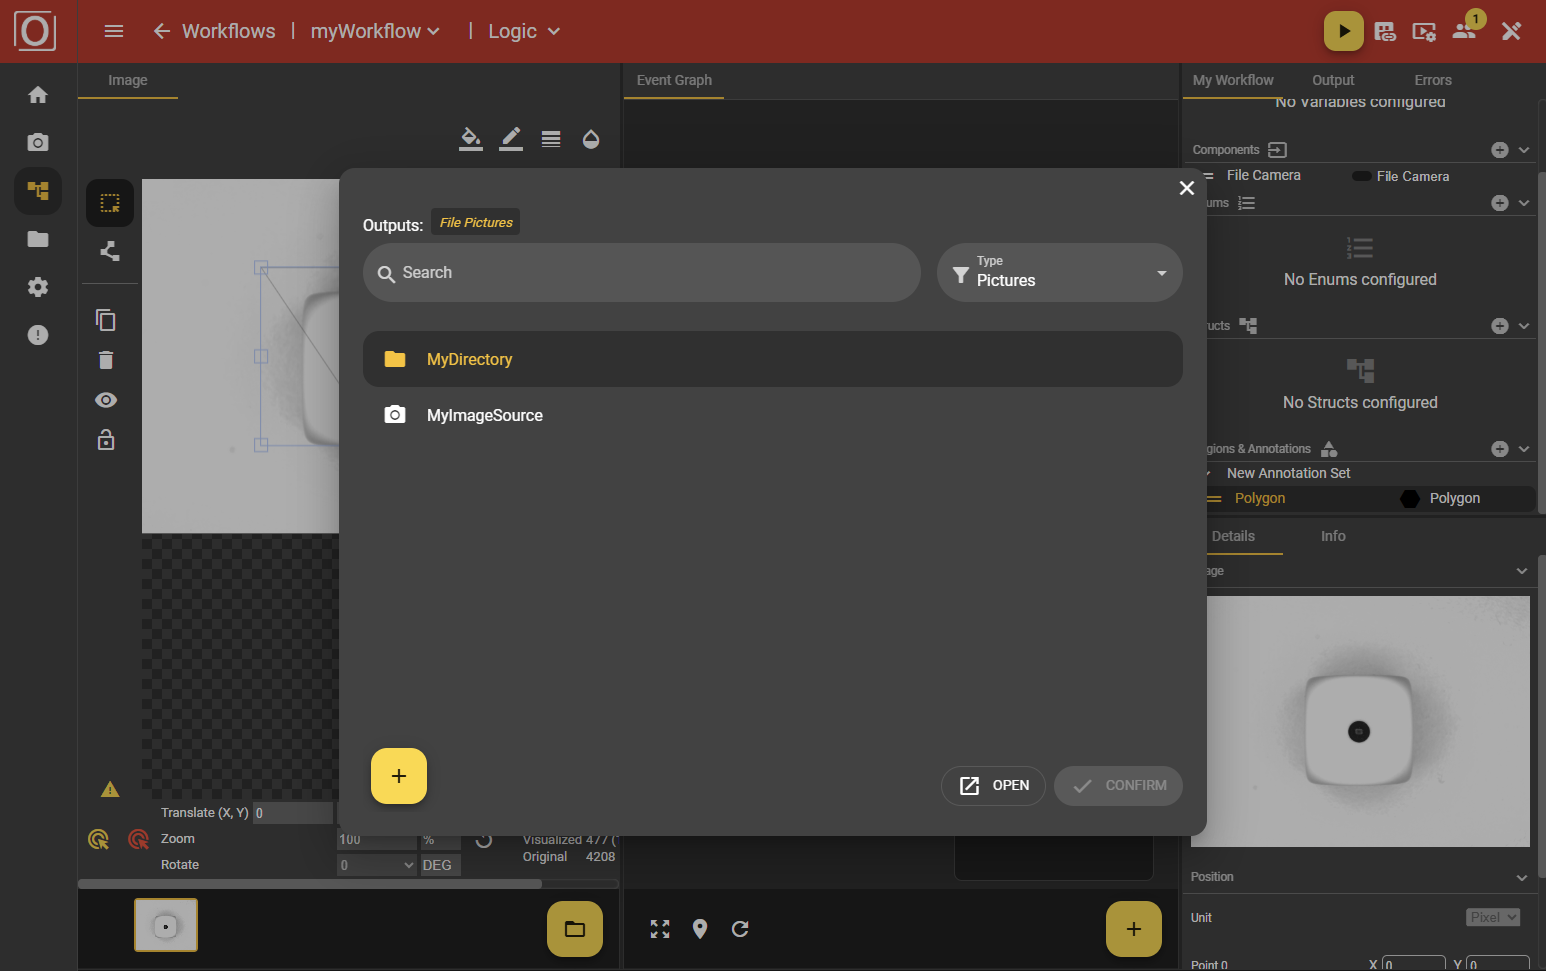
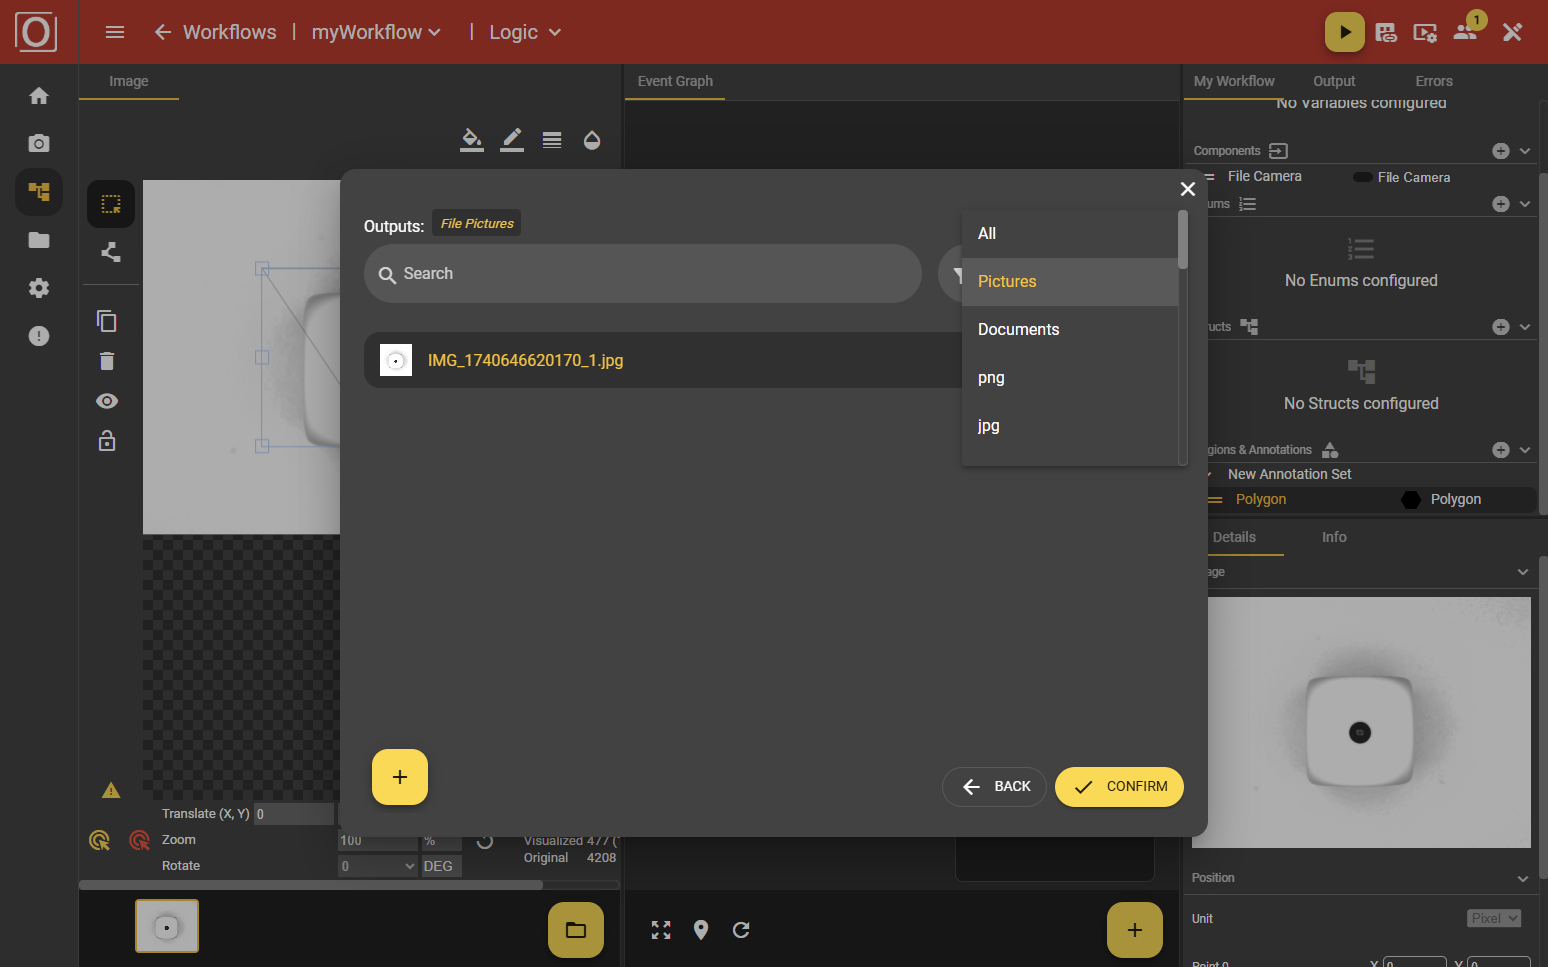
A dialog will open where you can either upload an entire folder or a file. Depending on where you want to access a file. At the top left you can see what type of file is expected. At the bottom left, you have the option of adding further files or folders to the File Manager and selecting them directly.
Scan Files
Hidden files
If you have not stored all folders and files on the camera system via the web application, you can add further files to your file system via the Scan Files tab. First use the “Start Scanning” button to search for hidden files. As soon as folders or files have been detected, you can select them and either add them to the file system or remove them from the camera system using the yellow buttons at the bottom of the screen.
Deleted files
If you have created folders or files via the web application but deleted them via the camera system, you can trace the removed folders or files via the Scan Files tab in the Deleted Files section.