Device Memory
In many situations, external storage is unavailable. In such cases, VISIONWEB offers the option of saving data directly to the camera's internal memory via the workflow.
Preparations
To use the internal device storage, you must first create a folder in the file system. Detailed instructions can be found at File System
Go to the "Files" folder in the main menu.
Create a new folder and give it a name—e.g., "Database" or "iO-niO."
The folder for saving the images was created successfully.
Workflow Setup
Creating the “Save to hard disk storage” node
In the context menu, look for the “Save to hard disk storage” node.
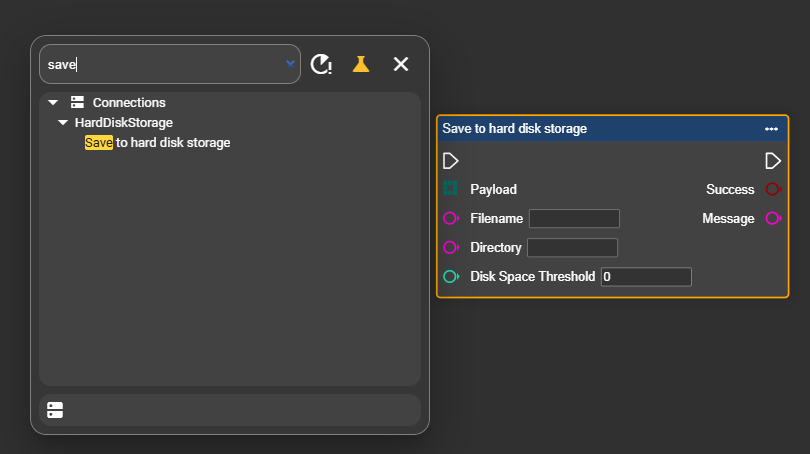
Now specify the folder for the "Database" directory.
Specify the maximum percentage of system memory that VISIONWEB is allowed to load data from the workflow into the camera memory. In this example, this should be up to 75 percent.
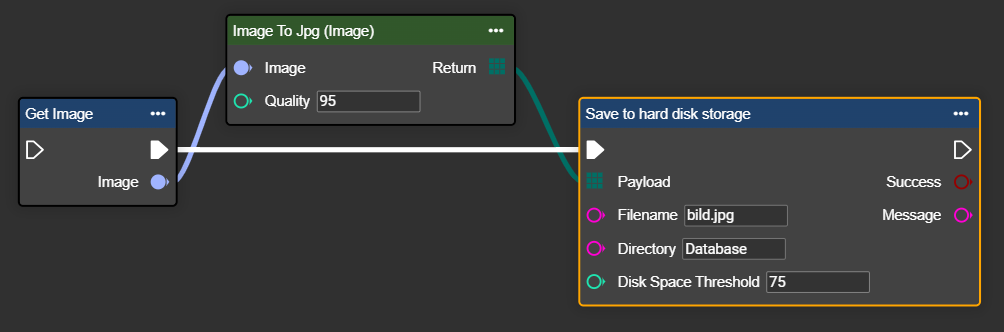
The “Save to hard disk storage” node can store all common file formats in the storage.
Congratulations - you can now save an image to the camera's memory.
If you want to dynamically configure the storage, you can do so at any time in the workflow. We'll use the example from FTP/SFTP again and replace the "Upload" step with "Save to hard disk storage." For each iteration, an image with a timestamp and result is saved in the corresponding results folder. However, the "OK" and "NOK" folders must first be created.
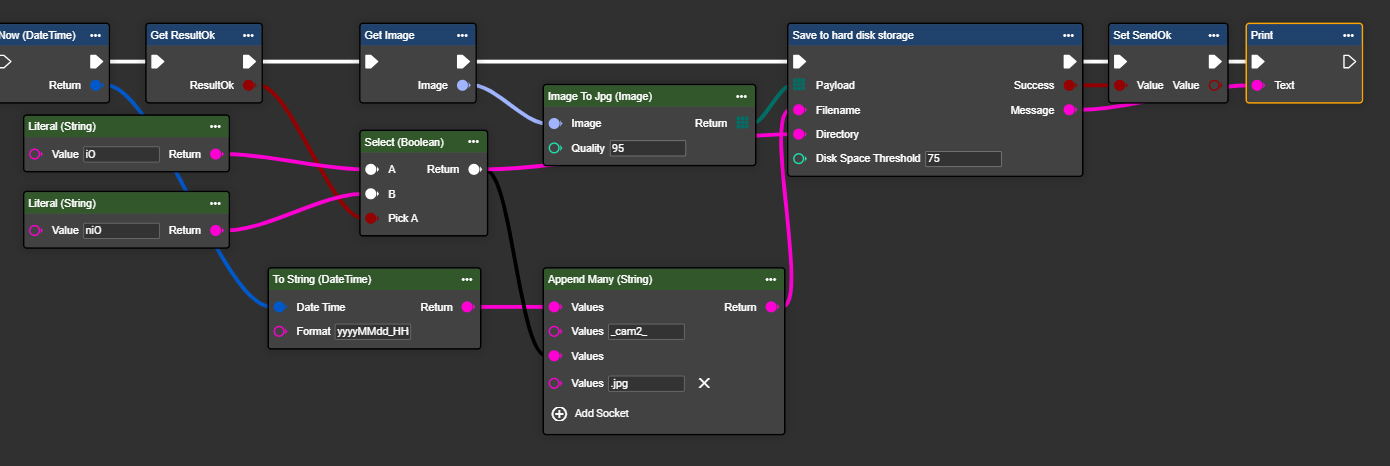
Congratulations – you can now dynamically store data in the device memory.
If the camera's memory exceeds the specified "Disk Space Threshold," saving is refused and this step is skipped. A corresponding message is displayed in the message of the Output tab.