FTP/SFTP
With VISIONWEB, users have the option of storing data on FTP and SFTP servers.
Connection Paramter
Parameter | Type | Unit | Explanation | Example |
|---|---|---|---|---|
Address | Domain || IP - String | Destination address of the (S)FTP server | myftp.myfactory.de | |
Port | Integer | Port to the (S)FTP-Server | FTP: Port 21 | |
Username | String | Username for authentication | yourName | |
Password | String | Password for authentication | xxxxxxxxx | |
Timeout | Integer | ms | Timeout if transmission takes too long | 5000 |
Additional parameters
Parameter | Type | Unit | Explanation | Example |
|---|---|---|---|---|
Payload | Byte Array | Payload - Anything that can be converted into bytes | Files | |
Directory | String | File path to the desired endpoint | /Directory1/Directory2/ | |
Filename | String | Data name Please always include the file extension. | myImage.jpg |
Workflow Setup
Creating an FTP connection
Unlike SFTP, the FTP node is not created as a component. It will only establish a connection at the time of the workflow—when the iteration reaches that point. Therefore, no component needs to be created.
To use FTP, the following steps must be performed.
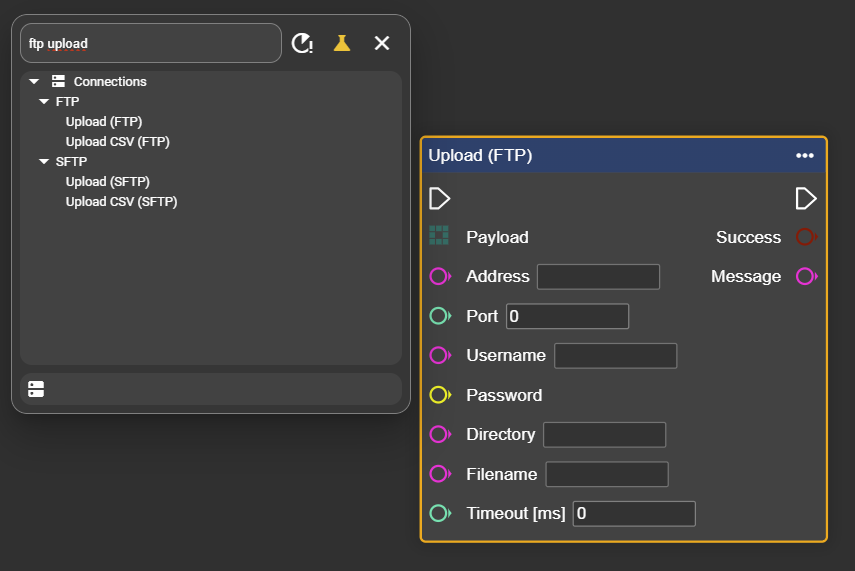
In the context menu, look for the “Upload (FTP)” node - there is a separate node for CSV applications.
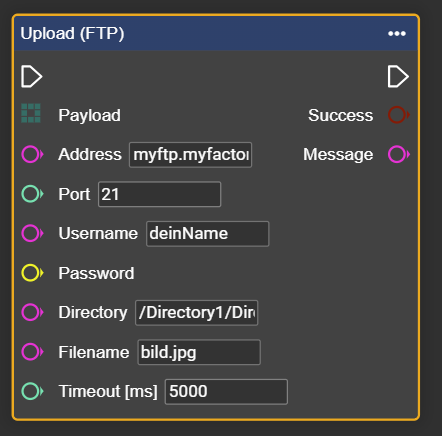
Now fill the Upload (FTP) node with the connection parameters.
Attach the data you want to transmit – in this example, an image – to the payload.
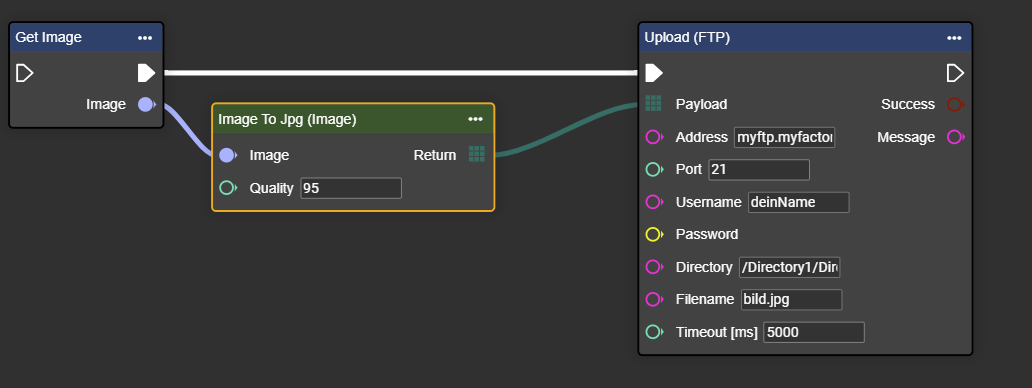
Congratulations! You can now upload data to the FTP server.
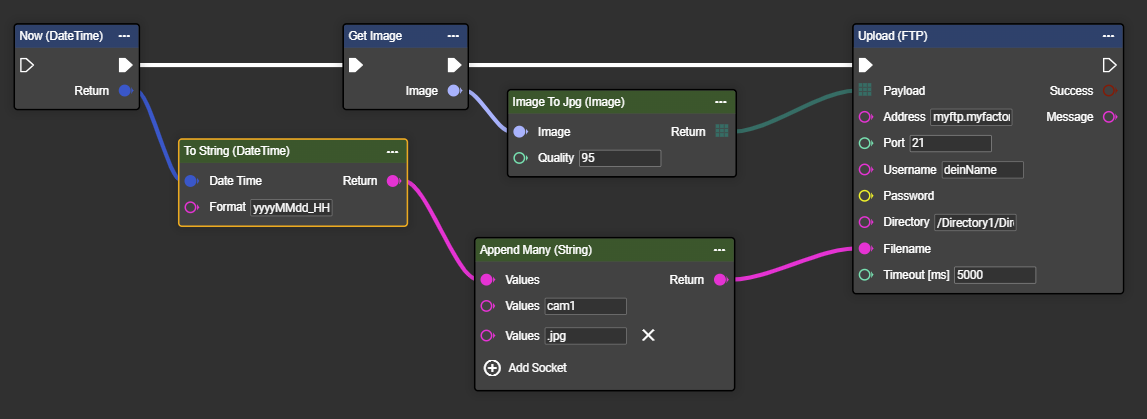
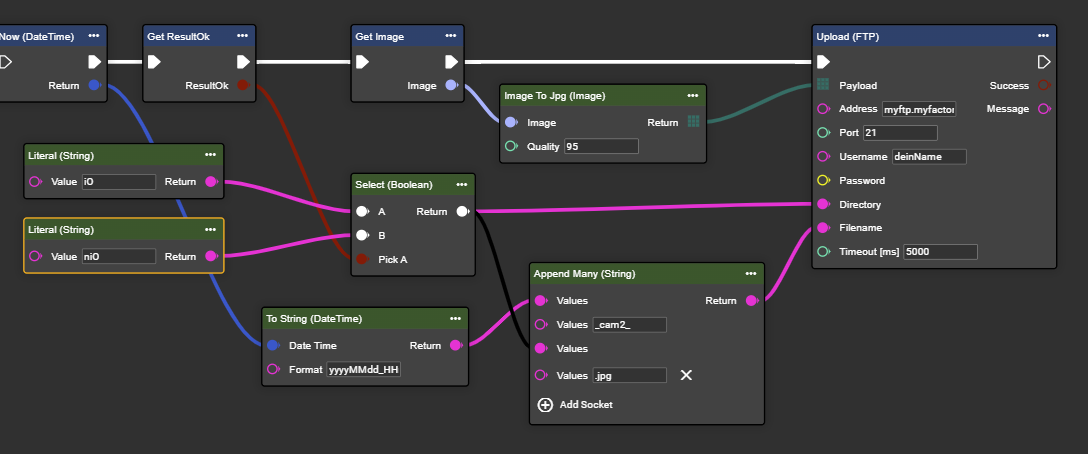
The filename can be generated dynamically in the next step, for example using “Append” and the current time. This way, the file
20250731_145234_cam1.jpgwill be saved inDirectory1/Directory2.
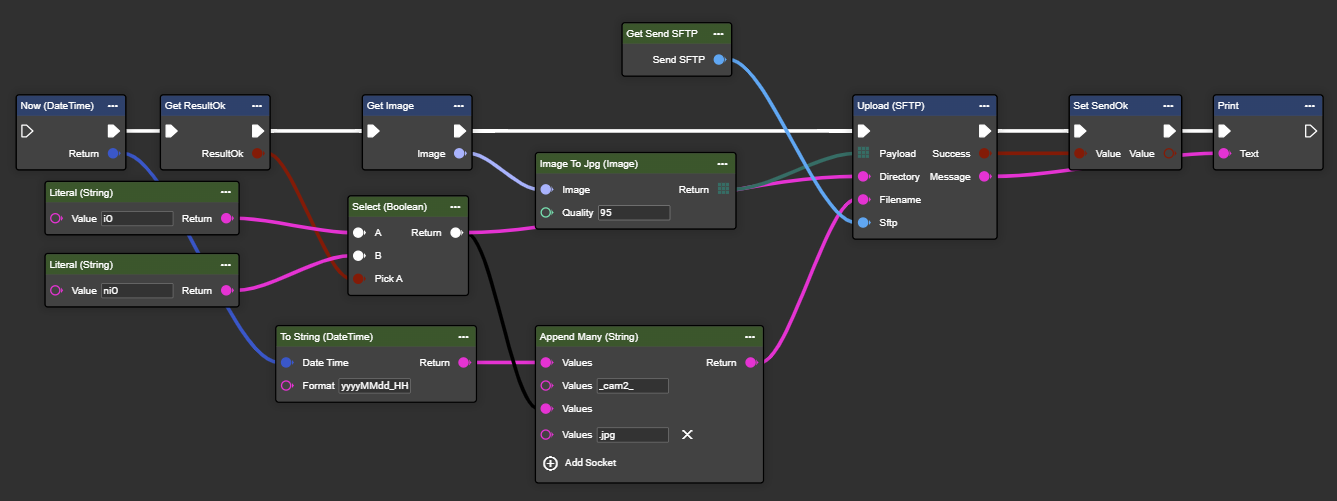
Folders and filenames can also be defined dynamically depending on the result. In the example, the “Result” controls not only the folder but also the input for the filename.
Result = iO: Stored in directory iO with filename 20250731_145234_cam2_iO.jpgResult = niO: Stored in directory niO with filename 20250731_145234_cam2_niO.jpg
Congratulations! You can now dynamically adjust filenames and store them in different folders depending on the situation.
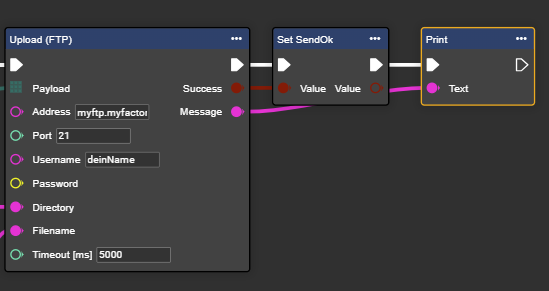
Via the “Success” and “Message” outputs, you can retrieve information about each iteration of the data transmission process.
Creating an SFTP Connection
This type of FTP transfer is usually preferred by most customers.
In Workflows, under Components, go to ➕.
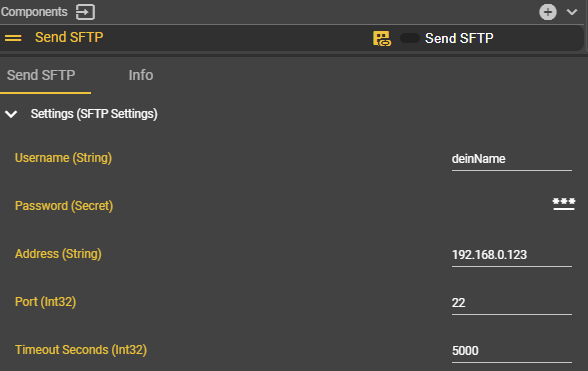
Search for the “Send SFTP” component and select it.

A new component named "Send SFTP" will appear. You can rename this component at any time.
Enter the connection details here.
Right-click in the Event Graph to open the context menu, search for “Get Send SFTP” and select this entry.
Congratulations! You have successfully created the SFTP component!
In the workflow’s context menu, also search for the “Upload (SFTP)” node and select it.
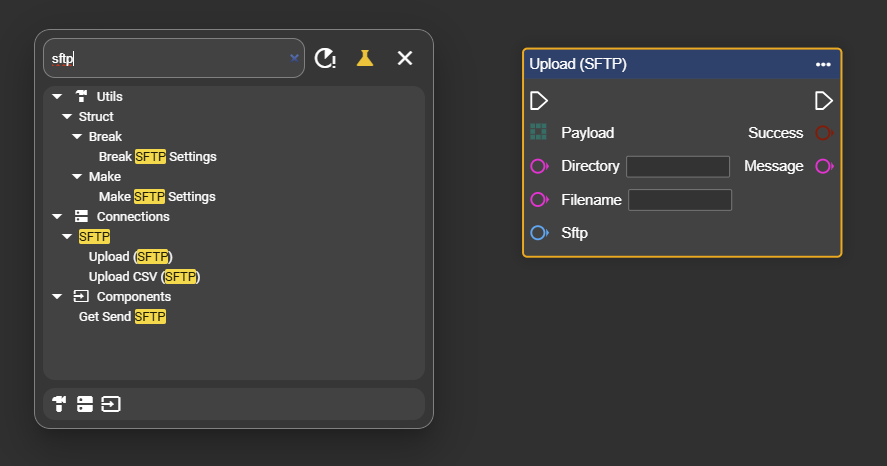
You can then embed the node in your workflow similar to FTP.
Congratulations! You can now also use the SFTP node dynamically.