CSV
The CSV node allows you to quickly and easily cache data and values and then transfer them to any data endpoint. A CSV file is always stored on the camera. These instructions show you how to write data to a CSV file in just a few steps.
Workflow Setup
Creating a CSV-File
In Workflows go to Components an click ➕.
Search for the component “CSV” and select this entry.

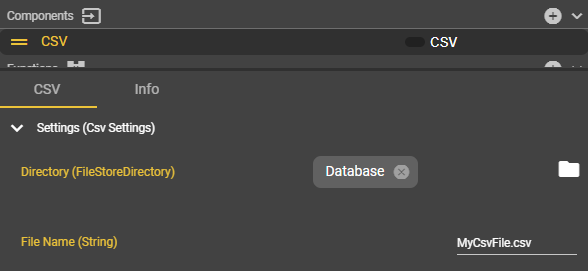
A new component called “CSV” will appear. You can rename this component at any time by double-clicking on the component name.
Now specify the target folder in the system and name the file with the extension *.csv to ensure that the correct file format is used.
Open the context menu in the Event Graph by right-clicking, search for “Get CSV” and select this entry.
Congratulations! You have successfully created a CSV file in the Database folder with the name MyCsvFile.csv.
Storing data in the CSV file
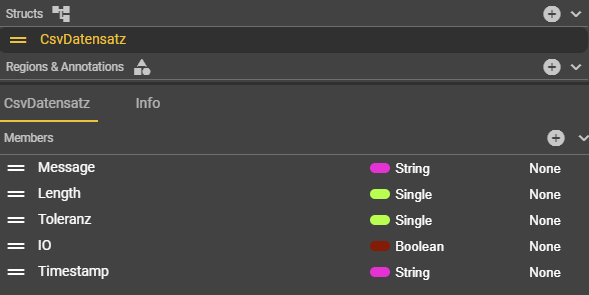
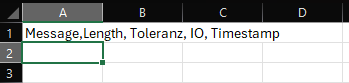
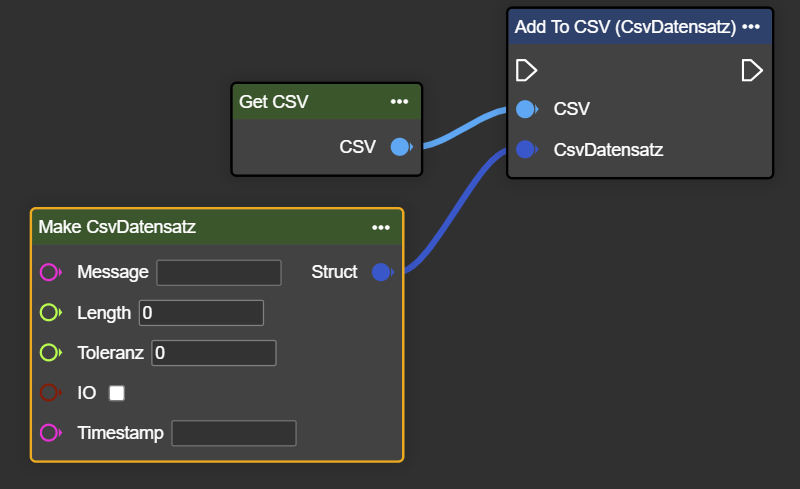
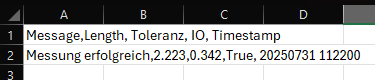
Before you can store the data, you must first create a structure for your columns. You can do this with structs. In our example, we use measured values, iO results, messages, and the timestamp as data. The columns are then arranged as desired. We have renamed the struct to “CsvDatensatz.”
Now search for the entry “Add To CSV (CsvDatensatz)” in the context menu, select it, and connect this node to the “Get CSV” node.
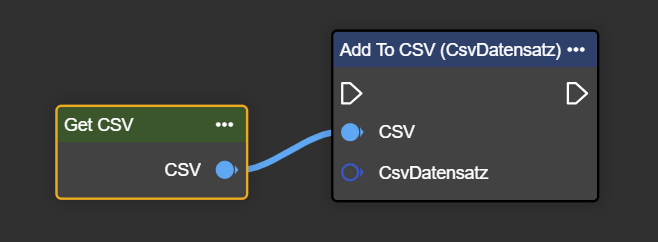
Then search for “Make CsvDatensatz” in the context menu. Select the entry and connect the struct output of the node to the input of the “Add To CSV (CsvDatensatz)” node.
Now place the nodes at the point in the flow where you want to store the data and connect them accordingly.
It does not have to be done using Get nodes as shown in the example; it can be integrated into the workflow as desired.
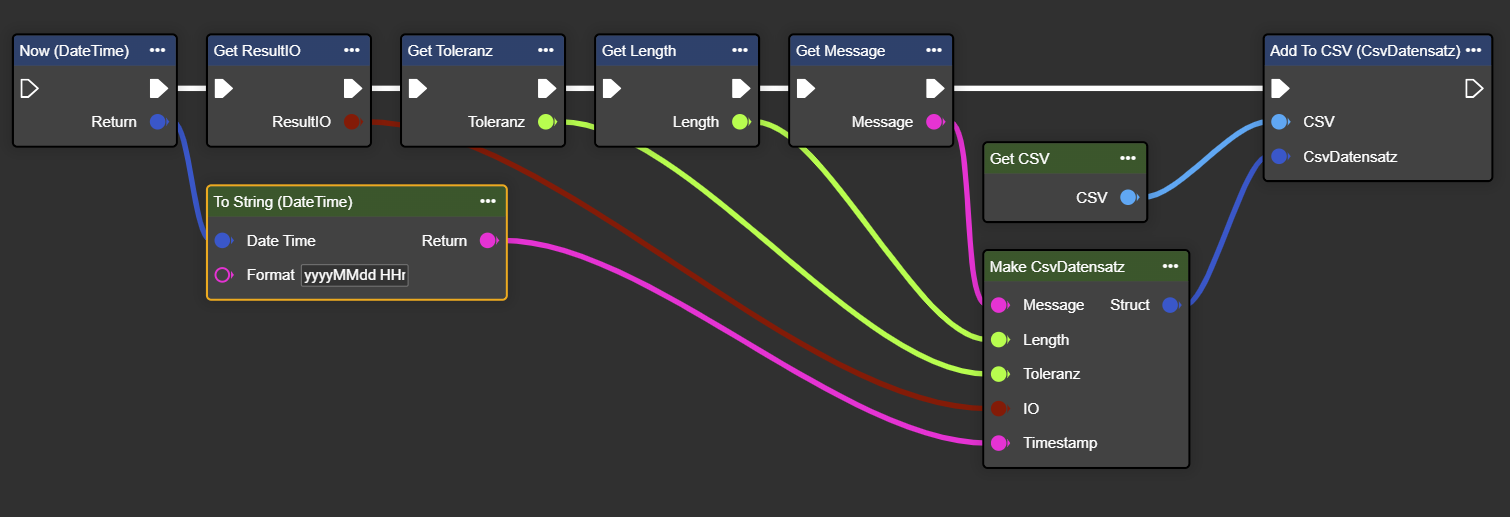
Congratulations! You are now saving data to the CSV file for each iteration.
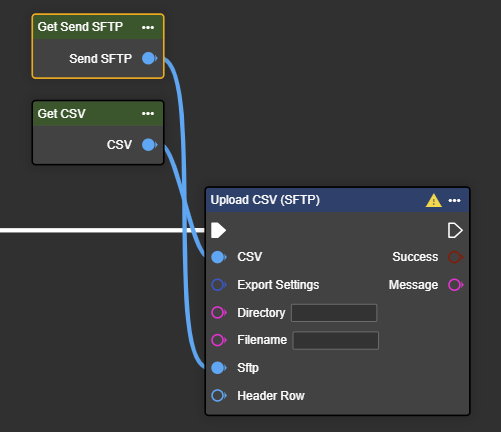
Uploading CSV files to endpoint
Select the desired endpoint and choose the corresponding CSV variant from the context menu. This example is based on the SFTP endpoint. You can read about setting up the SFTP component at FTP/SFTP .
Look for “Make CSV Export Settings” in the context menu. You can use this node if you want to change the delimiter between the data, e.g., from a comma to a semicolon. You can also use it to control the date specification if an input value is directly available as a DateTime value. In general, however, this node is not absolutely necessary.

In the context menu, also look for the entry “Start Header Row (CsvDatensatz)” to store the column names in the first row of the file during upload.
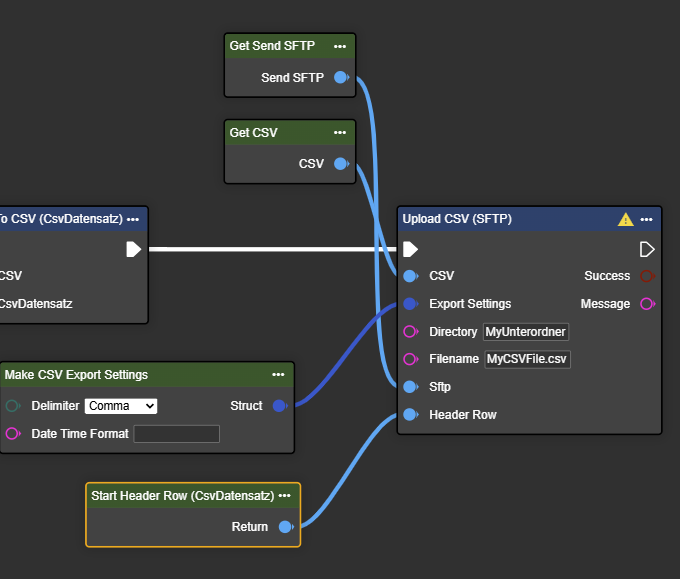
Congratulations! You can now successfully upload CSV files.