Azure
Microsoft Azure Blob Storage offers a powerful and flexible way to securely store data in the cloud, especially large amounts of unstructured data such as images, videos, or documents. Access to stored content can be controlled and individually approved using SAS keys (Shared Access Signatures). This allows data to be uploaded, shared, and processed from any location without requiring a direct connection to the Azure portal. Azure Blob Storage is ideal for applications that require centralized, scalable, and highly available data storage. In addition, the platform supports various access levels and integrations, making it easy to integrate into existing workflows or applications. This guide provides step-by-step instructions on how to set up Blob Storage, upload data, and manage it securely.
evoVIU currently offers two options for using Azure Blob Storage:
Upload (Azure Storage Blob): Enables images to be uploaded to Blob Storage.
Azure Storage Blob Camera: Enables users to download images from storage, which is particularly useful for testing a workflow with previously stored images.
Generate access & SAS key
A token is required to connect to Azure Storage, which can be generated via a Microsoft Azure account. (More information on Microsoft Azure)
Under “All Resources,” you can create a new container, which is a kind of storage area that can be filled with subdirectories. (More information on Microsoft Azure)
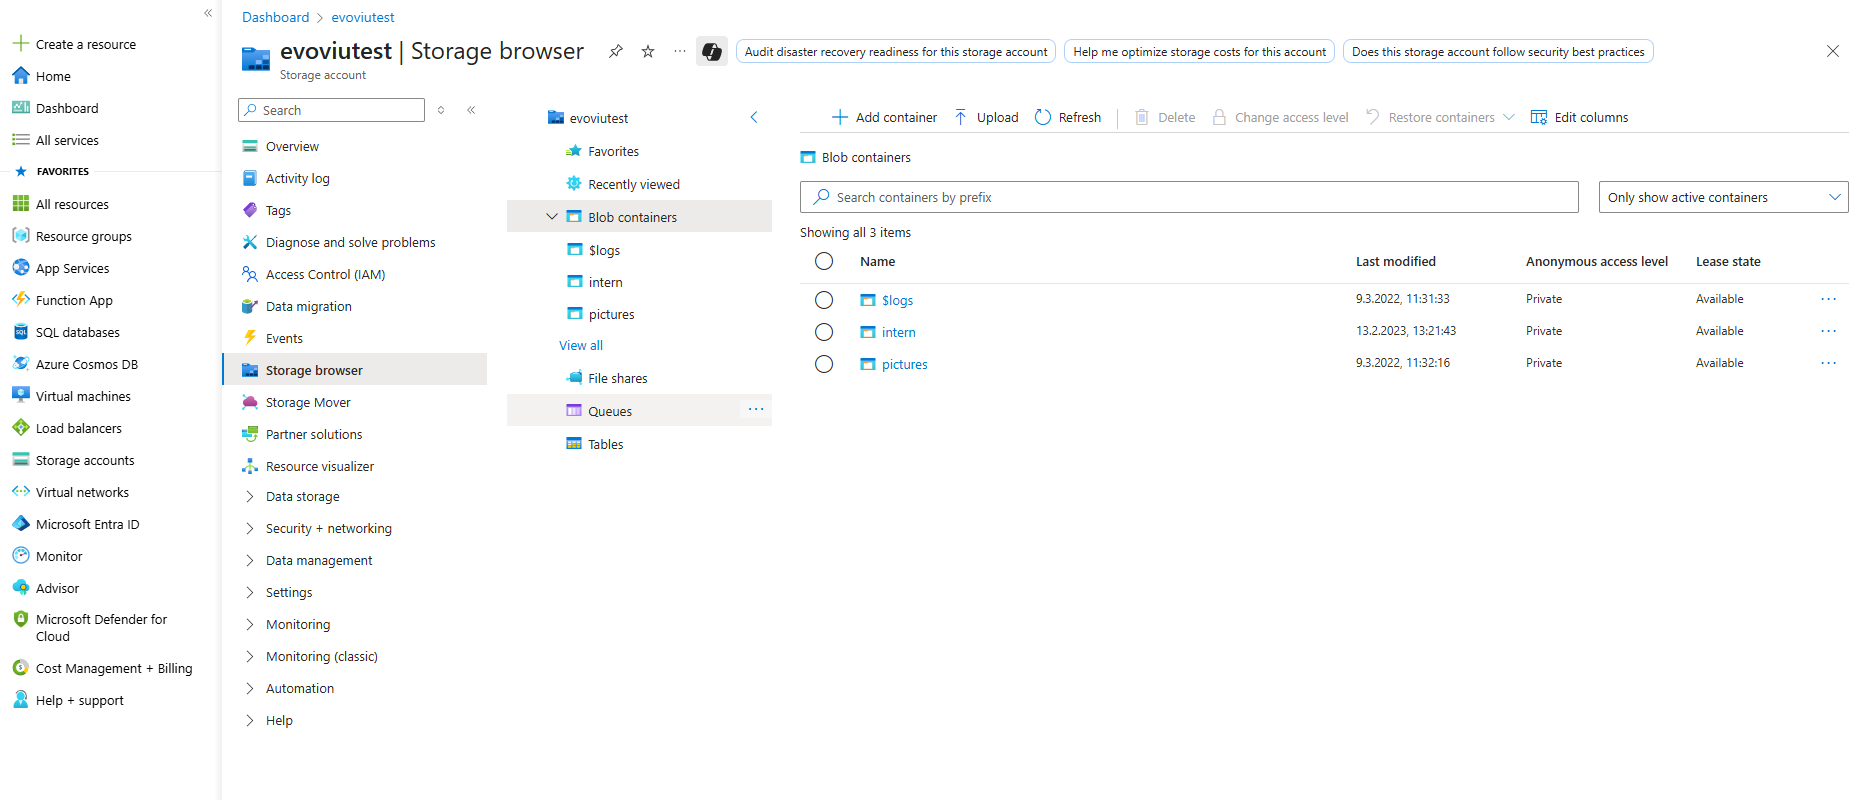
Once successfully created, the blob storage can be viewed:
Home/All Resources/<YourBlobStorage> → Storage Browser → Blob Container
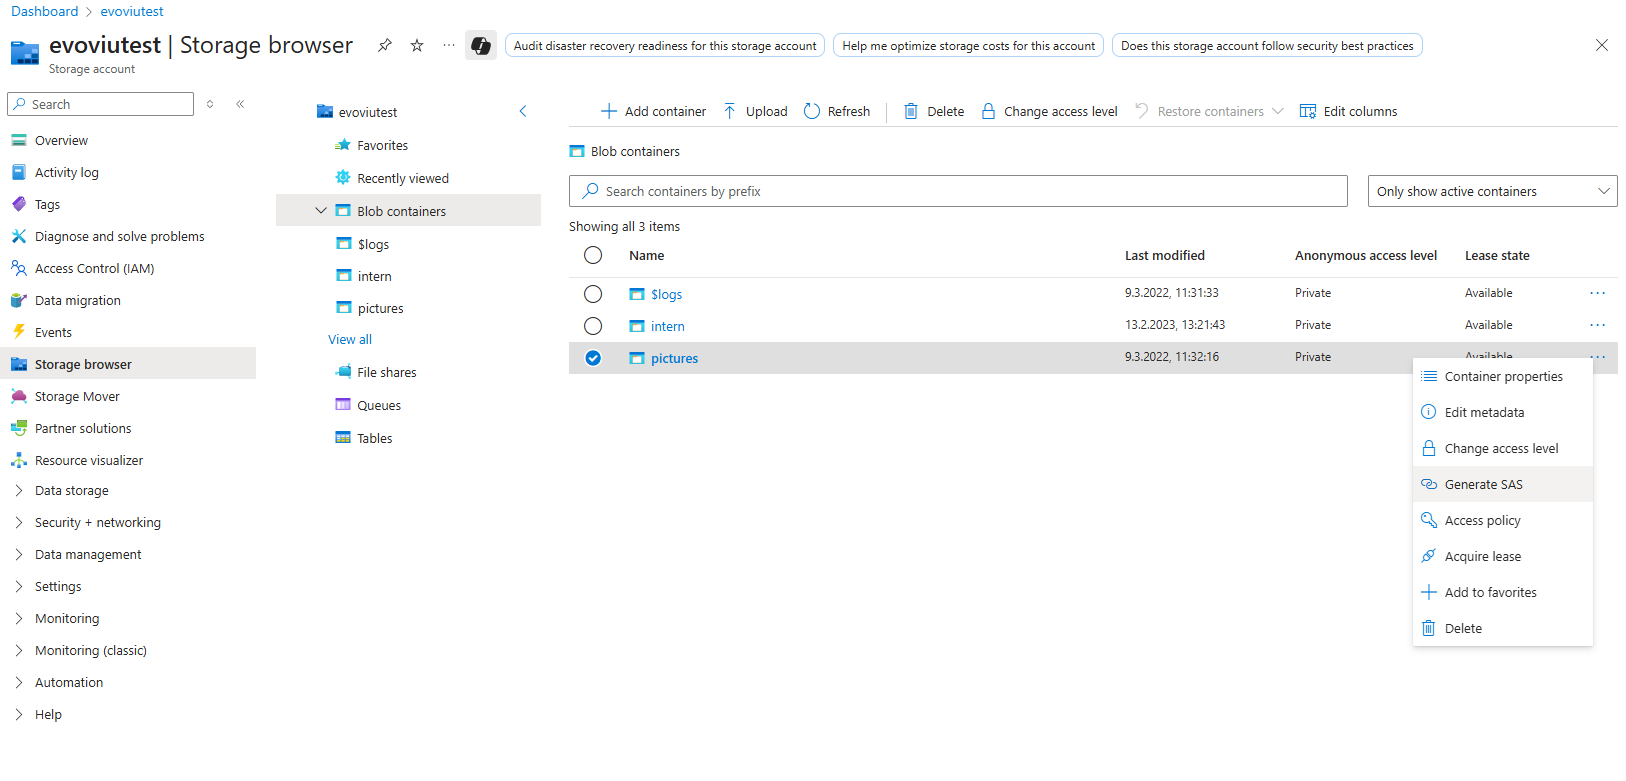
A token is required for the connection, which can be generated via the three-dot menu → Generate SAS. A suitable blob container should be used or created for this purpose.
When creating a new SAS, please ensure that the valid period does not exceed two years. However, this is generally a matter of personal preference and only a recommendation on our part. In addition, you may be required to specify whether only HTTPS or also HTTP is required.
We recommend connecting via HTTPS!
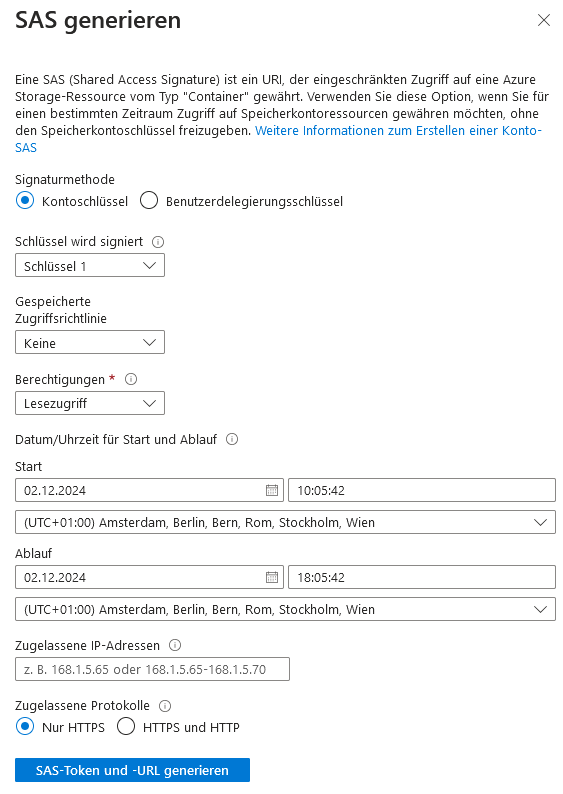
The necessary permissions must also be available in order to create folders and save data. Please consider carefully which rights are sufficient and which should not be available.
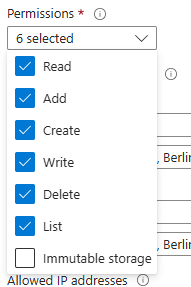
In most cases, the following rights are sufficient:
Read
Add
Create
Write
Delete
Once the configuration has been completed and a SAS has been created, you will receive a token and a URL. These can be used to store data in an Azure blob container in the workflow using the upload (Azure Storage Blob) node.
The URL is composed as follows:
<Adresse>/<Blobcontainer>?<Token>Using an example environment:
https://evoviudocumentation.blob.core.windows.net/pictures?<Token>Congratulations! You have just successfully created your own Blob Storage on Microsoft Azure.
Connection parameters
1. Upload - Parameter
Parameter | Type | Unit | Explanation | Example | Upload | Azure Camera |
|---|---|---|---|---|---|---|
Payload | Byte Array | The byte array contains the message data to be transferred. It can include various file formats, e.g. images, videos, or other files to be uploaded. | Image from “Image to JPG”-Node |
|
| |
Address | String | The destination address defines the endpoint in the cloud to which data is sent. It is usually provided by IT or determined directly via Microsoft Azure. |
|
| ||
Token | String - Secret | The token is generated when the SAS key is created. It is used for authentication and can only be stored as a secret element in the system. | <YourToken> |
|
| |
Container | String | In Azure, the container is the defined storage area for data. It is created depending on the use case and can be filled with subfolders via evoVIU. | pictures |
|
| |
Directory | String | Specifies a subfolder in the container. If this already exists, data is stored there. Otherwise, it is created automatically. If no specification is made, data is stored directly in the container. | mySubfolder |
| ||
Filename | String | Defines the name of the file to be transferred. The file name can be generated dynamically and is stored together with the file to enable unique identification. | 20250731_112200_myimage.jpg |
| ||
Timeout | Integer | ms | Sets the maximum duration for data transfer. If this time is exceeded, the process is canceled and the workflow continues with a corresponding message. | 5000 |
| |
Cycle Images | Boolean | Controls the image selection behavior during download. Either the first image is always used, or different images are retrieved one after the other, depending on the setting. | True |
| ||
Is Lazy | Boolean | Enables lazy load mode. Images are not downloaded simultaneously, but one after the other, which saves resources and can optimize loading time. | True |
| ||
Color | Dropdown | Determines the color format of downloaded images. Depending on the setting, images are converted and saved in color, grayscale, or other formats. | Color |
|
Workflow Setup
Upload Files to Azure
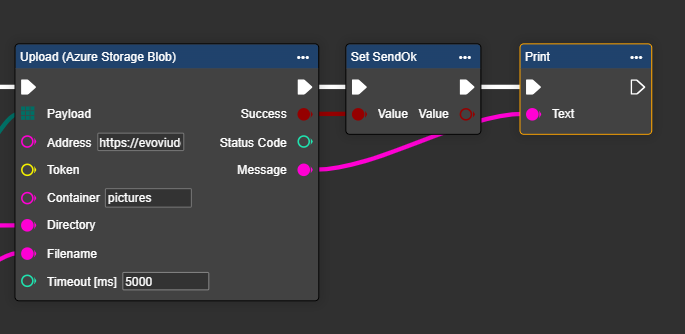
Right-click to open the context menu and search for the node “Upload (Azure Storage Blob)”.
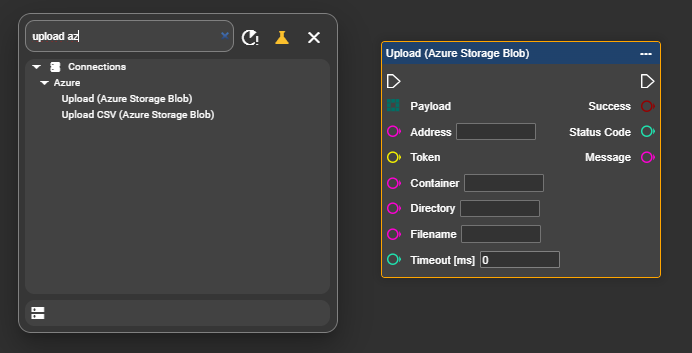
Now enter your connection parameters for the upload node:
Token: Your Token from SAS
Container: pictures
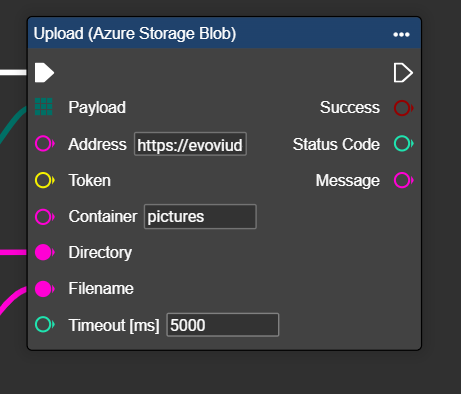
Connect the other parameters dynamically or store fixed values.
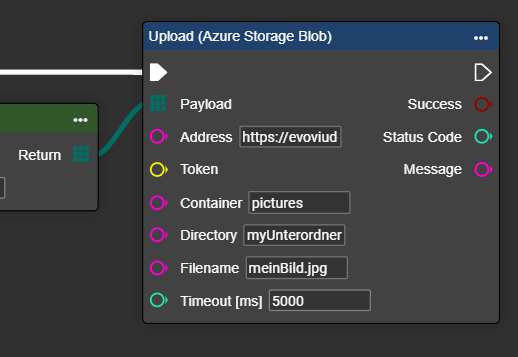
In the example shown, the file name and folder name are generated dynamically. The folder is created anew for each day and filled with the images taken on that particular day. The images are given file names based on a combination of the date and time stamp.
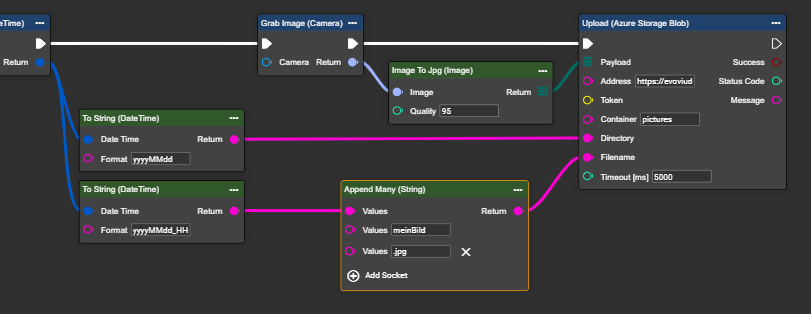
Alternatively, you can store the file name and folder name permanently, but then this file will be overwritten again and again.
Congratulations! You can now successfully upload data to the cloud.
If problems arise: Please check whether your IT department has approved the firewall for the system.
The outputs “Success,” “Status Code,” and “Message” provide feedback on the transmission status and any error messages.
Azure Blob Storage Camera
In Workflows, go to Components and select ➕.
Search for the “Azure Blob Storage Camera” component in the menu.

A new component named “Azure Blob Storage Camera” appears. You can rename this component at any time by double-clicking on the label.
Enter the connection parameters and decide whether the images should be displayed and loaded one after the other. Also decide whether the images should be converted to color.
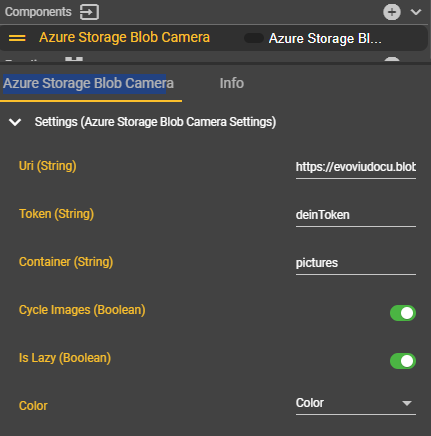
In the current version, the camera token is not stored as a secret. This will be adjusted shortly.
In the Event Graph, open the context menu by right-clicking, search for “Get Azure Storage Blob Camera” and select this entry.
Congratulations—you have successfully created the component for the Azure Blob Storage Camera!
In the workflow context menu, search for “Grab Image” and select this entry. Connect this node to the “Get Azure Storage Blob Camera” node.
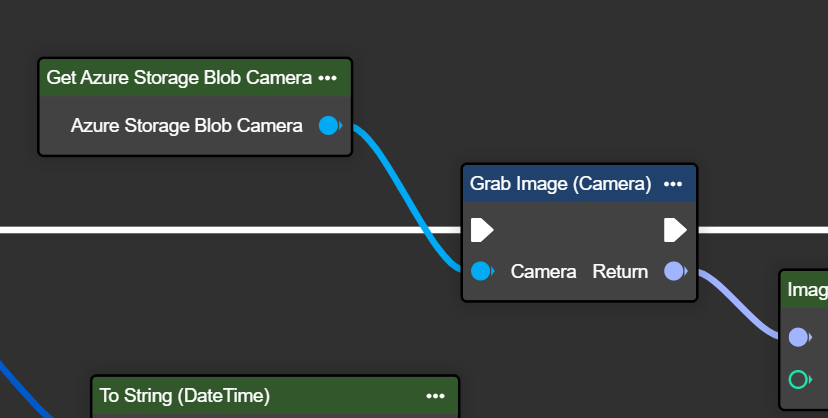
Congratulations—you can now download and process images from the cloud for each iteration.