File Image Source
In this chapter you will find general information on the operation of the File Image Source.
Introduction
When you create a new image source, you can specify the type. In most cases, the Hardware type will probably be used, but in special scenarios it may also make sense to use a specific data source. This is where the image source of type File comes into play. Here you refer to a folder in the file system and display the images it contains in the image source.
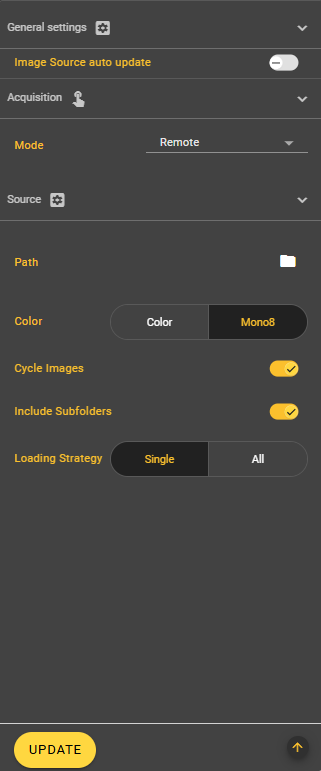
Auto Update
Below the filter area is the setting option for automatically applying changes to the image source. This setting is active by default. If you do not want to save changes in the image source automatically, you can deactivate this setting here. Instead, you will then see a button to apply the new values at the bottom right of the screen as soon as changes are made.
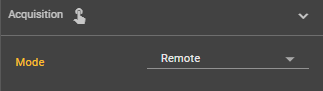
Acquisition
Mode
In the image recording settings, you can choose between four different recording modes: Manual, Free Run, Hardware and Remote. In addition, settings can be made for the exposure mode, exposure time and frame rate. Depending on the mode, there are further setting options.
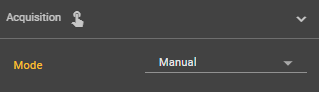
Modus 1: Manual
Manual mode is set by default. In this mode, you can take a picture manually using the yellow button in the Image Source Control Bar.
Modus 2: Free Run
Your pictures are taken continuously in Free Run mode. Here you have the same setting options as in manual mode plus one more.
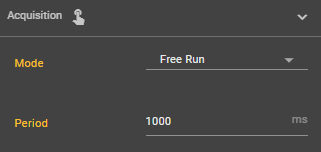
Frame Rate
You can select how many images per second should be recorded. Select a value between 1 and 30 fps. A high frame rate can have a negative impact on the performance of the camera.
Modus 3: Hardware
In hardware mode, a hardware trigger triggers the recording via the trigger pin of your docker connection on the smart camera. In addition to the settings already known from manual mode, there are three more settings.
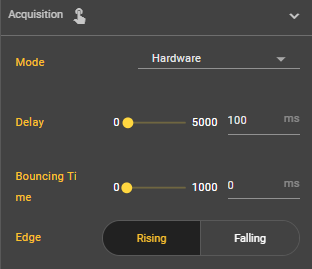
Delay
You can set a value between 0 and 5000 milliseconds for Delay. Depending on the input value, image recording is delayed after the trigger.
Bouncing Time
You can select a value between 0 and 1000 for the bouncing time. This is the time that is waited after a trigger until a trigger is responded to again. This prevents several recordings being made in between due to incorrect triggers.
Edge
Here you can set whether the image should be recorded as soon as the trigger is triggered (rising) or as soon as the trigger is no longer perceived (falling).
Modus 4: Remote
With the remote mode, you can also take the pictures manually, but not via the web interface, but via the http-Rest interface. The setting options are the same as for manual mode.
Source
In this area, you can configure the image source in terms of content and display settings.
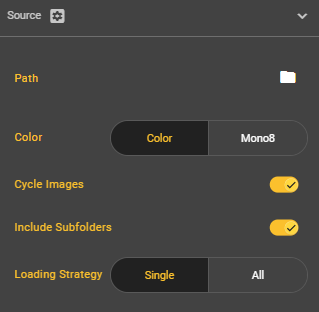
Path
If you click on the folder icon, a dialog opens. This shows you all available folders. You can even create additional folders and upload files at this point. Once you have decided on a folder, confirm the dialog and your selection will be applied.
Color
At this point, you can choose between displaying the image in color or grayscale mode.
Cycle Images
You can use the slider to specify whether the cycle should stop at the end of the folder or start again from the beginning.
Include Subfolders
You can also include subfolders using this slider.
Loading Strategy
At this point, you can decide whether all images should be loaded at the beginning or each image individually when called up. If you load the images separately using Single, the images are processed and displayed more quickly.