Autofocus
This chapter contains general information on operating the autofocus.
With autofocus, it should be possible to immediately determine the required values for a sharp image capture within a few seconds. This value is set automatically and used for every subsequent image capture with this image source.
But: If the object or the distance changes, the autofocus must also be reconfigured in order to continue to ensure optimum image capture.
In order for the autofocus to be determined, a configuration of the image source must always be active, both for configuration and for execution and calculations.
Configuration mode
Configuring a region
Bottom App Bar
If you want to focus on a specific image area, you can activate the configuration mode in the bottom app bar of the image source. As soon as this is active, a region is displayed on the last image taken. This can be adjusted in terms of its size and position. In the top left-hand corner above the image, you can view the exact coordinates and dimensions of your region and also edit them.
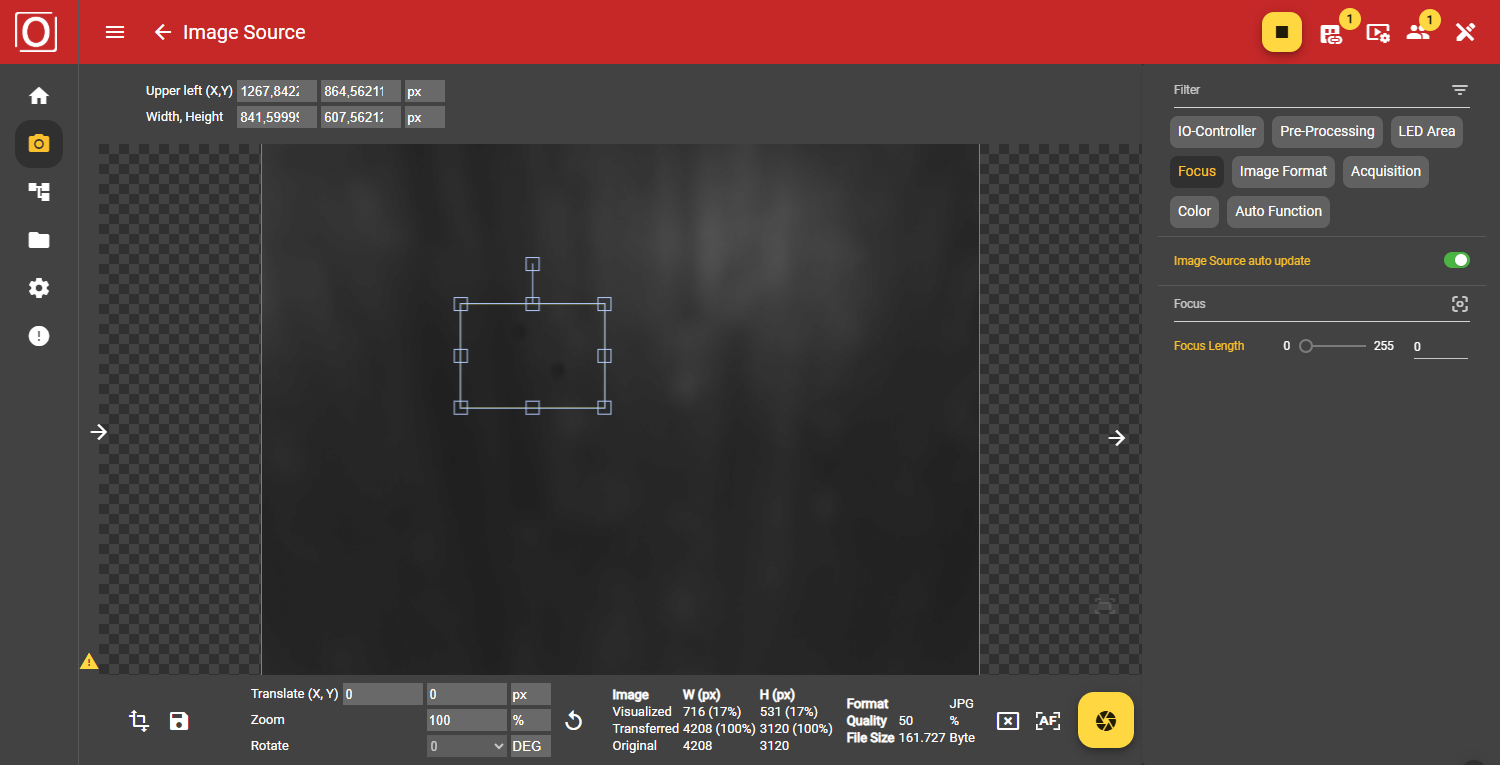
Image Source / Focus
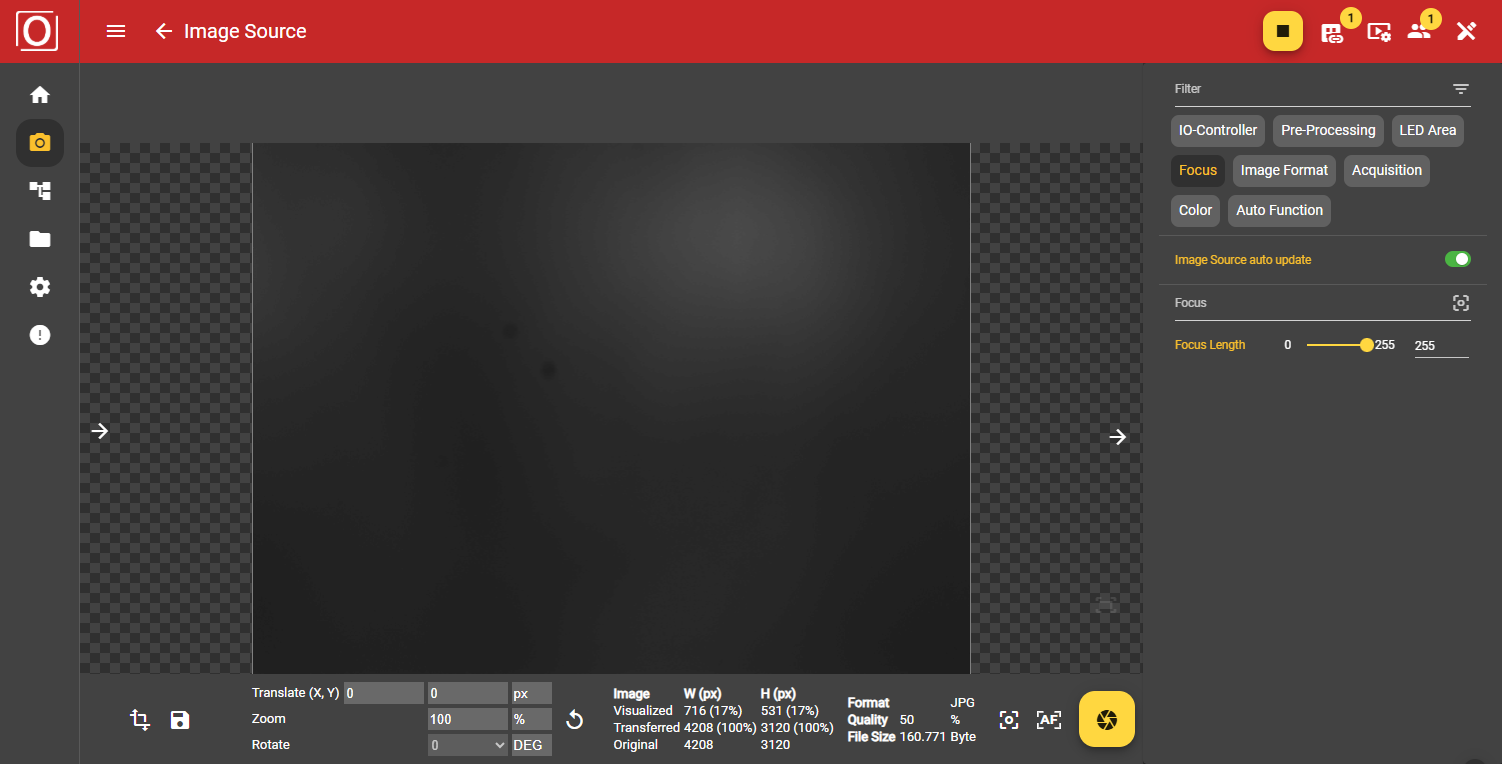
In the Image Source, you can make all settings in the right-hand bar. In the Focus area, you can view the set focus length. This can be adjusted manually using the manual focus. If you are using autofocus, the focus length is automatically adjusted as soon as the calculation is complete.
Live Operation
Starting the autofocus
Bottom App Bar
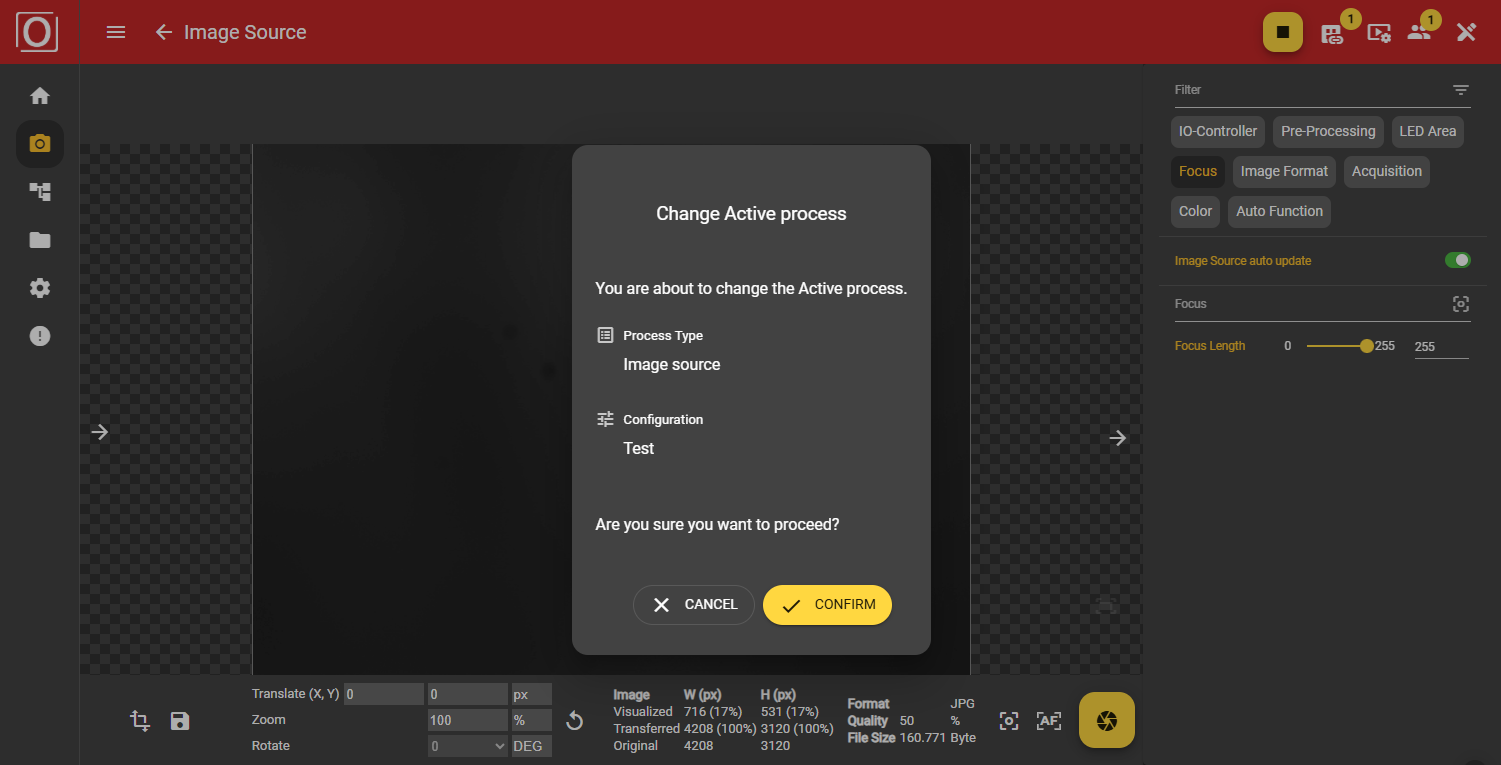
To start the autofocus calculation, you can use the Start button next to the button for manual image capture. As soon as you have clicked this, a dialog will appear in which you must confirm that you want to start the process.

After you have confirmed the start of the autofocus, the start button changes its appearance and offers you the stop function to end the calculation. It is not possible to carry out transformations on the image during the autofocus calculation. It is also not possible to save images.
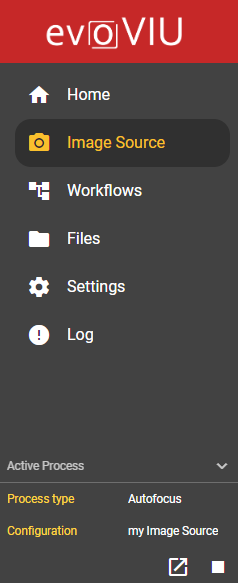
Navigation / Navigation Rail
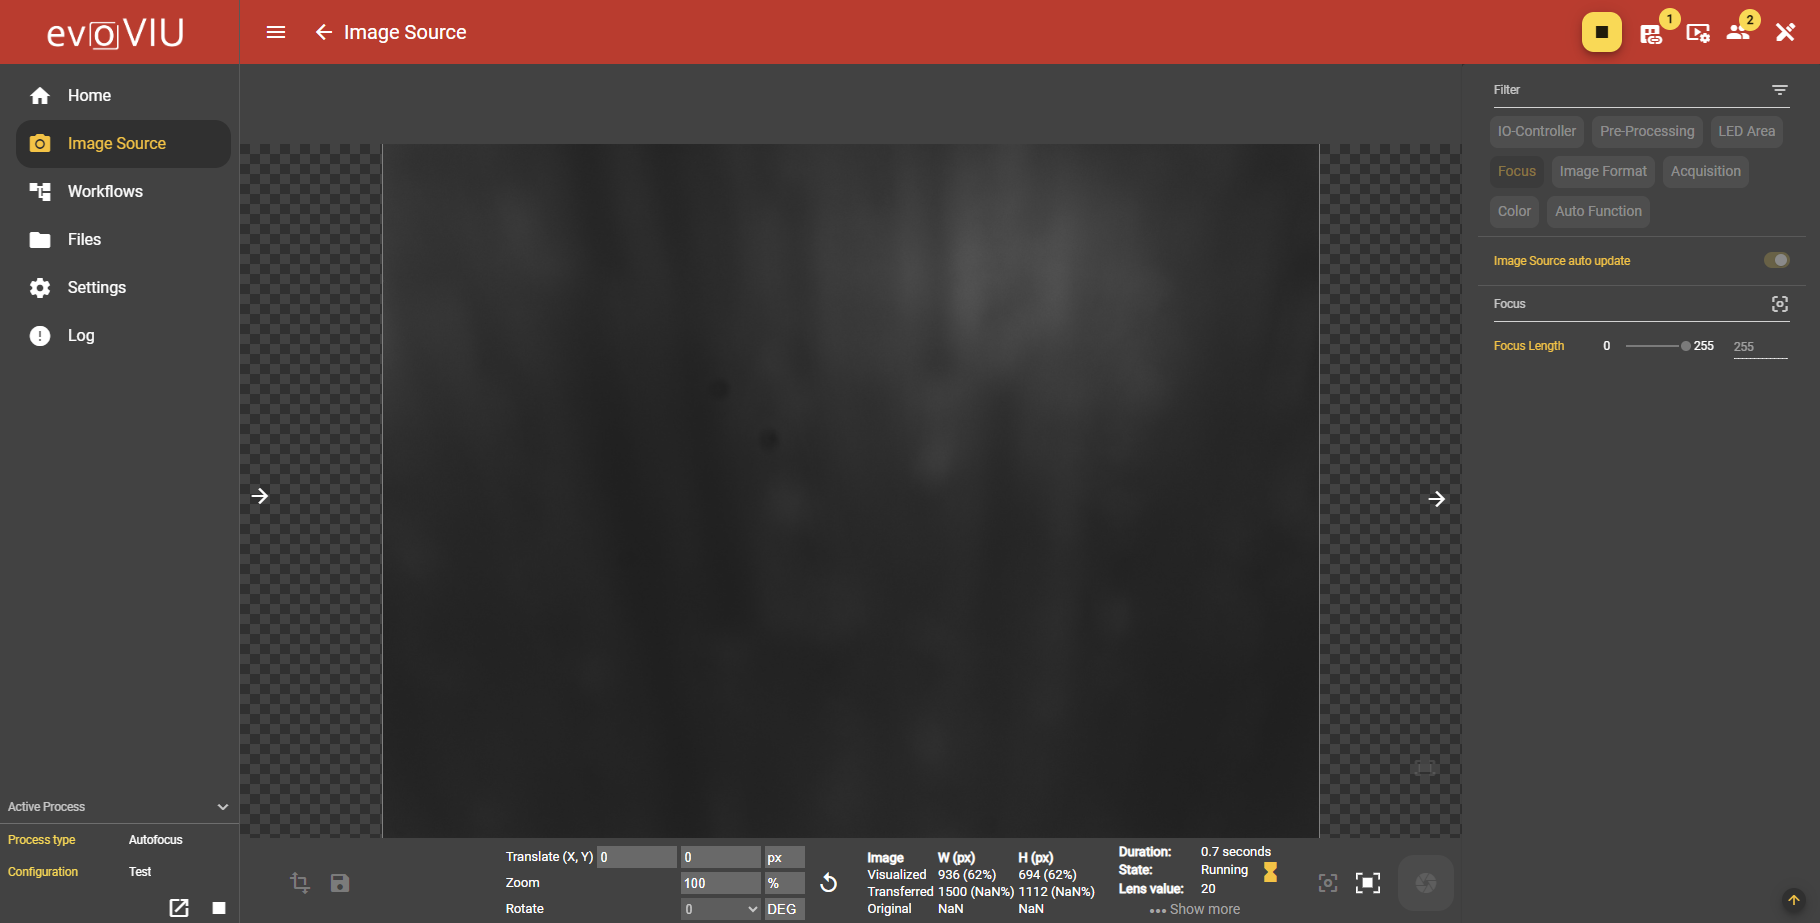
If you like working with an expanded, detailed navigation, you may already be familiar with the Active Process area at the bottom left of the screen. Here you can read out information about the currently active process and control it. As soon as the autofocus has been started, the Process Type changes from Image Source to Autofocus. You can use this display to switch to the configuration or stop the active process at any time.
Stopping the autofocus
In the bottom app bar next to the button for manual image capture is the button for prematurely ending the autofocus. You will first be asked to confirm your decision to stop the autofocus calculation via a dialog. The calculation is then stopped while the last available value is retained.
However, if the autofocus calculation ends naturally, the autofocus is automatically stopped, the value determined under Focus length is set and the stop button disappears or returns to the start button.
Results of the autofocus
As soon as the focus value has been determined, you can also view the detailed results. In addition to the duration, the result and the best focus value, you can also see the details of the calculation including the images. This information is displayed in the bar at the bottom of the screen to the left of the buttons for controlling the autofocus. There is also an extended detailed display in the form of an overlay, which you can open using the Show More button.
This chapter contains general information on operating the autofocus.
With autofocus, it should be possible to immediately determine the required values for a sharp image capture within a few seconds. This value is set automatically and used for every subsequent image capture with this image source.
But: If the object or the distance changes, the autofocus must also be reconfigured in order to continue to ensure optimum image capture.
In order for the autofocus to be determined, a configuration of the image source must always be active, both for configuration and for execution and calculations.
Configuration mode
Configuring a region
Bottom App Bar
If you want to focus on a specific image area, you can activate the configuration mode in the bottom app bar of the image source. As soon as this is active, a region is displayed on the last image taken. This can be adjusted in terms of its size and position. In the top left-hand corner above the image, you can view the exact coordinates and dimensions of your region and also edit them.
Image Source / Focus
In the Image Source, you can make all settings in the right-hand bar. In the Focus area, you can view the set focus length. This can be adjusted manually using the manual focus. If you are using autofocus, the focus length is automatically adjusted as soon as the calculation is complete.
Live operation
Starting the autofocus
Bottom App Bar
To start the autofocus calculation, you can use the Start button next to the button for manual image capture. As soon as you have clicked this, a dialog will appear in which you must confirm that you want to start the process.
After you have confirmed the start of the autofocus, the start button changes its appearance and offers you the stop function to end the calculation. It is not possible to carry out transformations on the image during the autofocus calculation. It is also not possible to save images.
Navigation / Navigation Rail
If you like working with an expanded, detailed navigation, you may already be familiar with the Active Process area at the bottom left of the screen. Here you can read out information about the currently active process and control it. As soon as the autofocus has been started, the Process Type changes from Image Source to Autofocus. You can use this display to switch to the configuration or stop the active process at any time.
Stopping the autofocus
In the bottom app bar next to the button for manual image capture is the button for prematurely stopping the autofocus. You will first be asked to confirm your decision to stop the autofocus calculation via a dialog. The calculation is then stopped while the last available value is retained.
However, if the autofocus calculation comes to an end naturally, the autofocus is automatically ended, the determined value is set under Focus length and the stop button disappears or changes back to the start button.
Results of the autofocus
As soon as the focus value has been determined, you can also view the detailed results. In addition to the duration, the result and the best focus value, you can also see the details of the calculation including the images. This information is displayed in the bar at the bottom of the screen to the left of the buttons for controlling the autofocus. There is also an extended detailed display in the form of an overlay, which you can open using the Show More button.