Image Source VIU1
This chapter contains general information on operating the evoVIU camera.
Introduction
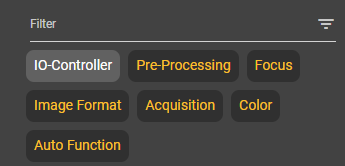
In this chapter, you will learn which setting options you have in the Configuration Bar of the Image Source.
Filter
You can make all possible settings for your image in the configuration bar. You can change these settings at any time, regardless of the activity of your stream. To have a better overview of the setting options, you can show and hide the individual sub-items at any time.
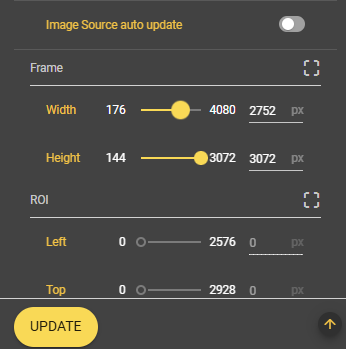
Auto Update
Below the filter area is the setting option for automatically applying changes to the image source. This setting is active by default. If you do not want to save changes in the image source automatically, you can deactivate this setting here. Instead, you will then see a button to apply the new values at the bottom right of the screen as soon as changes are made.
IO-Controller
Under this menu item, you can set your IO controller for the use of external light.
The IO controller is a hardware component that is responsible for input/output control, acts as an interface and enables data transfer between a central processing unit and the peripherals.
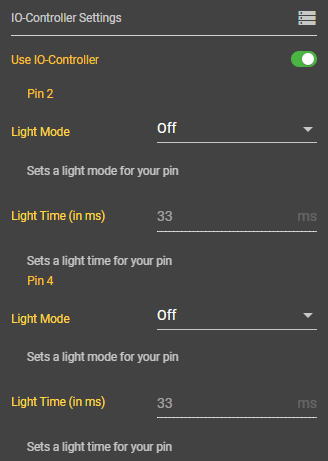
Use IO-Controller
Select here whether the IO controller should be used or not.
Pin 2
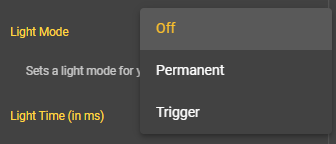
Light Mode
With the pin, you can choose from various lighting modes. You can work without light, with permanent lighting or triggered for a certain period of time.
Light Time (in ms)
If you have selected the light mode trigger, you can configure the light time yourself. Enter a positive value. The value is displayed in the unit ms.
Pin 4
Light Mode
With the pin, you can choose from various lighting modes. You can work without light, with permanent lighting or triggered by a trigger for a certain period of time.
Light Time (in ms)
If you have selected the light mode trigger, you can configure the light time yourself. Enter a positive value. The value is displayed in the unit ms.
Pre-Processing
This menu item can be used to make presettings for image processing.
Capturing Stategy

Select here how you want your image to be captured. You can choose between Simple and Flash.
Simple: The picture is taken depending on the selected recording mode.
Flash: The image is illuminated at the time of recording.
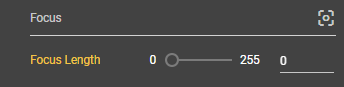
Focus
If you are using a camera with a C-mount lens, there are no attributes for configuring the image source.
Under this item, you can set the focus manually or automatically. If you want to set the focus manually, select a value between 0 and 255. This parameter is only relevant if a liquid lens is installed in your evoVIU. You can then focus on your object here.
Focus Length
Select a value between 0 and 255 here to set the focus and thus focus your image.
The Autofocus section explains in detail how you can automatically determine the best value for a sharp image.
Image Format
Under Image format, you can set the number of pixels and the corresponding resolution of your image. You can set your desired width as well as the width, X offset and Y offset. The choice of image format also has an influence on the performance of the web interface.
The permitted range of values for the width and height of the image depends on your camera. The values shown below may therefore differ from your values. The example is based on the daA4200-30mci camera module in version CEP1.7.0.
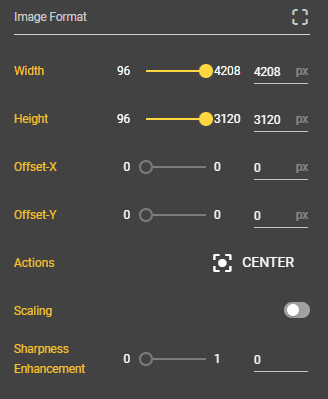
Width
Set the width of your image here.
Height
This is where you set the height of your image.
Offset-X
Here you can move your image on the X-axis to obtain the desired image section.
Offset-Y
Here you can move your image on the Y-axis to obtain the desired image section.
Actions
Click on Center to center all of the above settings.
Pixel Format
Here you can see which pixel format is used to format output pixels. The pixel format determines how the individual pixels are structured and how the image data is displayed.
Scaling
You can use the scaling parameter to scale images from the sensor size to your image ROI.
Sharpness Enhancement
If you have edited your image with the scaling parameter, you can increase the sharpness with the sharpness enhancement. To do this, you can select a value between 0 and 1. The higher the value, the sharper the image.
LED Area
You can control the light of your evoVIU under the LED Area menu item. Depending on which light module you have installed, the display may look different. The boxes shown correspond to the individual LEDs.
Type | Illustration |
|---|---|
Loxi 1 | 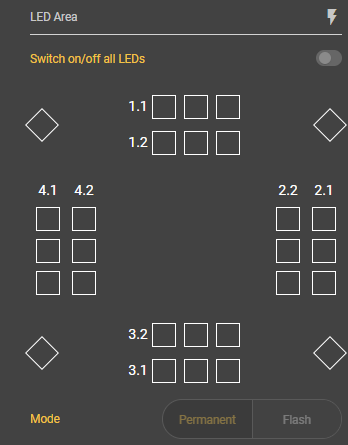 |
Loxi 2 | 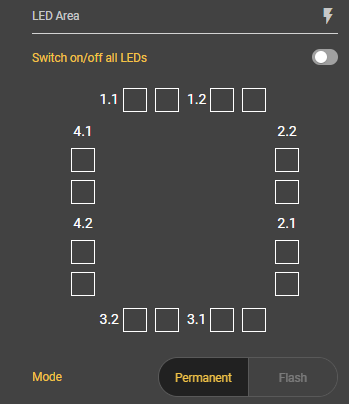 |
Loxi 3 |  |
If you select this setting and confirm the dialog, all LEDs are switched on simultaneously. The intensity is then also the same for all LEDs.
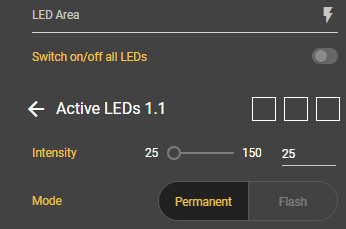
If you want to select the LEDs individually, you can simply click on one of the boxes and the respective segment will open. You can now select which LED you want to switch on in the top right-hand corner. After clicking, they will turn yellow.
Intensity
Set the intensity of the lights here. The higher the value, the brighter the LEDs light up.
Mode
Select whether the LEDs should light up permanently or flash.
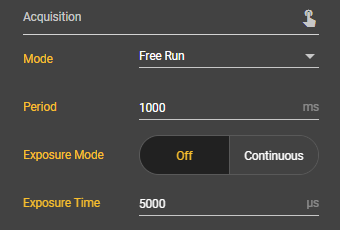
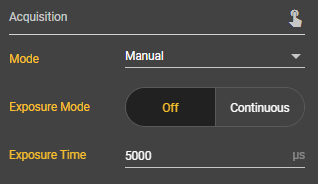
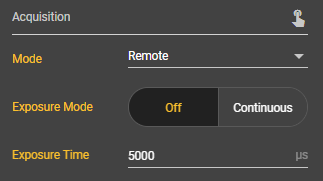
Acquisition
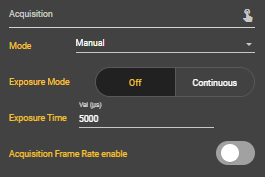
Mode
In the image recording settings, you can choose between four different recording modes: Manual, Free Run, Hardware and Remote. In addition, settings can be made for the exposure mode, exposure time and frame rate. Depending on the mode, there are further setting options.
Free Run
Your pictures are taken continuously in Free Run mode. Here you have the same setting options as in Manual mode, i.e. the Exposure Mode and Exposure Time, and also the Period, i.e. the time interval between image captures.
Hardware
In hardware mode, a hardware trigger triggers the recording via the pin of your docker connection on the smart camera. In addition to the settings already known from manual mode, there are three more settings with Delay, Bouncing Time and Edge.

Manual
Manual mode is set by default. In this mode, you can take a picture manually using the yellow button in the Image Source Control Bar.
Remote
With the remote mode, you can also take the pictures manually, but not via the web interface, but via the http-Rest interface. The setting options are the same as for manual mode.
Attribute | Free Run | Hardware | Manual | Remote |
|---|---|---|---|---|
Bouncing Time |
|
|
|
|
Delay |
|
|
|
|
Edge |
|
|
|
|
Exposure Mode |
|
|
|
|
Exposure Time |
|
|
|
|
Period |
|
|
|
|
Attribute
Bouncing Time
You can select a value between 0 and 1000 for the bouncing time. This is the time that is waited after a trigger until a trigger is responded to again. This prevents several recordings being made in between due to incorrect triggers.
Delay
You can set a value between 0 and 5000 milliseconds for Delay. Depending on the input value, image recording is delayed after the trigger.
Edge
Here you can set whether the image should be recorded as soon as the trigger is triggered (rising) or as soon as the trigger is no longer perceived (falling).
Exposure Mode
You can select either continuous or Off for the exposure mode. If you set the exposure mode to continuous, the camera permanently adjusts the exposure to the external conditions. If you set it to Off, you can set the exposure time manually.
Exposure Time
If the exposure mode is set to Off, you can select an exposure time between 68 and 2300000 microseconds. This determines how long the camera lets light onto the sensor while taking the picture. The longer the exposure time, the more light and the brighter the image will be at the end. If you see a black image in the first shot, this is often because the exposure time is set too low.
Period
You can select how many images per second should be recorded. Select a value between 1000 and 30000 ms. A high frame rate can have a negative impact on the performance of the camera.
Color
Under the Color sub-item, you can make various settings for the color settings of your image.
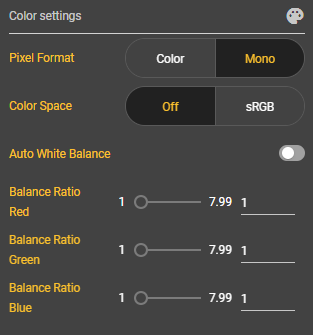
Pixel Format
Here you can select Color or Mono as the pixel format. The pixel format determines how the individual pixels are structured and how the image data is displayed.
Color Space
Here you can decide whether you want an sRGB color space or not. sRGB stands for standard RGB and is the typical color space for graphics on the web. It makes sense to select the sRGB colour space if the image brightness is to be optimized for display on a monitor.
Auto White Balance
You can use this slider to specify whether the value should be set automatically or manually. If you set this slider to Off, further attributes for configuring the balance ratio are displayed. These define the balance ratio for the red, green and blue color channels and can assume values between 1 and 7.99.
You can use this setting to manually perform a color shift for the white balance. White objects should appear white.
Auto Function
Under the Auto Function sub-item, you can make various settings that are taken into account by the image sensor when the picture is taken.
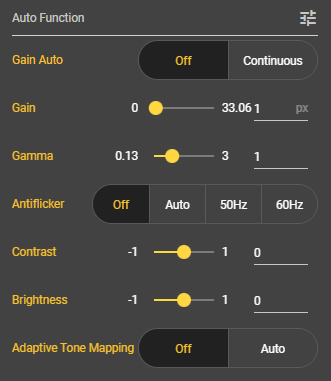
Gain Auto
The gain can be automatically adjusted here to achieve a certain brightness. The gain function amplifies the sensor signal and can therefore brighten your image. If you want to set the gain manually, select Off. The Gain parameter appears. If you set Gain Auto to continuous, the gain value adapts to the external conditions.
Gain
Enter a value between 0 and 33.06 to make your image brighter. All pixel values on the image are increased when the gain is increased.
Value | Illustration |
|---|---|
Gain-Value 0 |  |
Gain-Value 7 | 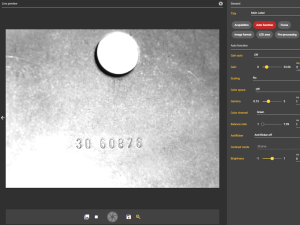 |
Gamma
You can use this parameter to adjust the gamma value. The values can range from 0.13 to 3. This allows you to optimize the image brightness for display on a monitor.
Value | Illustration |
|---|---|
Gamma-Value 2 | 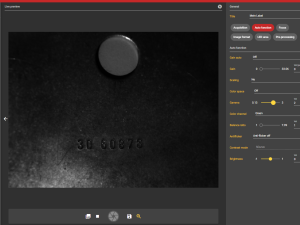 |
Gamma-Value 0,45 | 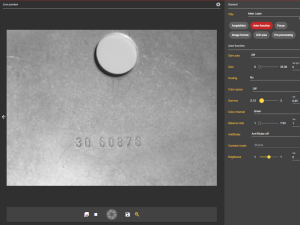 |
Antiflicker
You can use the anti-flicker setting to prevent streaking that could occur due to the lighting. The different setting options determine the frequency.
Contrast
You can set the contrast of your image here. If you select a negative value, the image will be darker. If you select a positive value, it will be brighter.
Brightness
You can set the brightness here. If you select a negative value, the picture becomes darker. If you select a positive value, it becomes brighter.
Adaptive Tone Mapping
Here you can switch the adaptive tone mapping of the image sensor on or off. The aim of tone mapping is to reduce the contrast range of images so that they can be displayed on conventional output devices.