UDP
The evoVIU camera supports UDP exclusively in client mode. Depending on the configuration in the workflow, the camera sends data such as status information, metadata, or events to a predefined IP address and port—quickly and without establishing a connection beforehand. UDP is connectionless and therefore particularly suitable for time-critical applications where speed is important. However, since there is no confirmation or error correction, packet loss may occur. The UDP client is configured via the camera's web interface, where the destination address and port are specified.
Since there is no connection status for UDP, no component needs to be created in the workflow for this protocol. The transmission takes place directly via the node.
So far, there's only one UDP client node for evoVIU. You can't make a UDP server.
Connection parameters
Parameter | Type | Explanation | Example |
|---|---|---|---|
Address | Domain || IP | The destination address of the existing UDP server. | myudpserver.mydomain.de |
Port | Integer | The port address of the server. This is usually specified by IT or the department. Please note that certain ports must be approved by IT when integrating the camera. | 7778 |
Workflow Setup
Creating a UDP telegram – step by step
Go to your event graph and right-click in the field to open the context menu.
Search for the “UDP Send” node and click on it. The node should now appear in the workflow.
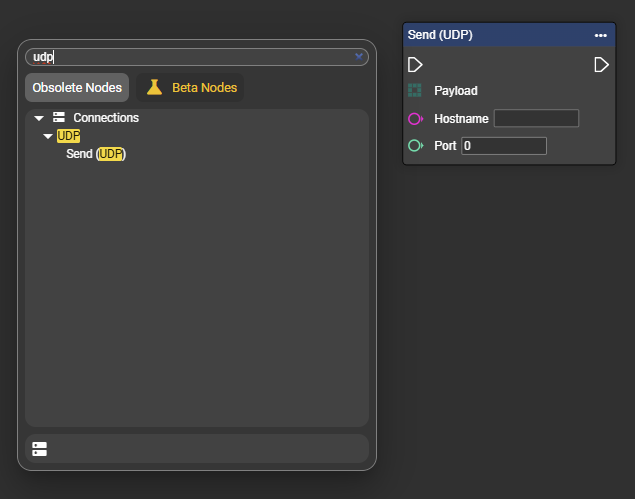
Now fill in the individual parameters for the connection.
Attach the desired data set to the payload.
The node is now ready to send data to the UDP server during runtime.
Using the Node “UDP Send”
Sending a data record without start/stop characters
The format of the data telegram to be sent is entirely up to you. It is important that the data format can be converted into a byte array in accordance with the connection. Images can also be sent via UDP.
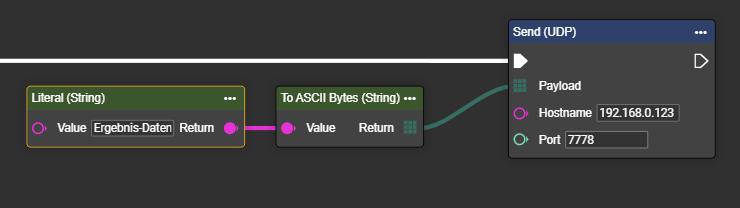
Example 1 shows the simplest way to send a data telegram without start/stop characters. The literal shown here is not necessary and is only used in this example to illustrate the data telegram to be sent.
Sending a data record with start/stop characters
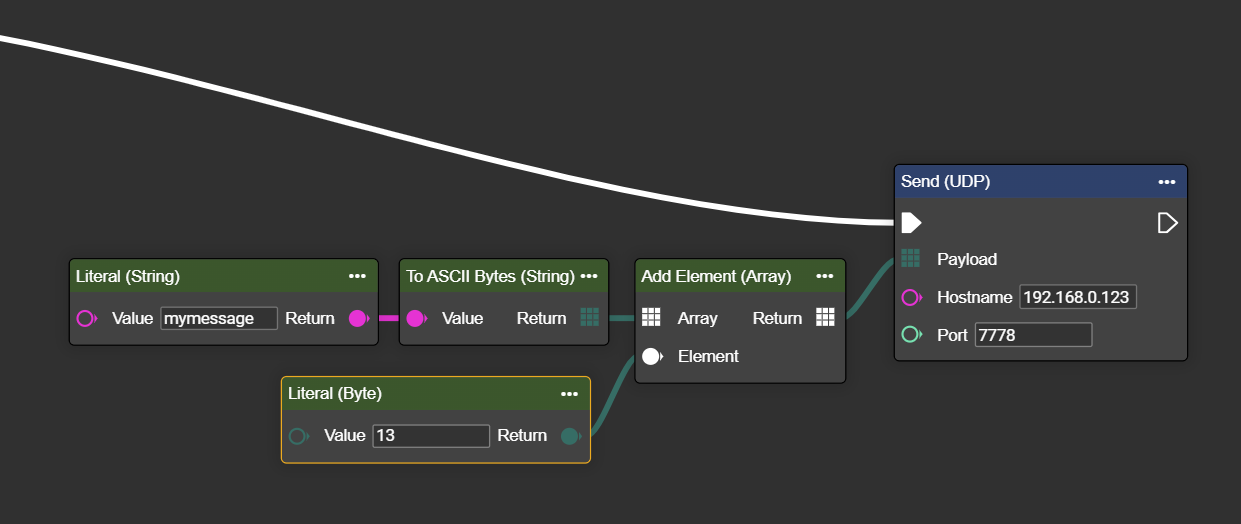
Example 2 shows the message structure with a stop character. In this example, CR was used, which is entered in decimal from any ASCII table. Any control character can be added and the structure can be extended as desired.
Unlike the TCP Send node, the UDP node does not have the start and stop characters permanently integrated – therefore, the array must be assembled manually.
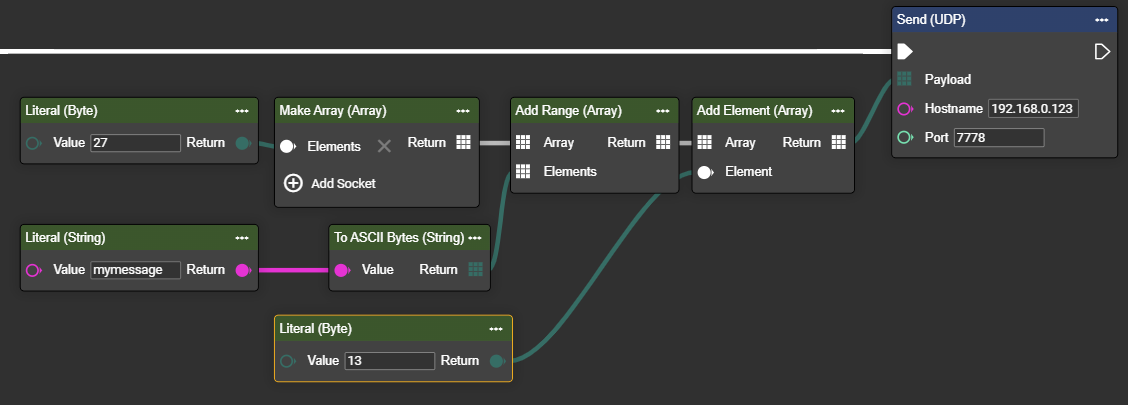
Example 3 shows the message structure with start and stop characters. In this example, ESC was used as the start character and CR as the stop character, which are entered in decimal from any ASCII table. If only a start character is required, the last “Literal” and “Add Element” can simply be omitted.
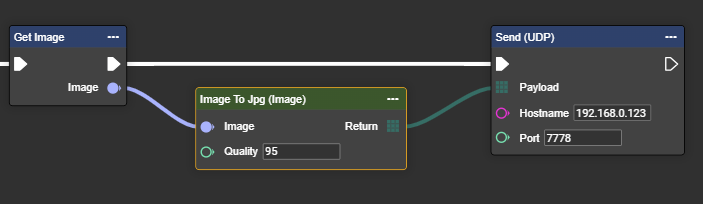
Sending an image via UDP
If you are actually considering sending an image via UDP, this would also be relatively simple. However, keep in mind that the other side must know what is being transmitted.