HTTP
The evoVIU camera supports the HTTP protocol both for communication with external services and for providing its own interfaces. Two central functions are used for this: HTTP events and HTTP client functions (GET, POST, PUT).
The camera provides its own HTTP APIs via the HTTP event function. This allows external systems to interact with the camera in a targeted manner – for example, to trigger an image capture or retrieve status information. The camera acts as an HTTP server and responds to defined HTTP requests via specific paths (e.g., /trigger, /status).
In addition, the evoVIU camera can act as an HTTP client and send HTTP requests such as POST, GET, or PUT to external APIs. This allows images, results, or metadata to be automatically transmitted to third-party systems or configurations to be queried, for example.
Configuration is carried out via the web interface, where the URL, header, and payload can be customized individually. HTTP offers a flexible and standardized way to integrate the camera into modern IT and automation environments – locally or cloud-based.
Connection Parameter
Parameter | Type | Unit | Explanation | Example | PUT | GET | PUT | Event |
|---|---|---|---|---|---|---|---|---|
Address | Domain || IP - String | The broker's destination address. This is usually provided by IT. | myapi.api.de/api/v1/start |
|
|
| ||
Headers | Header Item | The header item contains all possible additional header information required for the connection in HTTP. It is not absolutely necessary to integrate a header. Please note that certain parameters are specified by IT. Please inquire about this in advance.. | Authorization |
|
|
| ||
JSON | String | Data record that is ultimately transferred when needed. |
CODE
|
|
| |||
Timeout | Integer | [ms] | Timeout describes the maximum time that the application may take to connect or transfer the request to the endpoint. | 5000 |
|
|
| |
Event Id | String | The domain suffix that may be used as the API for the camera. This connection parameter is only necessary for an HTTP event. | Id: start https://<CameraIP>/api/v1/workflowNext/events/http/fire/start |
|
Workflow Setup
Difference between the HTTP Event component and HTTP GET/PUT/POST
In evoVIU, the HTTP Event component is used to receive incoming HTTP requests from external systems. It acts as an entry point when, for example, a webhook or an external service wants to send data to the camera. In contrast, the HTTP GET, PUT, and POST nodes are used to send requests to external systems from within a workflow. These components enable you to retrieve information from APIs (GET), update it (PUT), or create and send new data (POST). The main difference is therefore the direction of communication – incoming vs. outgoing.
Creating an HTTP event
If you want to build your own small API in the workflow or control the camera via HTTP, we recommend creating this using HTTP events, which can be created as often as required as components with different IDs. External systems can then access the camera. Master-slave relationships can also be established via evoVIUs.
In Workflows, go to Components and select ➕.
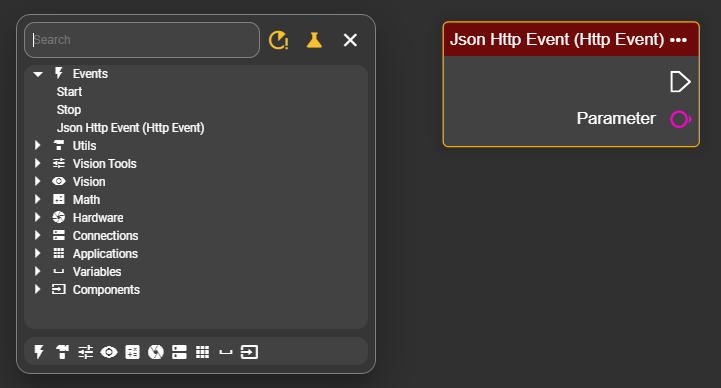
Search for the “HTTP Event” component.

A new component called “HTTP Event” appears.
Enter an event ID name in the component settings.
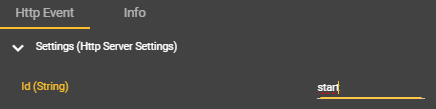
Example: start → https://<CameraIP>/api/v1/workflowNext/events/http/fire/start
Right-click to open the context menu and locate the event node “JSON HTTP Event.”
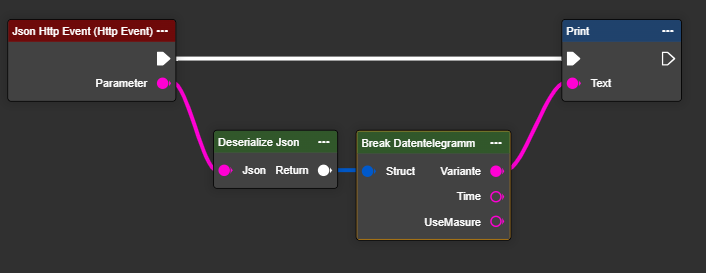
Connect a “Deserialize JSON” node to the output parameter of the “Json Http Event” node.
Under Structs, create a data telegram that is identical to the received data.

Use “Break Data Telegram” to break down the results that are sent in detail into their constituent parts.
Controlling an HTTP event via an external service
Without authentication enabled
If the camera is not encrypted, authorization is not necessary. However, it is still recommended to store this in the ITEM header.
HTTP | POST |
Address | https://<CameraIP>/api/v1/workflowNext/events/http/fire/start |
JSON |
CODE
|
Header Item | Authorization |
With authentication enabled
HTTP | POST |
Address | https://<CameraIP>/api/v1/workflowNext/events/http/fire/start |
JSON |
CODE
|
Header Item | Authorization |
The system can now successfully receive data for further processing.
Creating an HTTP PUT/POST node
External APIs can be accessed very easily via the HTTP nodes. No component is required for this.
Right-click to open the context menu in the Event Graph.
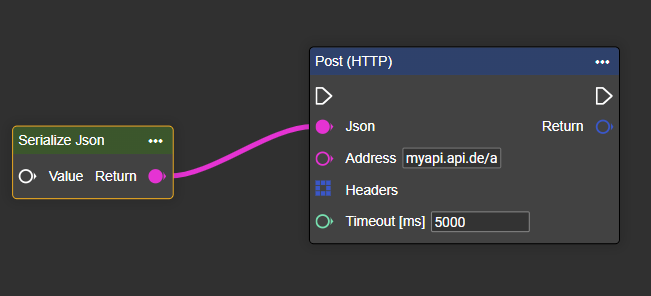
Find the appropriate node depending on the function. For example, Post to generate a new data record on an API.
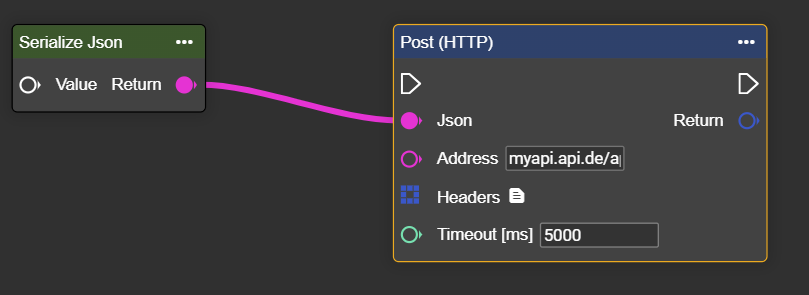
Enter all the necessary connection parameters.
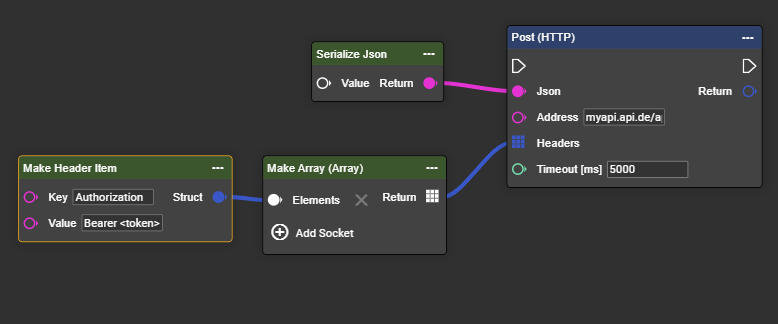
Add a header to authorize your message.
Header via Array-Construct
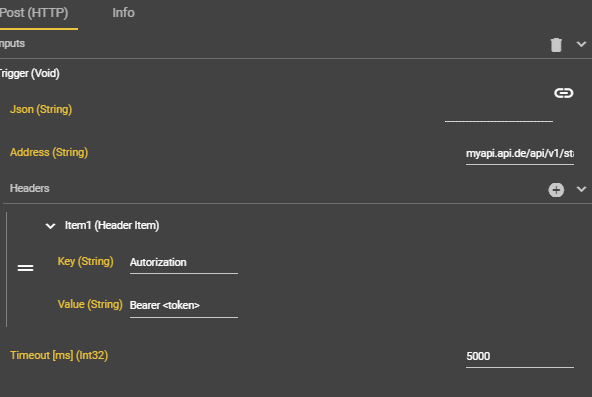
Header via input settings in post (HTTP) node
If you want to check whether your POST command was successful, or if you need the response data for further processing, add a “Break Http Response” node under the context menu.
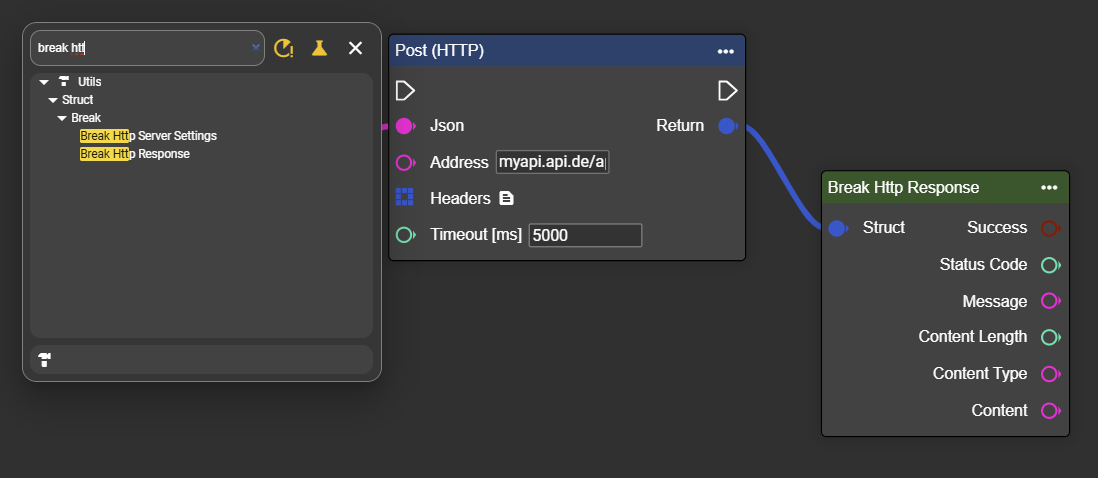
No JSON is required for the GET node. However, the response of the GET can be read via the content of the Break HTTP Response node.
When creating the program, we recommend that you first output the data—as long as it is not images, but only JSON—via the output using the print node.
Output Parameter | Data type | Explanation | Example |
|---|---|---|---|
Success | Bool | Is “True” if the request to the API was successful, otherwise “False”. |
|
Status Code | Integer | Returns the code, e.g. 204, as a response to the request. |
|
Message | String | Returns either Successfully or the corresponding error message for the request. |
|
Content Length | Integer | Returns the size of the response in bytes. |
|
Content Type | String | Reflects the type of content, e.g., application/json for APIs. This information can be useful for further processing. |
|
Content | String | Returns the actual content that the request transmits if necessary—usually only for GET nodes. | { |
The system can now send data to the API and process its response.