Camera control
Using VISIONWEB, the camera modules can be configured, configured, and actively controlled in a variety of ways – both internally and remotely – even during operation. Depending on the application, you can switch between different image sources or adjust settings via different communication paths.
Image capture occurs in the workflow via the "Grab Image (Camera)" node. This node can be easily searched for and selected via the context menu. Each Grab Image node used captures an image during the flow.
The execution time depends on the selected image resolution and the type of sensor used. Additionally, parameters such as the exposure time also influence the duration of the image capture.
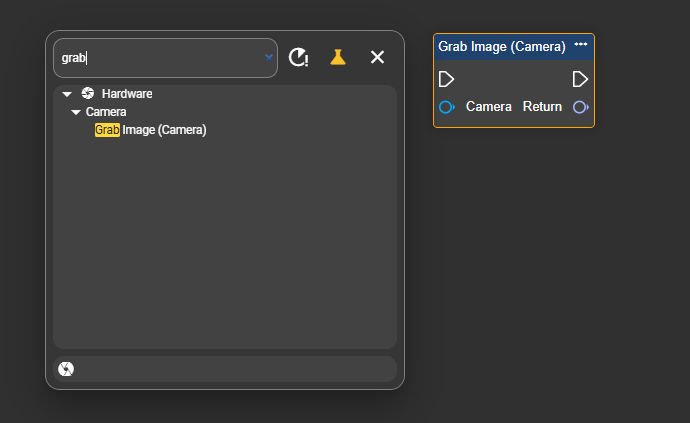
The "Grab Image" node allows you to select a camera component in the running flow and returns the captured image. The different camera components are explained in more detail below.
One internal and any number of external camera modules can be defined per workflow. In addition to the camera modules, image sources are also available that access a NAS or cloud server and provide stored image sequences one after the other for processing in the workflow.
Camera components
Camera module
The "Camera" component is the simplest of all camera components. It obtains its data via VISIONWEB either directly from the camera installed in the evoVIU or from a source configured under the ImageSource category.
ChapterImage Source already explained how to set up an image source on an object. This previously configured source can now be selected in the Camera component.
While the Camera Component only includes basic camera settings such as gain and exposure, the ImageSource Component allows complete control of the lighting.
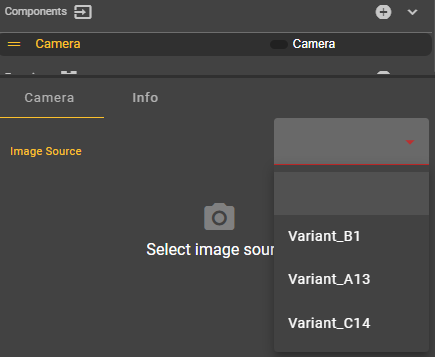
Click the "+" sign in the component area and search for Camera in the context menu. Then select the entry to create a new Camera Component.

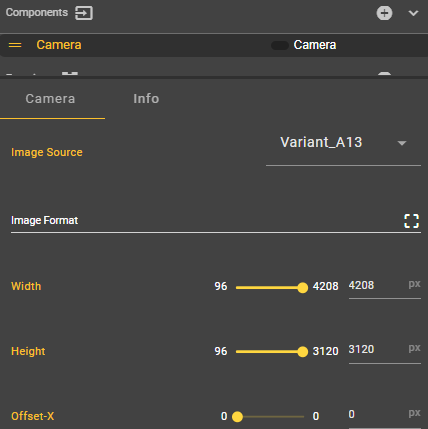
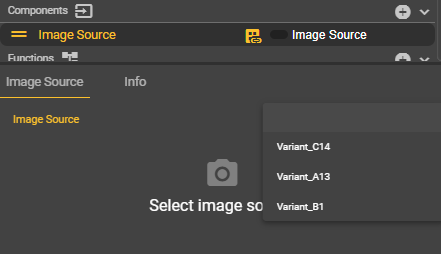
In the Camera Component you can select the previously configured image source.
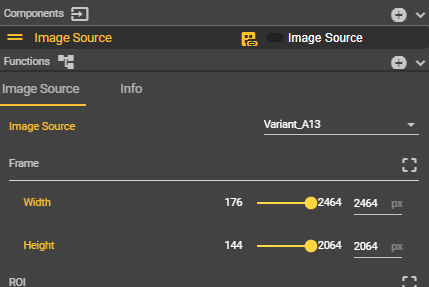
From here, you can adjust the image source settings directly in the workflow. The changes you make will then be applied system-wide.
Currently, it is not possible to change workflow image source settings while the workflow is running. This is possible in the image source itself.
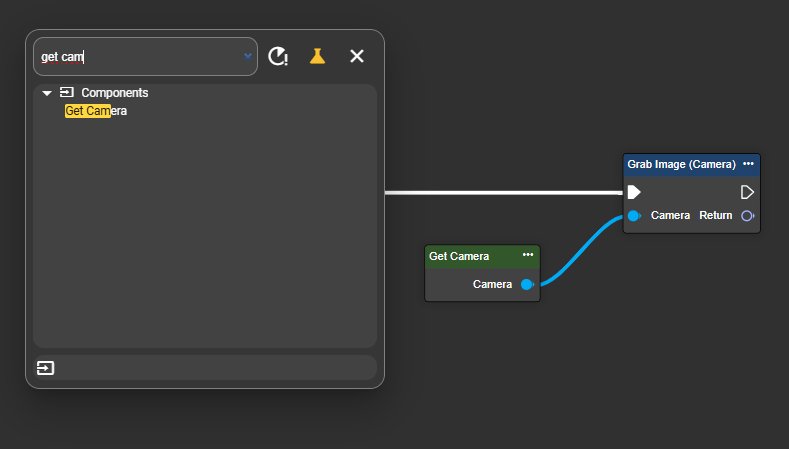
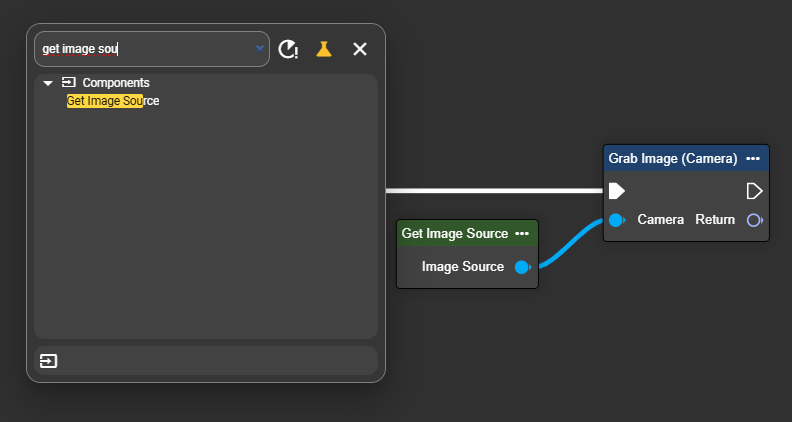
In the context menu, look for "Get Camera" or the name of the image source you configured in the component. Then connect the output to the "Grab Image" node.
Create a variable of type Image with the example name Image1 and set the Publish setting to true in the component.

A single image is captured at startup. However, you can replace the startup event with any event node of your choice. For more information, see: Event-Trigger
Congratulations – you have successfully stored an image in a variable in the workflow. You can now reuse this variable in subsequent processing nodes, e.g., with theLibrary VisionTools
You haven't yet configured any lighting and optics settings with the camera itself. You may need to configure these separately – more information can be found at Light control and https://evopro.atlassian.net/wiki/spaces/DVIU/pages/123931559. If you use cameras with evopro Loxi light modules, you can control the lighting directly via the image source.
Image Source
The "Image Source" component represents the more complex version of the camera components. In addition to the image data it receives via VISIONWEB from the camera installed in the evoVIU or a previously configured source, it also enables the control of light with and without flash, and optics.
Chapter Image Source already explained how to set up an image source for an object. This previously configured image source can now be selected in the Image Source component.
In the component area, click on “+” to open the context menu and select Image Source to create the new component.
In the Image Source Component you can select the previously configured image source.
From here, you can adjust the image source settings directly in the workflow. The changes you make will then be applied system-wide.
Currently, it is not possible to change workflow image source settings while the workflow is running. This is possible in the image source itself.
In the context menu, look for "Get Image Source" or the name of the image source you configured in the component. Then connect the output to the "Grab Image" node.
Create a variable of type Image with the example name Image1 and set the Publish setting to true in the component.

A single image is captured upon startup. However, you can replace the startup event with any event node of your choice. For more information, see: Event-Trigger
Congratulations! You have successfully stored an image in a variable in your workflow. You can now reuse this variable via subsequent processing nodes, for example, with the following: Library VisionTools
Remote Camera
The "Remote Camera" component allows you to retrieve images from another evoVIU and integrate them directly into your workflow. It controls the image source of the second evoVIU by starting and stopping it. Setup requires only the settings of the respective evoVIU via its UUID.
Configure an image source on the second evoVIU camera (example IP: 192.168.0.123) according to your requirements.
To do this, go to the corresponding camera under Image Source and configure the required options to obtain an optimal image. For more information, see https://evopro.atlassian.net/wiki/spaces/DVIU/pages/123930748.
Then get the UUID of the image source from the address bar.

Now go to the camera (example IP: 192.168.0.124) with the desired workflow and click "+" in the component area to open the context menu. Then select the Remote Camera entry to create the component.

In the Remote Camera component, you can select the previously configured image source of a camera with the IP address 192.168.0.123. To do so, enter the UUID from the address bar in the Image Source ID field.
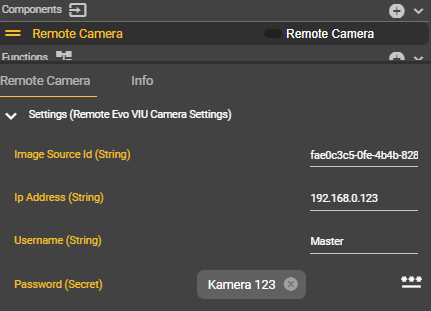
Equally important is the username and password. While the initial data can be used for this, we recommend creating a separate user account for remote use on the camera from which the images are retrieved. User Management
In the context menu, look for "Get Remote Camera" or the name of the image source you configured in the component. Then connect the output to the "Grab Image" node.

Create a variable of type Image with the example name Image1 and set the Publish setting to true in the component.

At startup, a single image is captured on the external camera. However, you can replace the startup event with any event node of your choice. For more information, see: Event-Trigger
Congratulations! You have successfully stored an image from an external evoVIU camera in a variable in your workflow. You can now reuse this variable via subsequent processing nodes, for example, with the following: Library VisionTools