Share Workflow
The Share Workflow function allows workflows to be sent to other compatible devices on the same network within seconds. This significantly speeds up camera setup. The following article explains step-by-step what to consider when using this function.
Start configuring the Share Workflow function
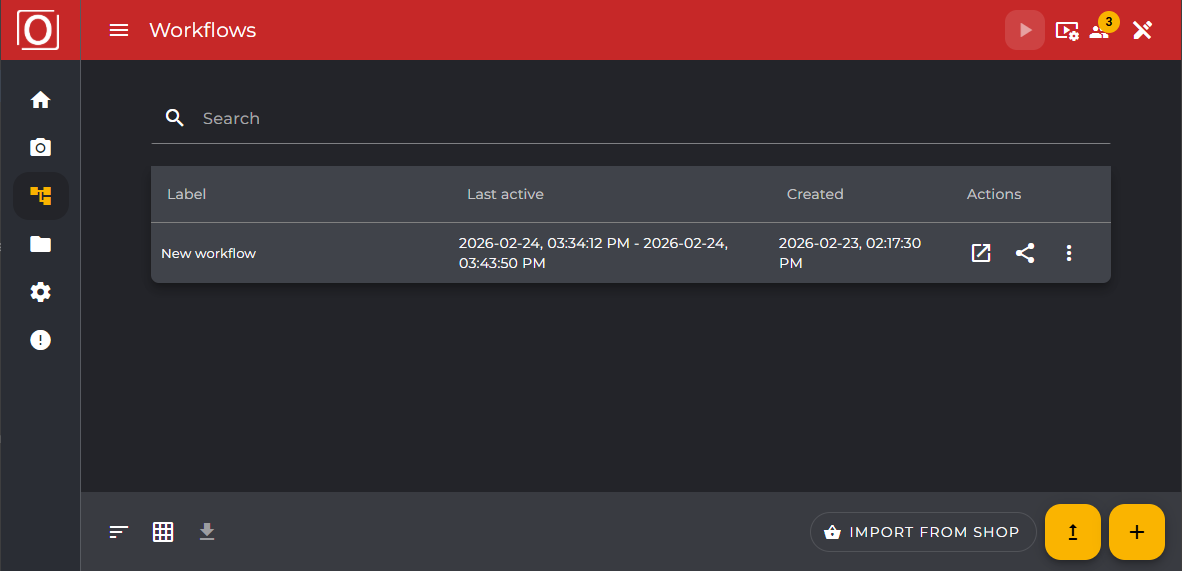
Once you have created a workflow, it will be displayed on the workflow overview page. The "Share Workflow" button, represented by the share icon, will now appear in the "Actions" column of the table. Clicking this button will redirect you to the next page.
Durchführung des Netzwerkscans
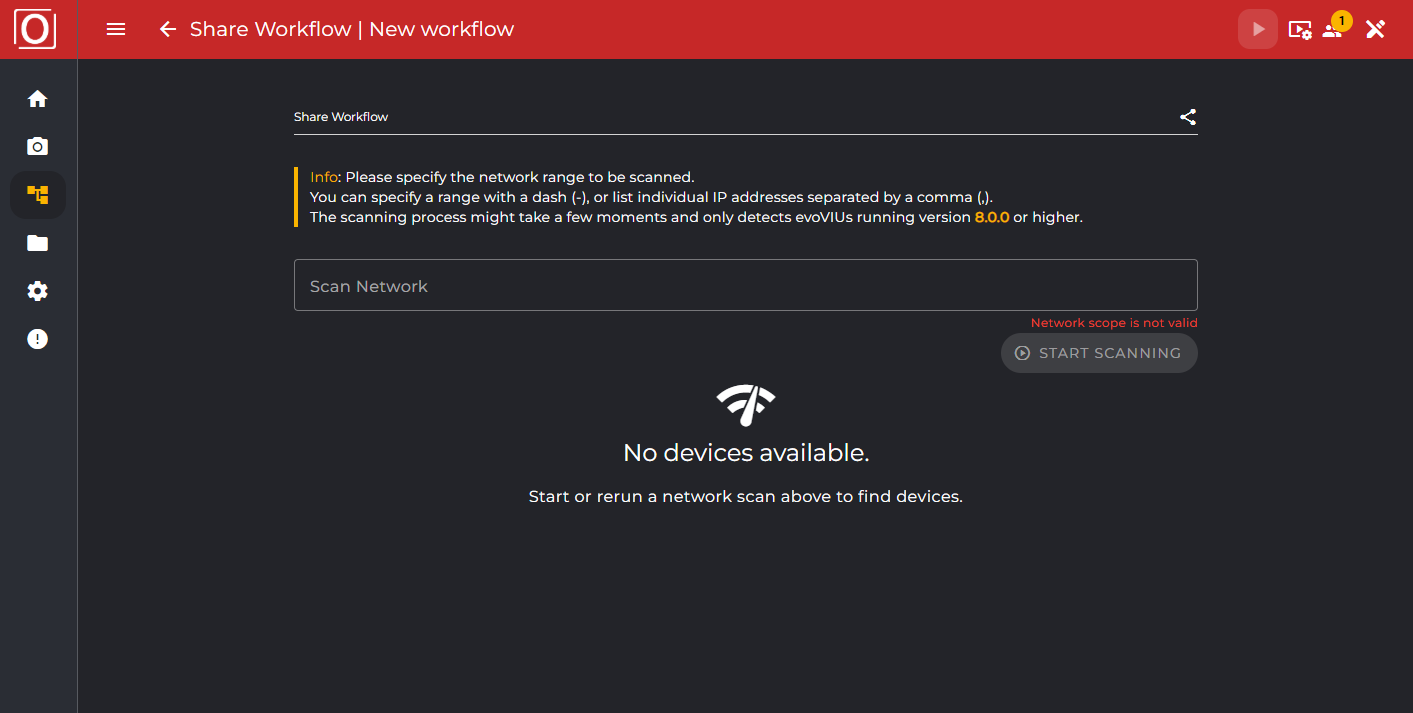
From this step onwards, next to the title “Share Workflow” and the name of the selected workflow, there is a back button in the top app bar, which allows navigation back to the overview page.
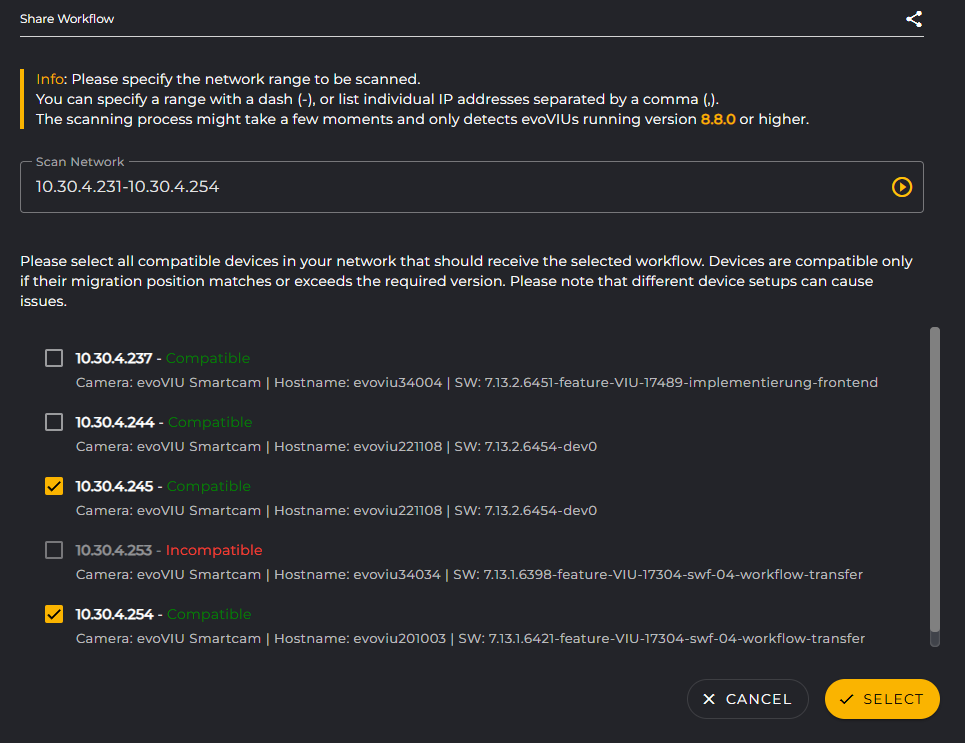
The next step involves searching for suitable devices within a network range. To do this, either enter a network range in the input field (which you can define using a hyphen) or a specific IP address, and then click the scan button to start the process.
Select target devices
Once the network scan is complete and devices have been identified, they will be listed below the input field. In addition to the IP address, information such as the compatibility status, camera name, hostname, and the software version installed on the device will also be displayed. Any number of devices can be selected via a checkbox and included in the workflow, provided the device is compatible. The process can continue once at least one device is selected.
To avoid misconfigurations, incompatible devices cannot be selected. They are still displayed so you can see which additional target devices are available.
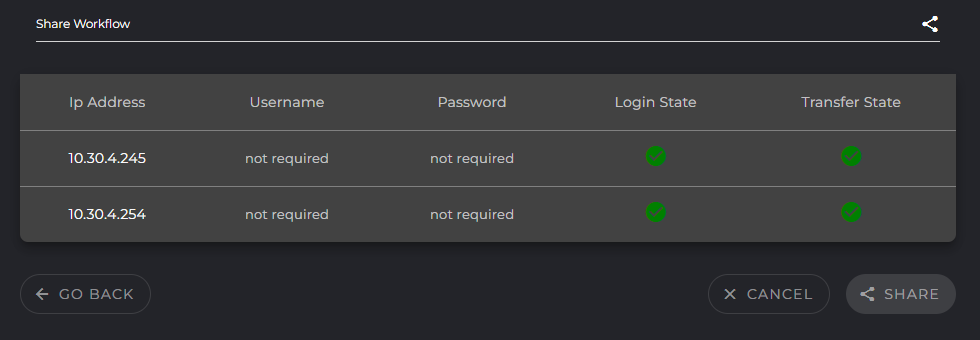
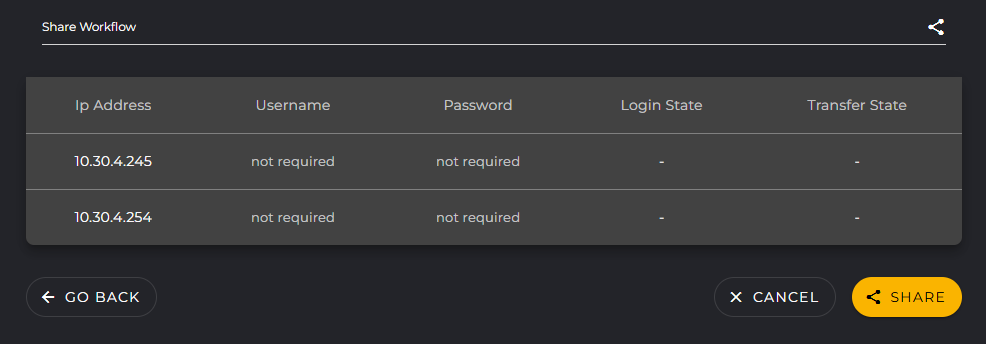
Authentication on target devices
The target devices you selected are now listed in a table. Authentication typically requires a username and password. However, this may vary from device to device. You can enter your authentication credentials directly in the table.
If no data is required for authentication, this will be indicated to you via the non-editable table entry “not required”.
The distribution process can only begin once all authentication data has been entered.
State of the process
Once all settings have been configured, the distribution process can be started via the "Share" button below the table. The workflow will then be sent sequentially to the selected target devices. The "Login State" and "Transfer State" columns in the table will now display the status of the distribution process.
The login state indicates whether authentication on the target device was successful. It also tells you whether a login attempt was even made. The transfer state provides the same information, showing the status of the workflow import on the target device. Icons indicate the respective states.