Variables
Introduction
Variables are a very useful and powerful tool in the workflow. Variables allow you to temporarily store values and use them for further processing steps. This makes it possible to output values after processing steps and to set different values at runtime depending on selected parameters.
Variable management
To use and manage variables, you must first ensure that you are logged in as an active editor and then check that the workflow is not active.
Adding variables
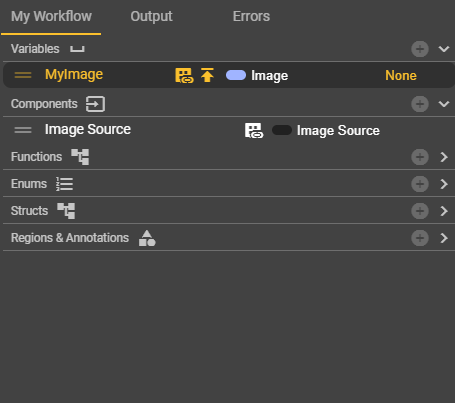
You can create variables in the “My Workflow” section. These variables can be integrated into the workflow via Get and Set nodes.
Removing variables
When you hover over an entry with the mouse, a “trash can” icon appears on the right-hand side. Clicking on this icon opens a dialog box in which you must confirm the deletion process.
Sorting variables
In the list of variables, you will find an icon with two horizontal lines on the left side of each entry. If you click on it and hold down the button, you can move entries within the variable range. This gives you a better overview.
Display information for variables
In addition to the variable label, you may have noticed some icons. These are intended to show you additional information about your variable without having to look in the corresponding Details tab. The following information is displayed there:
Icon | Meaning | Cause |
|---|---|---|
 | Usage | There is a node in the event graph that is based on the variable. |
 | Publish Value | The value of the variable has been published and can be viewed at runtime. |
 | Use as variant parameter | The variable is used as part of the variants and can take on different values depending on the variant. |
Configuration options
You can name variables as you wish by clicking on them or double-clicking on the variable name. However, you must ensure that each variable has a unique name.
Typing of variables
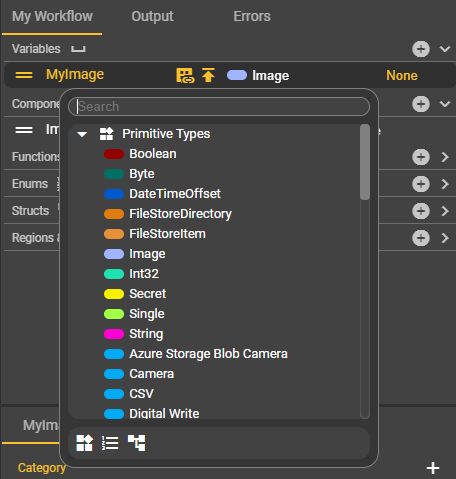
You can store any relevant data type that is required for your workflow as a variable. This includes primitive data types such as strings, enums, booleans, or integers, as well as created enums or structs. Select the appropriate data type from your list and specify whether it is an array or not.
Creating categories
In the Details tab of the node, which is always named after the variable, you can assign the variable to a category. Ultimately, creating categories gives you another sorting option. You can create folders and sort any number of variables into them. These folders can be expanded and collapsed, providing a better overview.
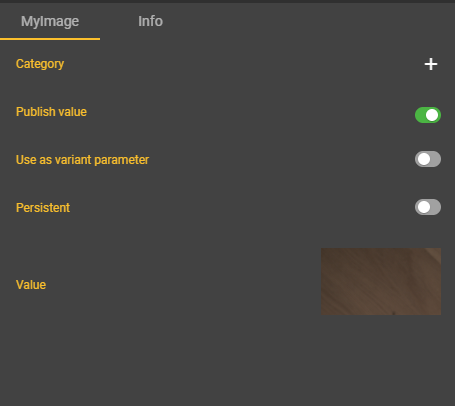
Publishing values
In the Details tab belonging to the node, you can enable or disable the “Publish Value” field. If you enable this, the values of the “Values” are displayed and passed on. For example, you can also select and display the value of the variable of type Image in the Image tab.
Use as variant parameters
Thanks to variant parameters, you can use a workflow for multiple use cases that differ only slightly, e.g., in the form of tolerances. If you activate this parameter, you can create different variants in the Variants area of the workflow and fill the parameter with different values. When starting the workflow, you must then select a variant. The values you have set are then used here.
Persistence of the variable
If you want to retain the value of a variable permanently, the Persistent setting option is very helpful. If you want to count how often the image was captured in your workflow, or how many errors occurred during your examination, you can use a persistent variable to map this use case. Values remain in your variable even if the camera is turned off for a long time or another workflow was active.
All you need to do to use persistent variables is switch to the Variants page in the workflow and assign an initial value to your variable there. You can also specify whether this value should be valid for the workflow in general or depending on the variant.
Example
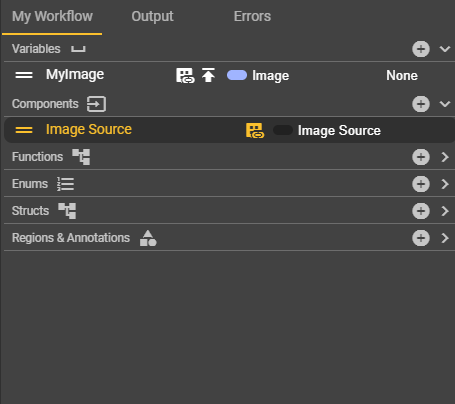
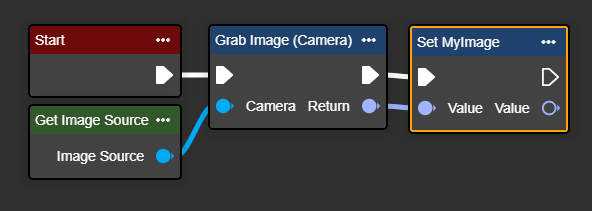
Let's assume we want to capture an image in the workflow and view it after capture. To do this, we need a few nodes in advance. The “Start” event node starts the workflow, and the “Grab Image” node takes care of image capture. To capture the image, we also need an Image Source Component, in whose settings an existing image source must be selected. The Image Source Component now also has a “Get” node, which we need to fully configure the “Grab Image” node. The image capture would thus be complete, but it would still not be possible to display the captured image.
To do this, you need to create a variable. You can choose any name you like, but it is crucial for naming the associated node. The type is initially set to “Boolean” after creation, but in our case it must be changed to “Image.” To do this, simply click on “Boolean.” A menu will open and list all available data types. Search for the type “Image” and select it. The first step is now complete.
Now click on your variable. Your selection will change the content of the Details tab. This is usually located in the lower right half of the Workflow Logic view. However, this tab is not named “Details,” but rather the name of your variant. There you will find the “Publish Value” setting. Activate this setting. This is necessary because it enables the content to be passed on and thus also displayed.
Now we can add the variable as a node in the workflow. Open the context menu in the Event Graph tab by right-clicking and enter the name of your variable in the search field. Now select the entry with the prefix “Set.” The execution line of the “Grab Image” node must be connected to the “Set” node of the variable. Likewise, the inputs and outputs of the Image type must be connected to each other. Once this is ensured, the workflow can be started using the yellow Start button in the red bar at the top of the screen.
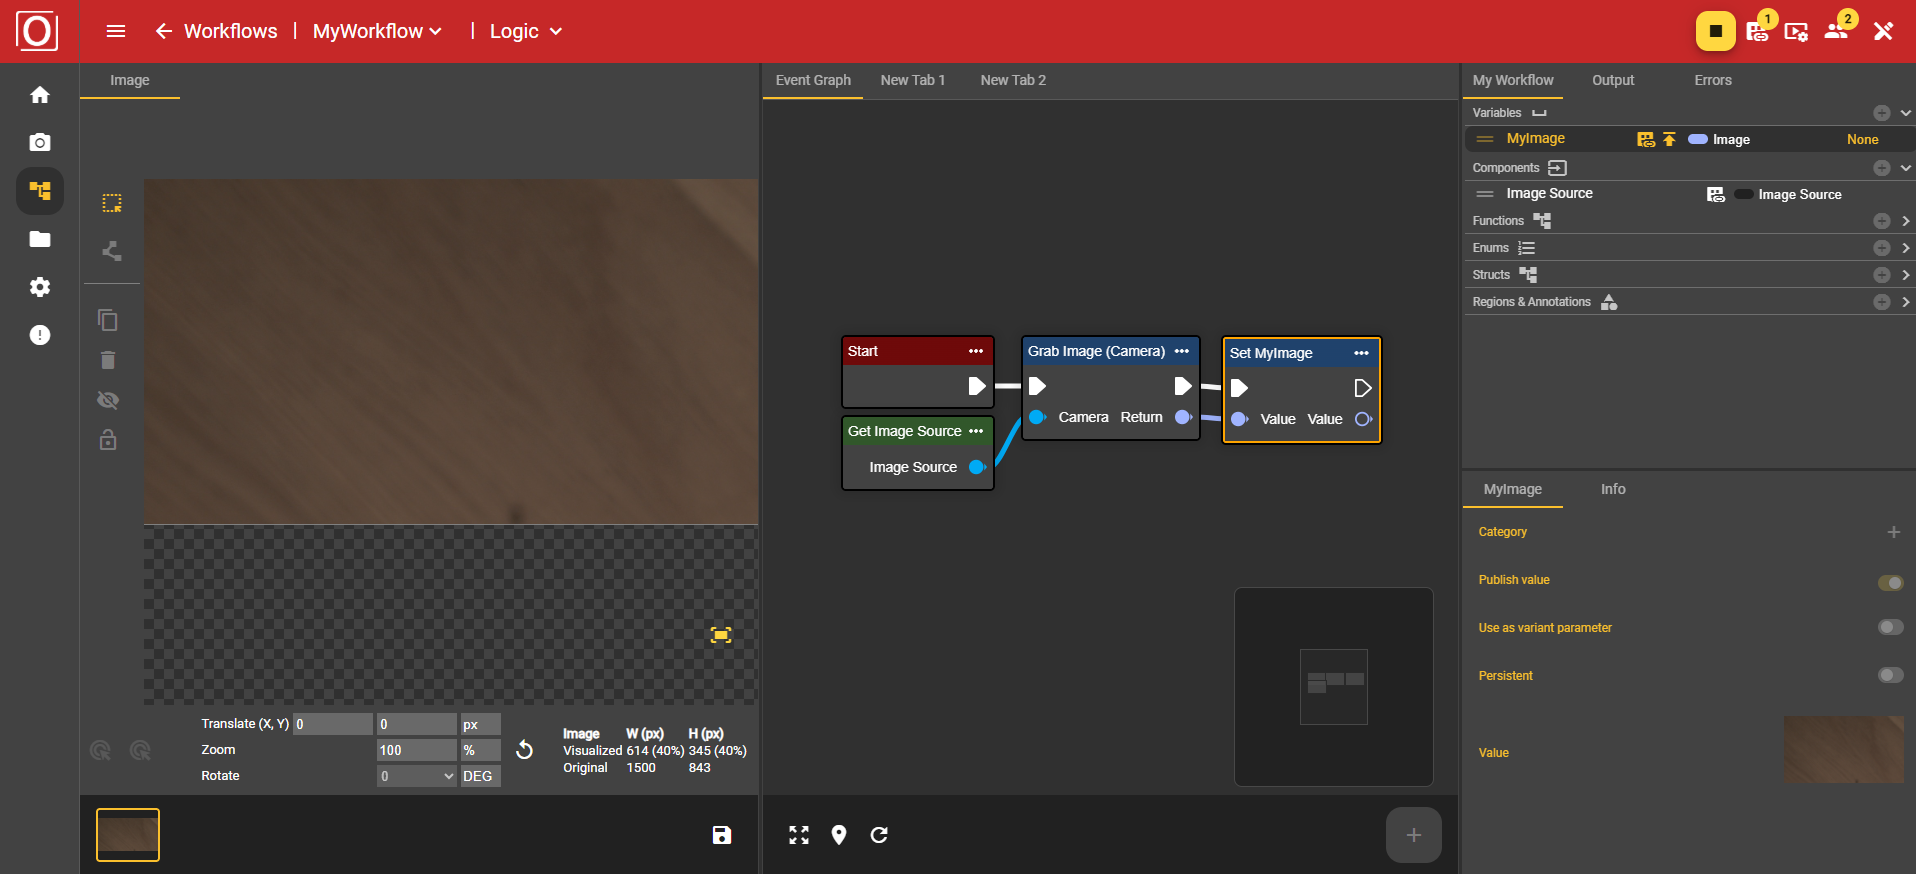
Once the workflow is active, you can click on your variable again. You can now view the actual value of your image variable in both the Details tab and the Image tab.
Advanced example
However, variables are not limited to images: If you want to read a barcode, for example, you need not only the tool, in this case the “Read Single 1D/2D Code” node, but also a variable with the appropriate type. The node returns a result in the form of the Code Result type. In this example, you can use the “Break Code Result” node to break down the processing details into individual parts and assign them to variables with more tangible data types.