Custom Functions
This chapter provides general information on how to use custom functions in the evoVIU camera workflow.
Introduction
Custom functions are located in the My Workflow tab between the Components and Enums sections.
Managing custom functions
Creating a custom function
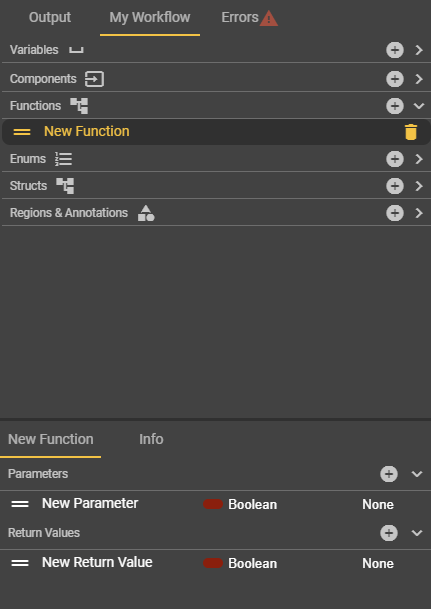
In the “Functions” area, you can create a new custom function using the plus symbol. In principle, it is possible to create as many custom functions as you like. The label assigned to each function serves to distinguish between them. This label can be chosen freely, but must be unique within the custom functions.
Removing a custom function
When you hover the mouse over a custom function entry, the trash can icon for removing the custom function is displayed. You can also use the key combination ALT + Shift + Delete to do this, provided you have selected a custom function. A dialog box then opens in which you must confirm the process for removing the custom function.
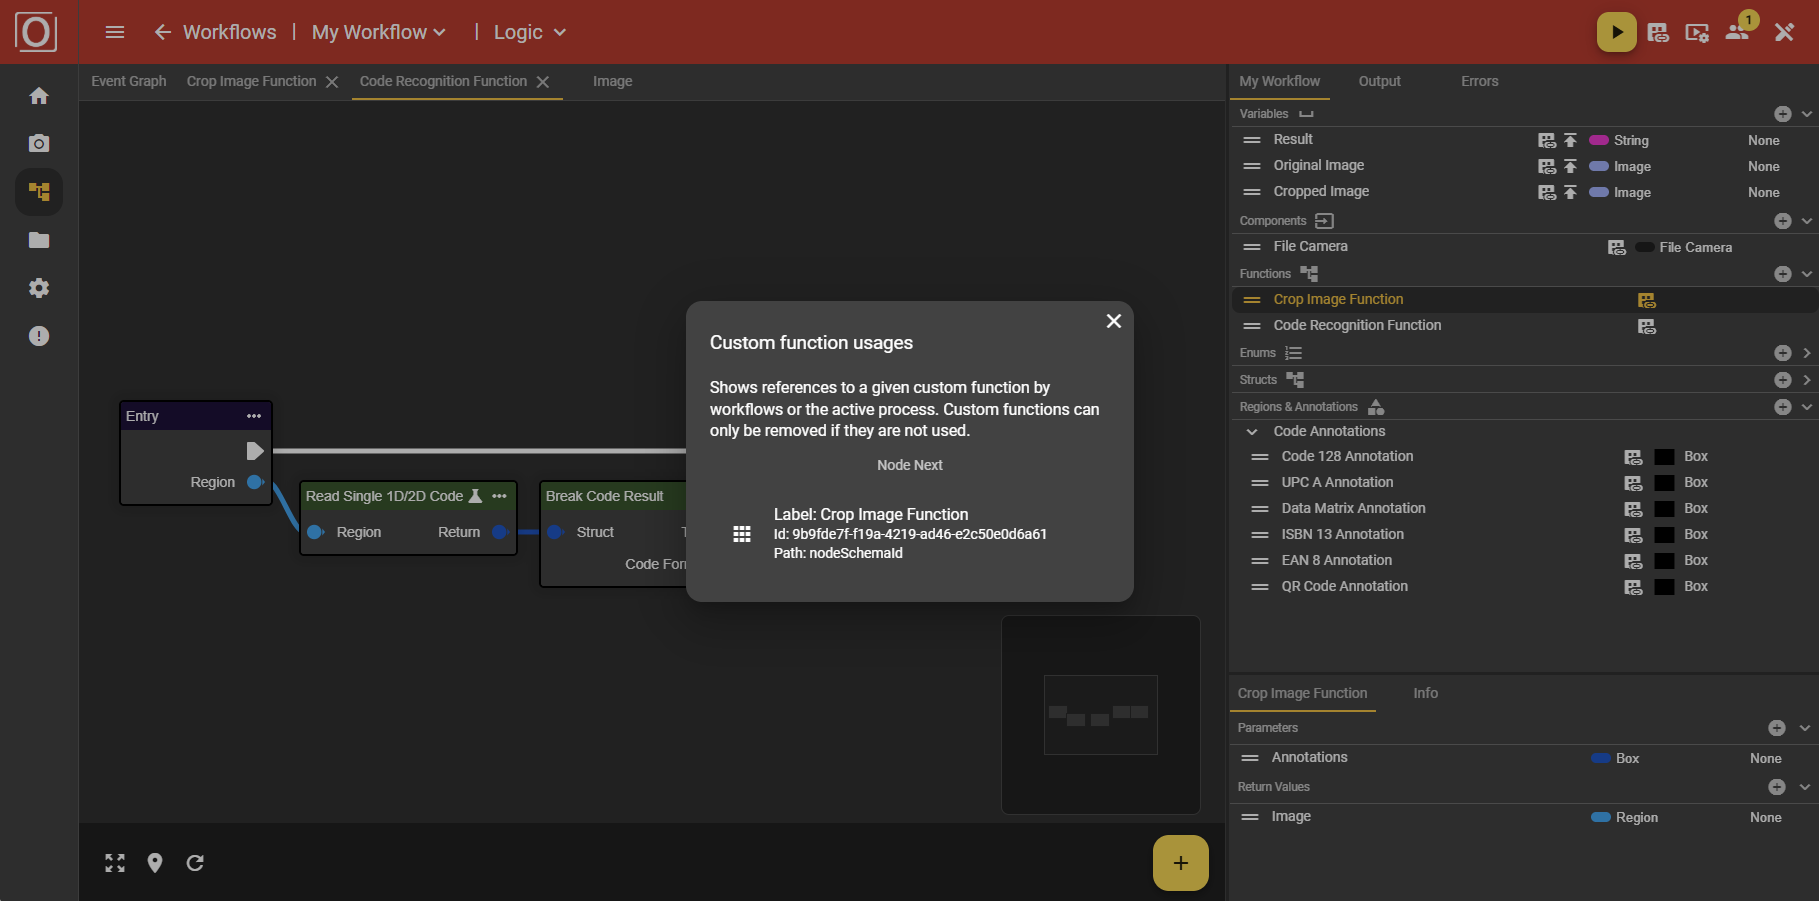
However, removing the custom function is only possible if you are not using it in the event graph of the workflow. If this is the case, you must first remove the custom function from the event graph of the workflow.
Moving a custom function
To get a better overview of your functions, you can sort the entries as you wish. To do this, you simply need to ensure that the workflow is not active while you are the active editor. Once this is the case, you can use the button with the two horizontal lines in front of the name of your custom function to drag and drop it into the appropriate area. As soon as you release the mouse button, the custom function will be placed at the location where you are currently positioned.
Parameters of a custom function
Creating parameters
Once you have selected a custom function, you can define the incoming parameters in the corresponding Details tab. Parameters are data that you can enter into the custom function from the workflow's event graph and process there. In addition to a label, you can also assign a type, which you are probably already familiar with from configuring variables in the workflow. Here, too, you can create any number of parameters, but make sure that each parameter has a unique name.
Removing parameters
As soon as you hover the mouse over a parameter entry, the trash can icon for removing the parameter is displayed. You can also use the key combination ALT + Shift + Delete for this purpose, provided you have selected a parameter. A dialog box then opens in which you must confirm the process for removing the parameter.
Moving parameters
Similar to custom functions, you can also move the associated parameters within the custom function. To do this, use the button with the two horizontal lines in front of the parameter name and drag the entry to the desired position. As soon as you release the button, the selected parameter will be moved to the corresponding position.
Return values of a custom function
Creating return values
Similar to parameters, you can also define return values in the Details tab. Return values allow you to feed data from the custom function back to the workflow's event graph so that it can be further processed there. Return values must also have unique names and can be typed.
Removing return values
It is also possible to remove return values. The trash can icon for removing the return value is displayed as soon as you hover over an entry with the mouse. You can also use the key combination ALT + Shift + Delete to open the dialog box in which you must confirm the deletion process.
Moving return values
To sort return values, you can use the same mechanism as for the parameters within the custom function. To do this, use the button with the two horizontal lines in front of the return value name and drag the entry to the desired position. As soon as you release the mouse button, the selected return value is moved to the corresponding position.
Configuring a custom function
Selecting a custom function
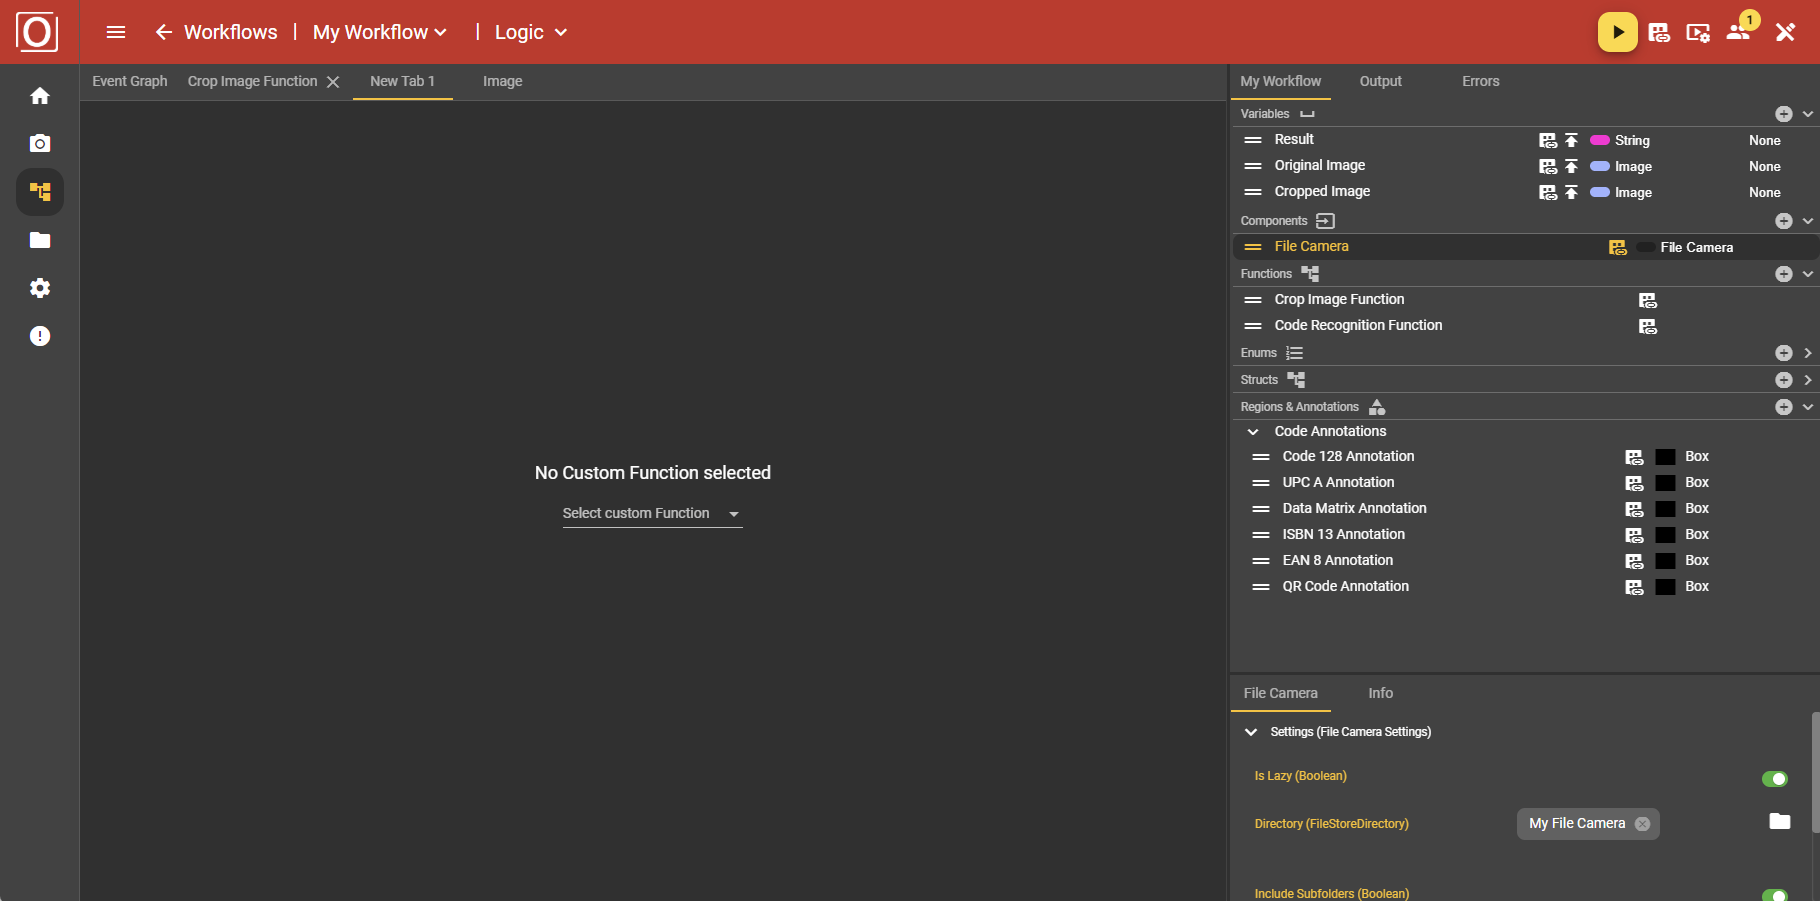
To fill a custom function in the form of a graph with nodes, you must select the New Tab 1 tab. Initially, no custom function will be selected in the center of the tab. You can make your selection using the drop-down menu and then start the configuration.
Once you have made your selection, the name of the tab will change to match the title of your custom function. In addition to the label, the tab also has a button in the form of an X that allows you to select a different custom function.
Integrating a custom function into the workflow
At the bottom of the Event Graph tab, there is a bar with a yellow button that allows you to add nodes. You can also right-click to open the menu for adding nodes. There, you can enter the name of your custom function in the search bar and then select it by clicking on it. The custom function is now added to the graph of your workflow.
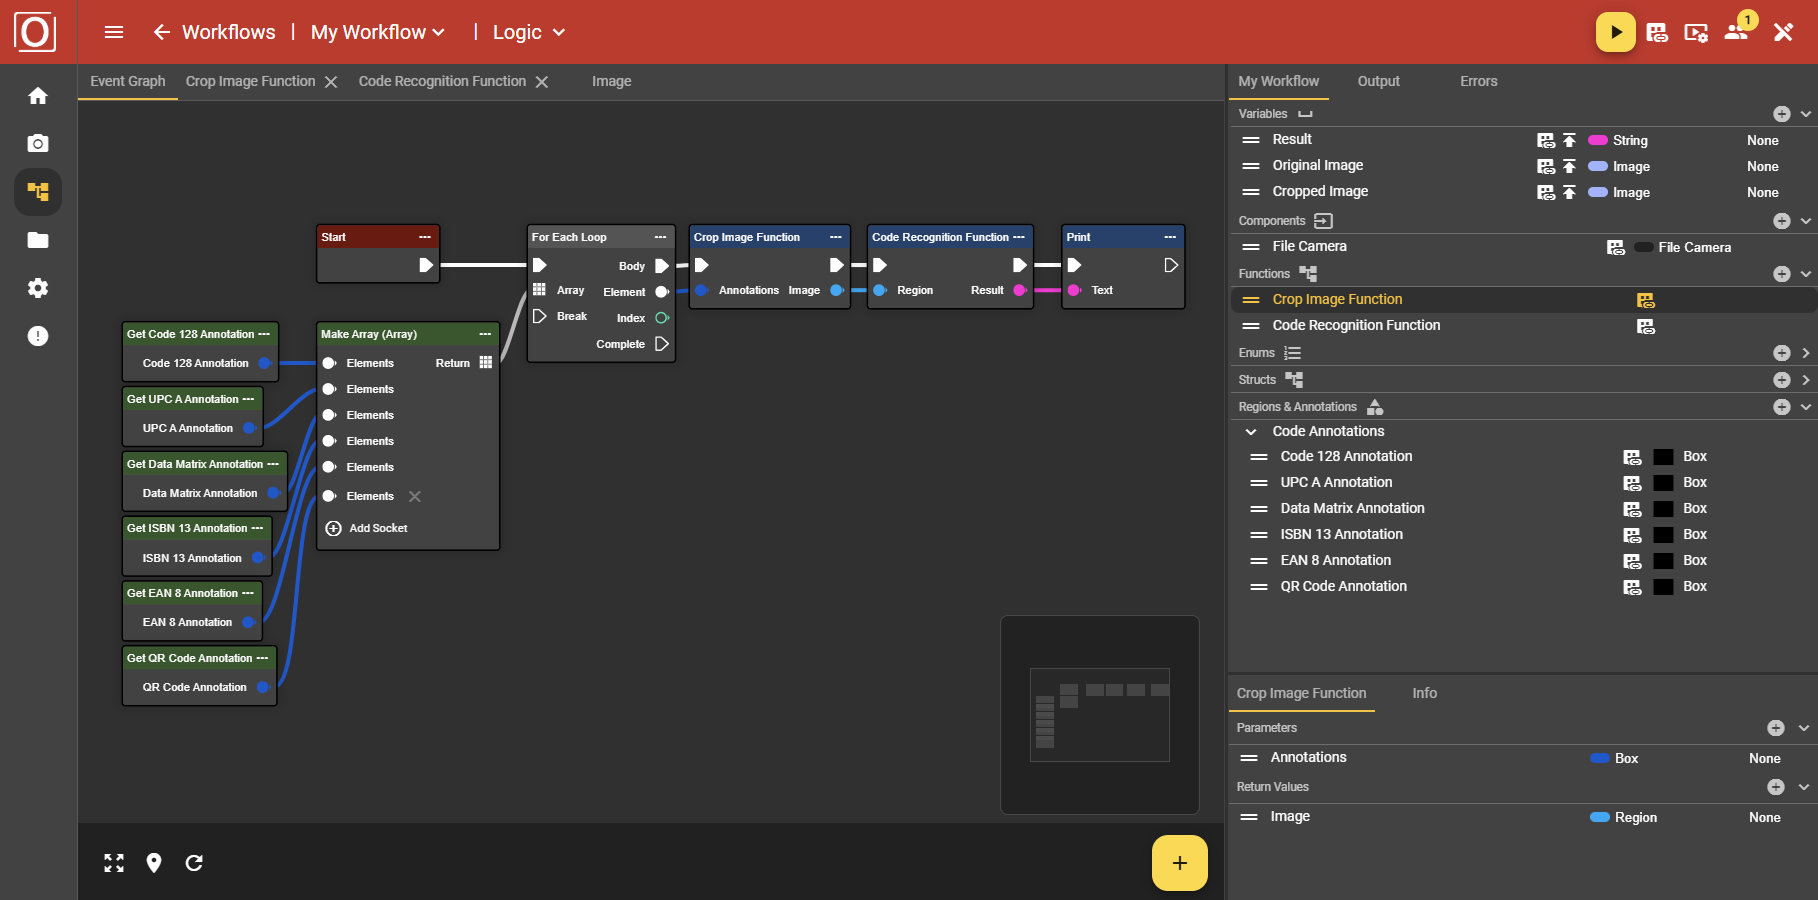
Once you have added the custom function as a node to your workflow, a note about the use of the custom function will also appear in the My Workflow tab. If you click on the icon, you can then see where the custom function is used in the dialog box. At this point, a security mechanism also comes into play: once your custom function is used in the workflow, you can no longer delete it. To do so, you must first remove the node from the workflow so that it is no longer in use.
Add necessary nodes
The tab for configuring the custom function is initially empty. It is recommended to start by adding the input and output nodes. These are named Entry and Return, respectively, and are required for the execution of the entire workflow. You can add the nodes by right-clicking within the tab or by clicking the yellow plus button on the right side of the bottom bar and then selecting the respective nodes from the menu that opens. This procedure is similar to the configuration of the general workflow.
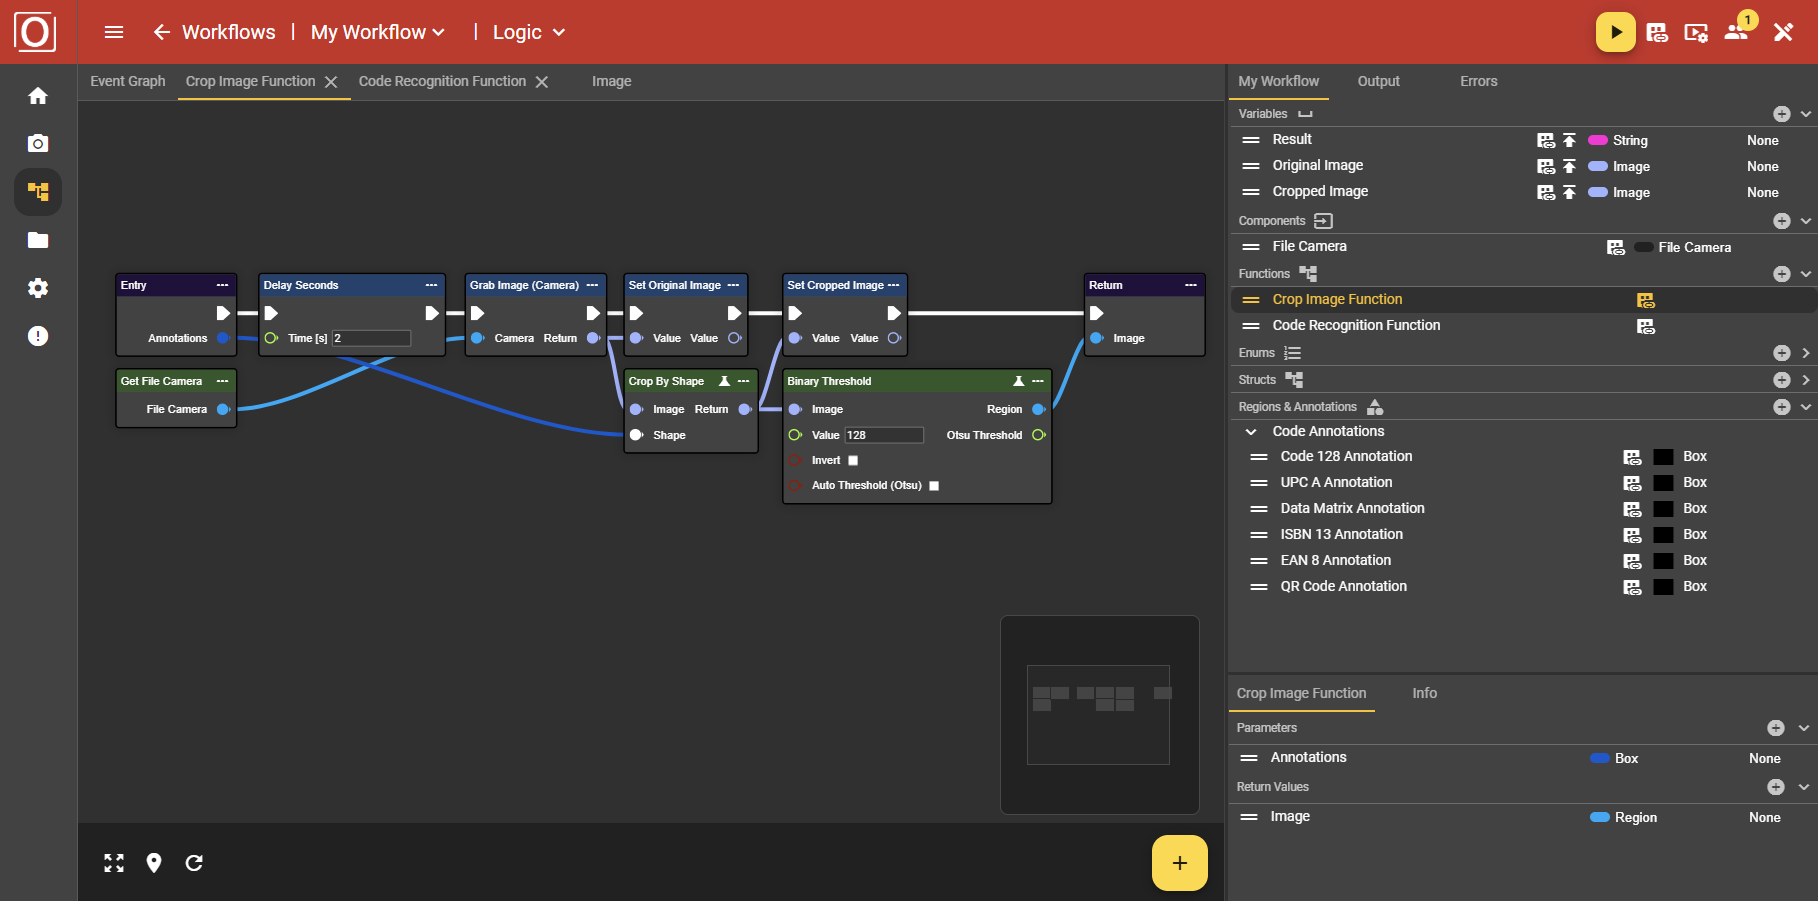
Configuring a custom function using a graph
You now have complete freedom to design between the Entry and Return nodes. All the tools available in the Event Graph tab and the associated menu are also available within the custom functions.