Development process of AI solutions
In this chapter, you will learn the relevant steps and information for developing an AI solution in VISIONWEB.
YOLO
VISIONWEB enables AI-based image processing through the integration of Ultralytics YOLO models.
Supported Task Types
Ultralytics offers models for five basic task types; currently, four of these are supported in VISIONWEB:
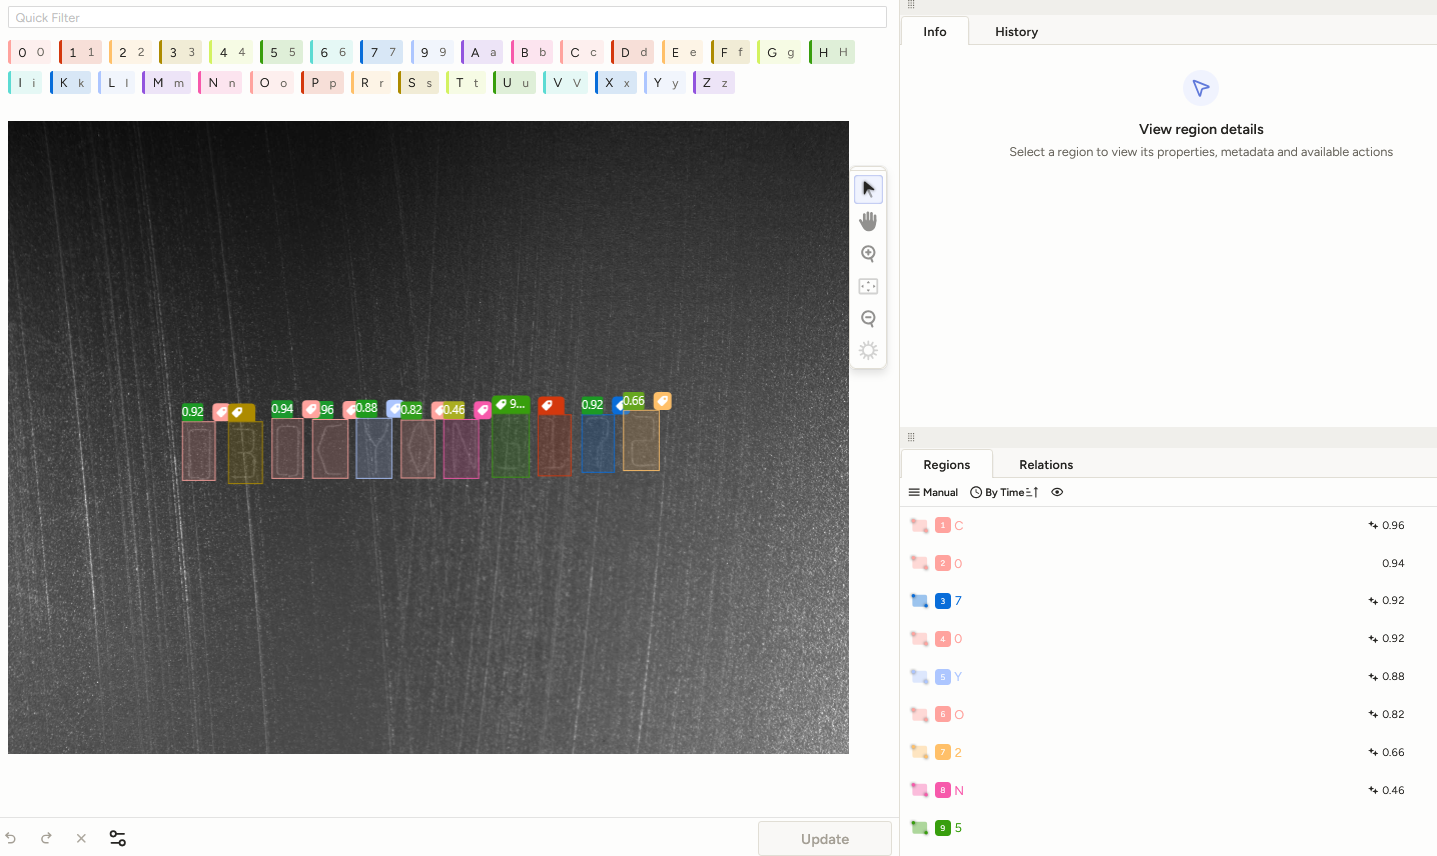
Object Detection: Describes locating and classifying objects in an image. Objects are usually localized using a bounding box.
Oriented Object Detection: Unlike regular object detection, in oriented detection the bounding boxes are not axis-aligned but rotated to localize the object as precisely as possible.
Instance Segmentation: In addition to the coarse localization of the object by a bounding box, pixel-accurate masks of the object are created and returned.
Classification: Assigns the entire image to one or more classes.
Ultralytics offers five model sizes for each of the five task types. The larger the model, the more accurate it is, but at the cost of speed. Larger models also typically require a more extensive dataset.
In addition to the four mentioned task types, VISIONWEB also offers code recognition. This is based on a standard object detection model trained on laser codes. The code recognition returns the individual detected characters as recognized objects, as well as the read code.
Supported YOLO Versions
In VISIONWEB, YOLOv8 and YOLO11 are securely supported. Other YOLO versions from YOLOv5 onwards are potentially compatible but have not been extensively tested.
License
To commercially use YOLO models, an enterprise license from Ultralytics must be purchased; otherwise, according to the AGPL 3.0 software license, the source code must be published. Compliance with the license terms and any necessary procurement of an enterprise license is the responsibility of the user.
Image Capture and Preprocessing
The basis for developing a model is a sufficiently large and high-quality dataset. For this purpose, the image capture of the evoVIU is suitable. More detailed information on setting up the image source and options for data storage can be found on the following pages:
If necessary, an initial preprocessing such as contrast or brightness corrections can be performed on the images before saving.
All preprocessing steps performed here must also be carried out before inputting the images into the inference.
Image Annotation
After sufficient data has been generated and appropriately preprocessed, annotations need to be created. Tools such as LabelStudio
LabelStudio offers the ability to pre-annotate images with a pre-trained YOLO model. This can significantly speed up the labeling process.
The accuracy of the later model can be significantly influenced by the quality of the annotations.
For training with Ultralytics, the annotations for each image must be saved in a correspondingly named *.txt file. Each line references an object in the image and follows this schema:
class_id x_center y_center width height
The coordinates of the bounding box must be normalized to values between 0.0 and 1.0. More detailed information about the structure of the label file can be found in the Ultralytics documentation. LabelStudio already supports exporting annotations in a YOLO-compatible format, so no further adjustments would be necessary here.
Model Training
Model training can be performed in Python using the Ultralytics library. There is also the option to use transfer learning. In this process, models pretrained on large datasets can be optimized on your own data. This can lead to an acceleration of training speed and, especially with a small amount of data, to a stabilization of the model.
The training can be configured via a YAML file. Hyperparameters such as the number of epochs or learning rate can be set. Additionally, parameters for data augmentation can be adjusted. More detailed information on configuration and execution of the training can be found in the Ultralytics documentation.
Ultralytics performs an automatic preprocessing of the images. In this process, the images are scaled to the specified input size using a letterbox.
It is recommended to split the dataset into training, validation, and test data. A common split is:
70% training data
15% validation data
15% test data
The paths to the individual datasets and the definition of the possible classes are specified in a YAML file. The model is then trained on the training dataset and repeatedly validated using the validation dataset during training.
It is advisable to validate the model on the test dataset after training is complete. Ultralytics also offers a method for this purpose.
Model Export and Quantization
There are two options for using YOLO models on an evoVIU. Inference can be performed on the CPU with an ONNX model, or alternatively on the NPU with a TFLite model. Using the NPU enables significantly accelerated inference but requires quantization, which can lead to precision loss in the model.
ONNX
If the model was trained with Ultralytics, the resulting PyTorch model (.pt) must be exported to the ONNX format. Ultralytics provides an export function for this purpose.
TFLite
To use the model on the NPU, the model must be exported to the TFLite format and quantized to uint8. For this, the De-Girum repository must be used.
After cloning and setting up the repository, the quantization and export of the model can be started via a CLI command. Images are required for the calibration process during quantization. The same YAML file used for training can be specified for this purpose.
Several TFLite models are created. For use on the evoVIU, only the file best_full_integer_quant.tflite is relevant.
Possible CLI command:python3 dg_export.py --weights path/to/your/best.pt --format tflite --quantize --data path/to/your/data.yaml --img-size 640 --max_ncalib_imgs 648
Inference in VISIONWEB
For each task and model type, there are corresponding nodes and components in the workflow. The nodes and components are located under Applications|ONNX or Applications|NPU respectively.
Components
Settings for inference and post-processing of results can be made via the components. Available components are:
ONNX Yolo Detection
NPU Yolo Detection
ONNX Yolo Classification
NPU Yolo Classification
ONNX Yolo Segmentation
NPU Yolo Segmentation
ONNX Code Detection
NPU Code Detection
The different components are similar in their basic settings but vary in parts according to the object detection task to be performed.
Inference Settings
Model File Path: Specifies the path to the ONNX or TFLite model to be used for inference.
Make sure that the selected component and the model match in terms of task and hardware.
Number Of Threads: Determines the load on the NPU/CPU.
Output Parsing Settings
Oriented Boxes (Detection): Indicates whether oriented or normal object detection should be performed.
The appropriate model must be specified accordingly!
Confidence Threshold: Specifies the minimum confidence value. Detections below this value are filtered out. A typical value is 0.6.
Mask Threshold (Segmentation): Specifies from which confidence value pixels are considered part of the mask. A typical value is 0.5.
IoU Threshold (Detection, Segmentation): Specifies how much overlap between two detected objects is allowed. This filters out detections that reference the same object. A typical value is 0.45.
Maximal Number Of Detections: Specifies the maximum number of detections to be returned.
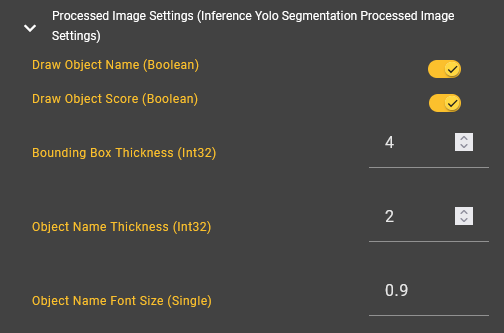
Processed Image Settings (Detection, Segmentation)
These settings concern the output of the processed image. On this image, the detected objects, their confidence values, and classes are displayed. For overview purposes, the labeling of the detected objects can be disabled. A bounding box is always drawn. In classification, nothing is drawn, as the entire image is classified.
Npu Inference Settings (NPU)
Settings that are only relevant during inference on the NPU:
Bilinear Interpolation (Segmentation): Interpolates the masks of detected objects. This results in more accurate contours.
Classes File Path: Path to a JSON file that defines the possible classes with ID and name. The structure of the JSON should conform to this format:
{
  "categories": [
    { "id": 0, "name": "dog" },
    { "id": 1, "name": "cat" },
    ...
  ]
}
All classes on which the model was trained must be included in the JSON file!
Return Preprocessed Image: Specifies whether the preprocessed image should be returned. For performance reasons, this option is disabled by default.
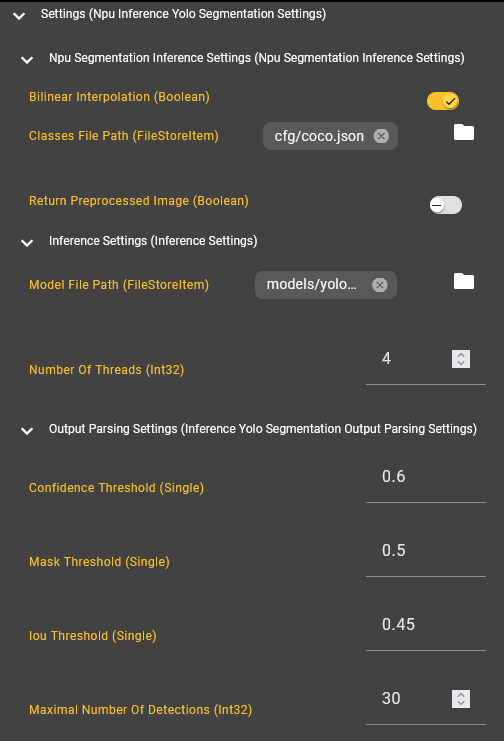
Example configuration of an ‘NPU Yolo Segmentation’ component
Nodes
The workflow provides eight different nodes:
Detect Objects (ONNX)
Detect Objects (NPU)
Classify Image (ONNX)
Classify Image (NPU)
Segment Instances (ONNX)
Segment Instances (NPU)
Detect Code (ONNX)
Detect Code (NPU)
The corresponding components must be passed to these, as well as one or more images.
The images should be captured under conditions similar to those of the training data. Preprocessing steps applied before training should also be performed on the images before inputting them into the inference node.
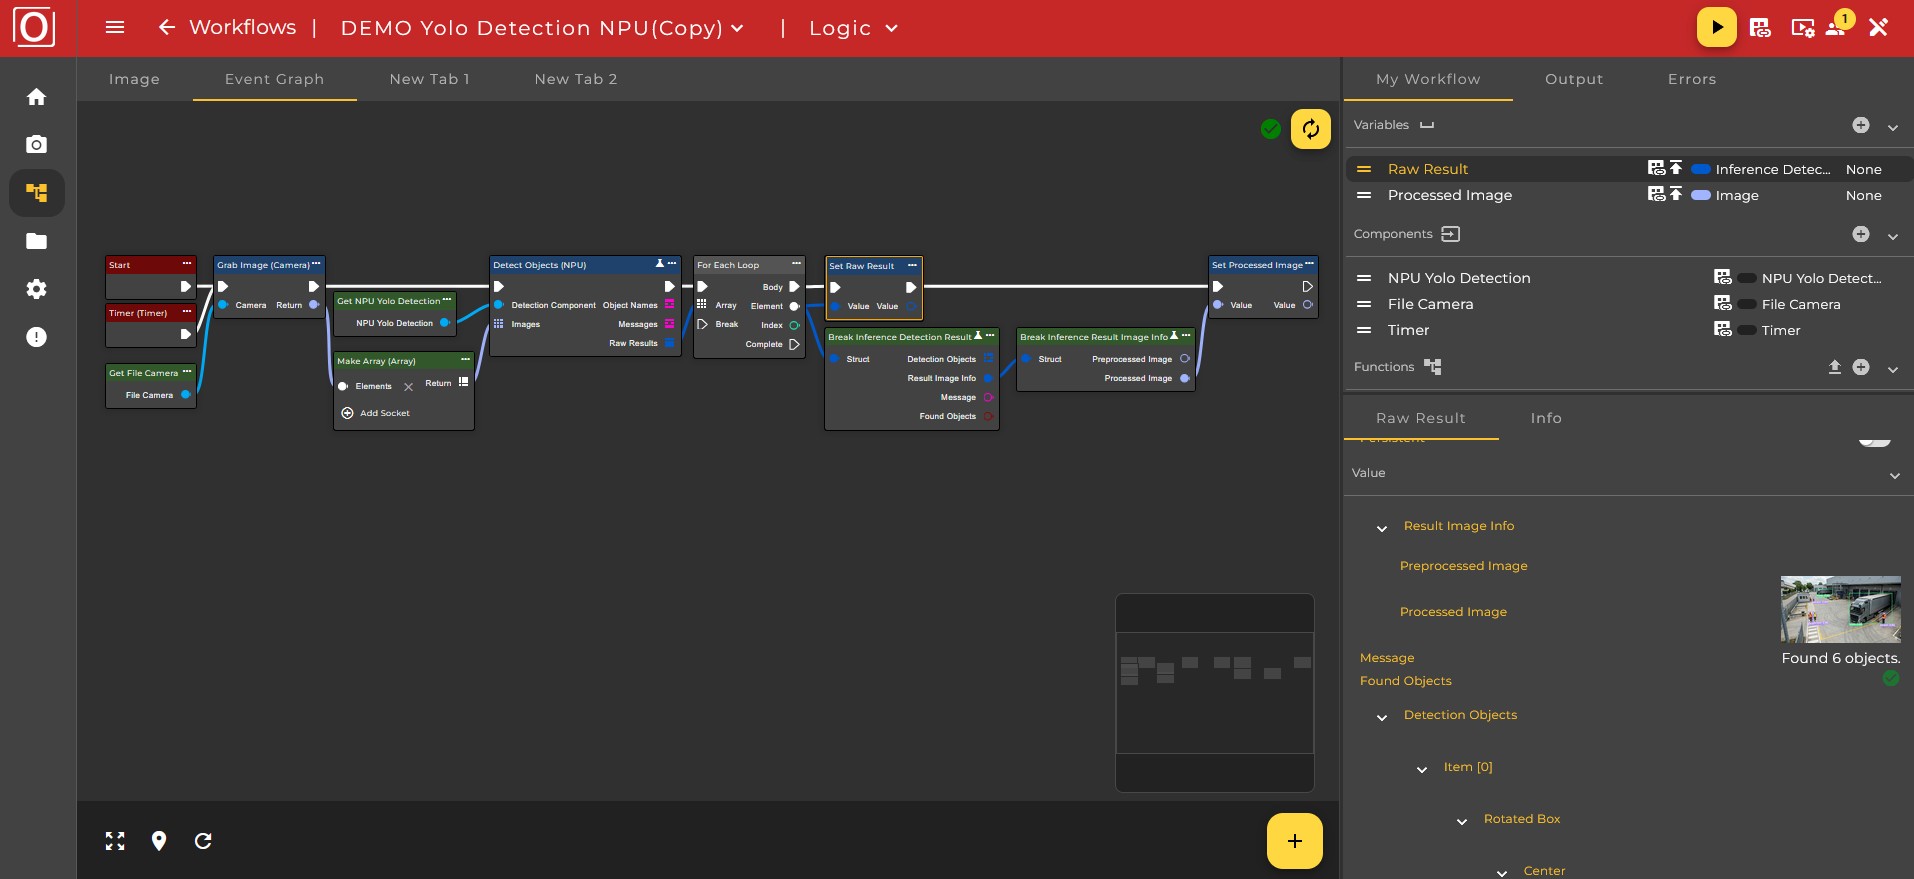
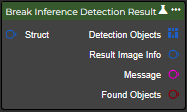
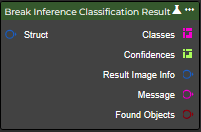
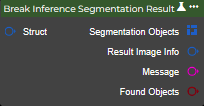
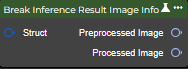
Each node returns the found classes of all input images after inference, as well as messages regarding the inference result. Additionally, a so-called Raw Result is created for each input image. These differ according to the task performed:
Inference Detection Result
Inference Classification Result
Inference Segmentation Result
Inference Code Detection Result
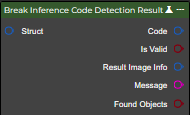
The Raw Results contain all valid detections. These can be bounding boxes, object classes, and associated confidence values, or in the case of instance segmentation, masks of the detected objects. Additionally, the preprocessed image and the input image with drawn bounding boxes and labels are returned. Similar to training with Ultralytics, the input images are automatically scaled to the required size using a letterbox. The resulting image can be viewed in the Preprocessed Image section.
The following workflow demonstrates the use of a YOLO model for object detection on the NPU, as well as the subsequent storage of the results in corresponding variables.