Overview page
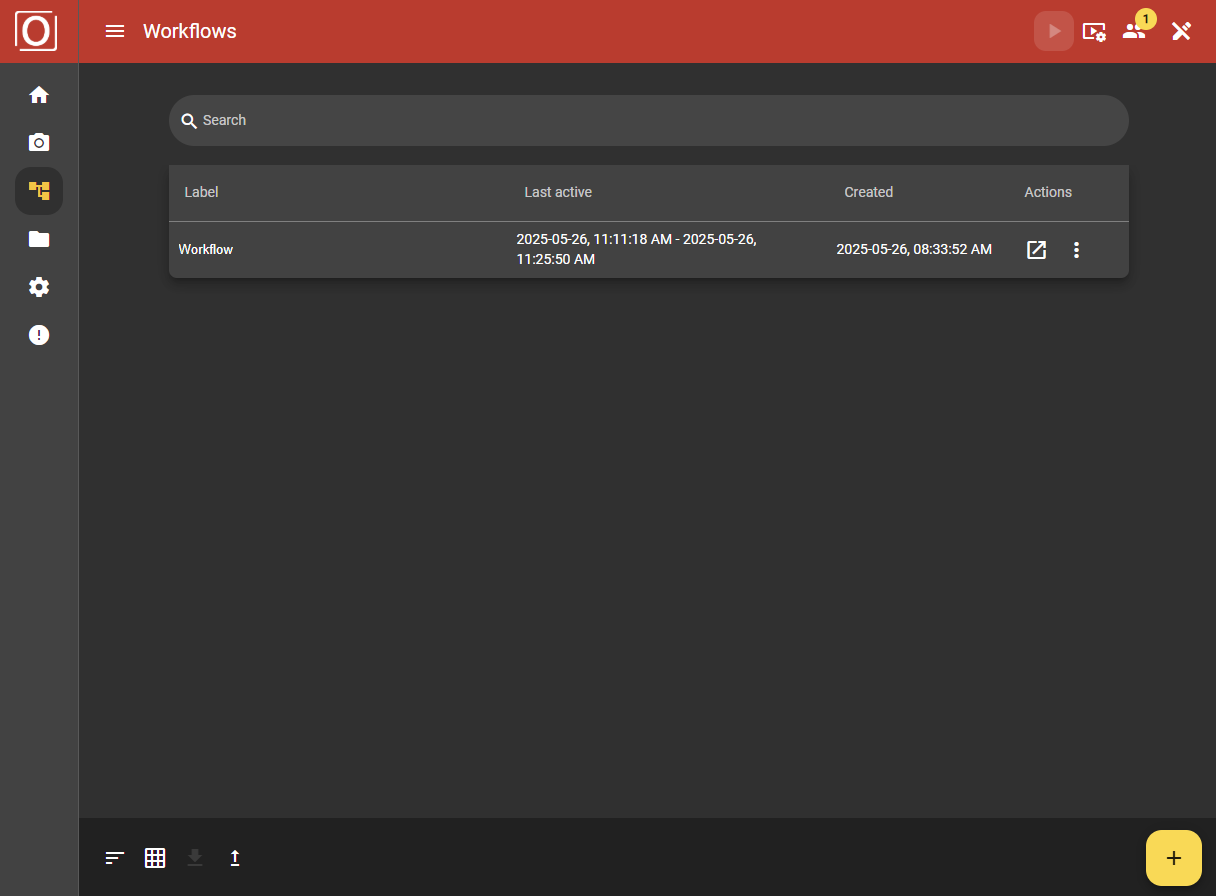
Here you can see the list of all current workflows on the camera. This list contains information such as the creation date and time of the last active workflow. You can also delete or move selected workflows via a three-dot menu. You can create a new workflow using the plus button in the bottom right-hand corner. To create a new workflow, a name must be entered in the dialog box.
Components of the overview page
Listing of workflows
As soon as workflows are available, the tabular list of workflows immediately stands out. We recommend that you use the table view. Here you can see at a glance which workflow was active from when to when and when it was created. You will also find the button to open the detailed and configuration view of the workflow as well as an administration menu.
Search bar
There is a search bar above the table. As soon as you make entries there, the table is filtered and only displays the workflows whose label matches the search term.
Bottom App Bar
In the bar at the bottom of the screen, on the right-hand side, there is a yellow button to open the create dialog. You can then add a workflow via this dialog. You can also use this bar (arranged from left to right) to sort the list, change the view and import workflows.
Components of the table view of workflows
Display information
All available workflow configurations are listed in the table. As already mentioned, you can view the last activity period of your workflow and the creation date next to the label.
Opening workflows
In the Actions column, to the left of the icon with the three vertically stacked dots, is the button for opening the selected workflow in the detail and configuration view.
Once you have selected a workflow in the table, you can also open it using the ALT + CTRL + o key combination.
Management menu of workflows
Duplicating workflows
If you have selected a workflow and open the administration menu, you will see the “Duplicate” option. This allows you to create a copy of your workflow and continue editing without changing your source.
Once you have selected a workflow in the table, you can also duplicate it using the ALT + CTRL + c key combination.
Editing workflows
The “Edit” option in the administration menu opens a dialog in which you can change the label of your workflow. Alternatively, you can also do this directly in the table. To do this, double-click on the label that you want to change.
Once you have selected a workflow in the table, you can also edit it using the ALT + CTRL + e key combination.
Removing workflows
If you want to delete a workflow, you can select the “Remove” option in the administration menu. A dialog will then appear in which you must confirm your selection.
As soon as you have selected a workflow in the table, you can also remove it using the Delete button.
Exporting workflows
If you also want to use a workflow on another camera, you can use the “Export” option in the administration menu. A dialog then opens in which you can protect the workflow to be exported with a password and name the file as you wish. The export file corresponds to the .zip file type and contains two JSON files and a text file in addition to possible files.
Moving workflows
If you want to get a better overview of your workflows, the “Move Up” and “Move Down” options in the administration menu should be very helpful. This allows you to move entries within the table.
As soon as you have selected a workflow in the table, you can also move it up using the key combination ALT + CTRL + Arrow up and down using ALT + CTRL + Arrow down.
Importing workflows
To be able to import workflows, you must click on the file upload icon. A window will then open in which you can select the file to be imported on your system.
The workflow to be imported must be in the form of a .zip file. As with the export of a workflow, this file must also consist of a folder with files, two JSON files and a text file.