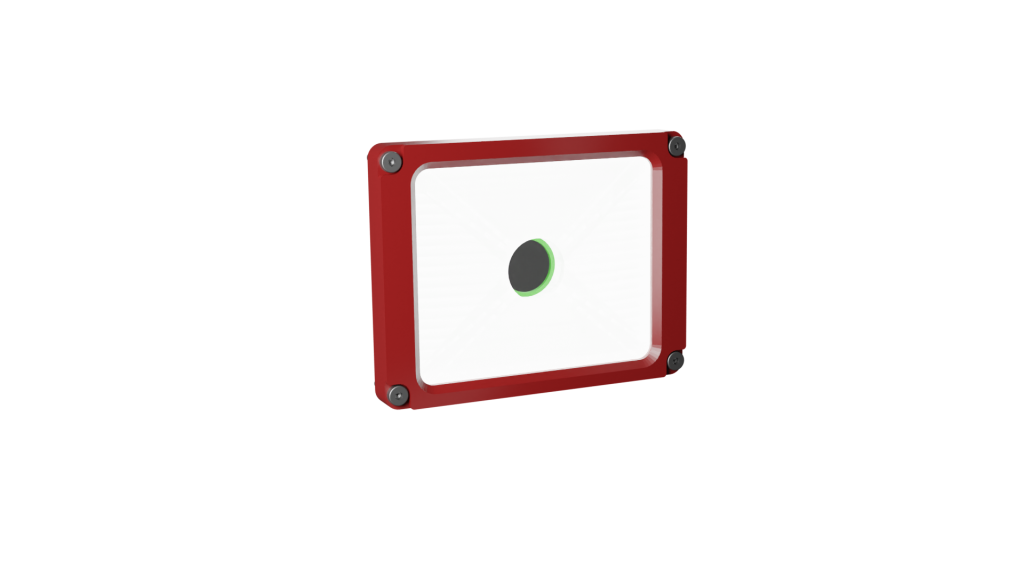
VIU1: Light module
Loxi 1 - direct / intern
In this chapter, you will learn everything about the Loxi1-X light module.
Overview
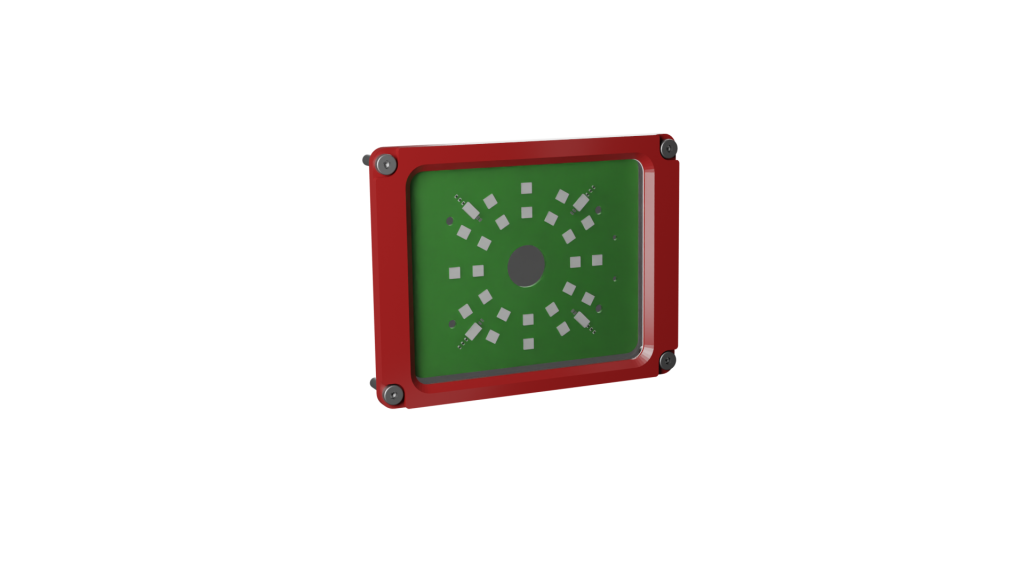
The Loxi1-X light module belongs to the class of direct, internal lighting.
The light module consists of eight segments, each with three light-emitting diodes. The light module thus has a total of 24 LEDs, which can be equipped with different wavelengths via color coding. Organic surfaces in particular can be best illuminated with the Loxi1-X module.
//Distance measurement
In addition to the LEDs, the Loxi1-X module has 4 TOF sensors with a range of 0–65535, enabling it to precisely measure the distance to target objects up to 1 m away.
Implementation will follow in later software versions.
Key features
Direct light modul
Individual settings for each individual LED
Up to 8 brightness levels for each individual LED
Distance sensor for distance measurement up to 1 m
Areas of application
Organic surfaces
Barcodes
Labels
Field of view areas
color coding
-R | Red (612 – 630nm) ACTIVE
-G | True Green (513 – 545nm) ON REQUEST
-B | Blue (450 – 480nm) ACTIVE
-A | Amber (609-624nm) ON REQUEST
-W| White (4000K) ACTIVE
Exchange
The light module may only be replaced by a trained specialist and only when the device is switched off.
Shut down the system via the web interface.
Switch off the power supply to the evoVIU.
Open the four screws on the front of the evoVIU housing.
Open the four screws on the Loxi1-X light module.
Remove the circuit board and insert the replacement circuit board into the camera.
First, tighten the two screws on the front docker side and make sure that the module is positioned straight on the mounting surface and contacts.
Now tighten the two remaining screws on the module.
Screw the front cover back onto the camera.
Switch on the power supply to the camera.
If the LEDs flash within the next 30 seconds, you can use the new module.
New Loxi module successfully integrated
If you see a light sequence twice within the next 30 seconds, the Loxi module has been recognized by the system.
No light sequence visible
If you do not see a light sequence, check the setup again. In rare cases, a spring contact may not be making proper contact with the circuit board. If you continue to experience problems, please contact our support team.
light output
The LEDs of the Loxi1 light module are controlled individually per driver. Settings above 25 mA per LED should only be made in flash mode. Ensure that the light module is installed in such a way that no one can look directly into the light to avoid health risks (e.g., eye damage).
Variant number
XXXXX-XXX-L1-R | L1-R: Red / L1-G: Green /L1- B: Blue / L1-A: Amber / L1-W: White
Loxi 2 - diffuse / intern
In this chapter, you will learn everything about the Loxi2-X light module.
Overview
The Loxi2-X light module belongs to the class of diffuse, internal lighting.
The light module consists of eight segments, each with nine sideLight LEDs. The light intensity can be adjusted individually for each segment. In addition, each segment is divided into three areas consisting of three sideLight LEDs. These areas can be switched on and off individually as desired in order to optimally adjust the light intensity of the Loxi2-X to the object to be illuminated. This results in a total of 24 areas, enabling optimal and variable light control with defined hotspots.
A printed light guide is inserted in the center, which optimally distributes the light and couples it out to the front. The use of a diffuse scattering film optimizes the refraction of the light. A center ring shields the S-mount lens.
The diffuse illumination ensures homogeneous illumination of the area and can be used especially for metallic surfaces, barcode, and label recognition.
Ideal for reading laser markings
Laser engravings on metallic surfaces in particular can be optimally illuminated with the Loxi2!
Key features
Diffused light module
72 powerful LEDs for optimal illumination
Up to 24 lighting areas for different hot spot settings
Individual settings for each of the 24 LED areas
Up to 8 brightness levels for each individual LED area
Areas of application
Metallic surfaces
Organic surfaces
Barcodes
Labels
Field of view areas
Color coding
-W| White (6500K) ACTIVE
Exchange
The light module may only be replaced by a trained specialist and only when the device is switched off.
Shut down the system via the web interface.
Switch off the power supply to the evoVIU.
Open the four screws on the front of the evoVIU housing.
Position the evoVIU with the glass cover facing upwards and remove the cover with the glass cover from the evoVIU, taking care not to damage the seal in the evoVIU housing. Do not use any metal objects to separate the cover from the housing.
Remove the diffuser film from the housing.
Then remove the Loxi2-X circuit board together with the light guide.
Carefully remove the light guide from the circuit board and insert it into the replacement circuit board with the printed side facing down. Make sure that the two holes in the light guide are aligned with those in the Loxi2-X circuit board.
Insert the replacement circuit board together with the light guide into the evoVIU. Pay attention to the two guide pins on the connection to the Loxi2-X circuit board and the four threaded bolts in the holder. Make sure that the module is positioned straight on the mounting surface and the contacts.
Place the diffusion foil on the light guide and align it centrally.
Place the cover with the glass cover on the evoVIU and screw it tight in a criss-cross pattern.
Switch on the camera's power supply.
If the LEDs flash within the next 30 seconds, you can use the new module.
New Loxi module successfully integrated
If you see a light sequence twice within the next 30 seconds, the Loxi module has been recognized by the system.
No light sequence visible
If you do not see a light sequence, check the setup again. In rare cases, a spring contact may not be making proper contact with the circuit board. If you continue to experience problems, please contact our support team.
Variant number
XXXXX-XXX-L2-W | L2-W: White
Loxi 3 - diffuse / extern
In this chapter, you will learn everything about the Loxi3-X light module.
Overview
The Loxi3-X light module belongs to the class of direct, external lighting.
The light module consists of 8 segments, each with 5 light-emitting diodes. The light module thus has a total of 120 LEDs. These can be individually controlled in a total of 24 different areas around the diffuser plate to create light hotspots
Different diffuser plates are inserted into the center section of the lighting to optimize the refraction of the light. A center ring shields the S-mount lens.
The diffuse lighting ensures homogeneous illumination of the area and can be used primarily for metallic surfaces, barcode, and label recognition.
Ideal for reading laser markings
Laser markings and engravings in particular can be read optimally on metallic surfaces with the Loxi3.
Key features
Diffused light module
Lighting area: 134 mm x 101 mm
Individual settings for each area consisting of 5 LEDs
Up to 8 brightness levels for each individual LED area
Areas of application
Metallic surfaces
Organic surfaces
Barcodes
Labels
Field of view areas
Color coding
-W| White (4000K) ACTIVE
Exchange
The light module may only be replaced by a trained specialist and only when the device is switched off.
Shut down the system via the web interface.
Switch off the power supply to the evoVIU.
Open the four screws on the front of the evoVIU housing.
Open the four screws on the Loxi1-X light module.
Remove the circuit board and insert the adapter board into the camera.
First, tighten the two screws on the front docker side and make sure that the module is lying straight on the mounting surface and contacts.
Now tighten the two remaining screws on the module.
Now screw the light shield for Loxi3 in place with countersunk screws.
Insert the enclosed heat conductor.
Now insert the Loxi3 and push the contacts into the adapter board.
Insert the light guide disc and the diffuser plate.
Screw the new large Loxi3 front panel back onto the camera.
Switch on the camera's power supply.
If the LEDs flash within the next 30 seconds, you can use the new module.
New Loxi module successfully integrated
If you see a light sequence twice within the next 30 seconds, the Loxi module has been recognized by the system.
No light sequence visible
If you do not see a light sequence, check the setup again. In rare cases, a spring contact may not be making proper contact with the circuit board. If you continue to experience problems, please contact our support team.
Would you like to switch from Loxi3 to the smaller Loxi modules? Please feel free to contact us in the support area.
Variant number
XXXXX-XXX-L3-W | L3-W: White